Watering
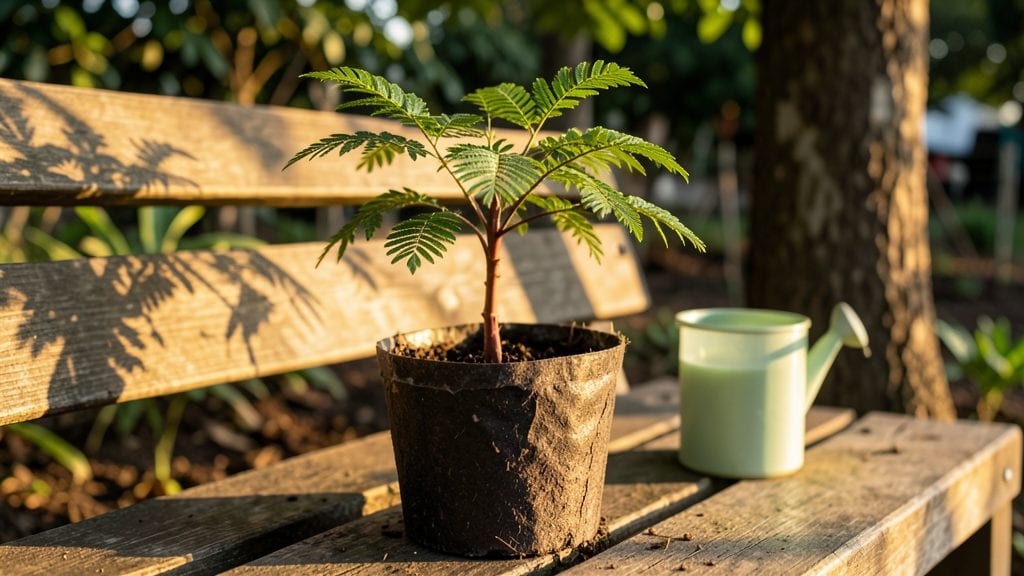
Growing a Delonix regia seedling from scratch means bringing home the flamboyant flame tree’s signature orange-red blooms—though it takes real patience. 🌱 I’ve wrestled with slow germination and leggy seedlings, but the payoff is worth it: a tree that bursts into color by its third year.
The key is mimicking its native tropical conditions from day one.
The right setup makes all the difference. You’ll need well-draining soil (think 60% potting mix to 40% perlite), a warm spot above 70°F, and a humidity dome to keep those tiny sprouts from drying out.
Most people rush germination, but soaking seeds for 24 hours first cuts the wait time from weeks to days—honestly, that small step saves frustration later.
By month three, you’ll have a sturdy 12-inch seedling with compound leaves that look like delicate ferns. The real magic happens when you move it outdoors after frost risk passes—suddenly, you’re nurturing a tree that’ll one day host 3-foot-wide blooms.
Just watch for yellowing leaves (overwatering) or stunted growth (too much shade).
This isn’t a fast crop—think years, not seasons—but every pruning and watering adjustment builds toward that showstopper canopy. Once established, Delonix regia thrives with minimal fuss, rewarding you with blooms that turn heads (and Instagram feeds) for decades. Let’s get those seeds sprouting right.
📚 In This Guide
- What you need
- Instructions
- Tips and common mistakes
- Wrapping up and next steps
What you need
- ● Delonix regia seeds: 3–5 fresh, viable seeds (ensure they’re plump and free of cracks).
- ● Seed-starting trays or small pots: 4–6 biodegradable pots (3–4 inches in diameter) or a seed tray with individual cells.
- ● High-quality seed-starting mix: A well-draining, sterile mix (e.g., 50% peat moss + 50% perlite or coco coir).
- ● Watering can or spray bottle: With a fine mist nozzle for gentle hydration.
- ● Plastic wrap or humidity dome: To maintain moisture while seeds germinate.
- ● Grow lights or sunny windowsill: A south-facing window or LED grow lights (12–16 hours/day) for optimal growth.
- ● Trowel or small shovel: For transplanting seedlings.
- ○ Fertilizer (optional): A balanced, water-soluble fertilizer (e.g., 10-10-10) for seedlings once true leaves appear.
- ○ Heat mat (optional): To keep soil warm (75–85°F) and speed up germination.
- ○ Mulch (optional): Straw or shredded leaves to retain moisture in outdoor plantings.
Step-by-Step guide to growing a healthy Delonix regia seedling
This vibrant tropical tree thrives with the right balance—let's nurture it from seed to showstopper.
🌱 Step 1: Prepare the Seed and Germination Medium
Start by soaking the Delonix regia seed in warm water for 24 hours to soften the tough outer shell. This step is crucial because the seed coat can delay germination for weeks if left dry. After soaking, place the seed between two damp paper towels and fold them to create a cozy, humid environment. Keep the towels in a sealed plastic bag to maintain moisture.
Position the bag in a warm spot—75-85°F is ideal—like near a sunny window or on top of a refrigerator. Check daily for sprouting, which typically occurs within 2-4 weeks. You'll know germination has begun when you see a tiny white root emerge first, followed by the seedling's first leaves. Be patient; this tropical beauty takes its time waking up.
🪴 Step 2: Transplant into a Well-Draining Pot
Once the seedling has developed 2-3 sets of true leaves and a sturdy root system, it’s ready for its first pot. Use a 6-inch diameter pot with drainage holes to prevent root rot—a common issue with tropical plants. Fill the pot with a mix of 50% potting soil and 50% perlite or coarse sand to ensure excellent drainage. Delonix regia hates soggy roots, so this blend is non-negotiable.
Gently remove the seedling from the paper towels, being careful not to damage the delicate roots. Plant it 1 inch deep in the soil, firming the mix lightly around the base to secure it. Water thoroughly until water drains freely from the bottom, then place the pot in a location with bright, indirect light. Avoid direct sunlight at this stage—it can scorch the tender young leaves. You'll see new growth within 2-3 weeks if conditions are right.
☀️ Step 3: Acclimate to Full Sun and Outdoor Conditions
After 4-6 weeks in its pot, your Delonix regia seedling is ready for a taste of the outdoors. Start by moving it to a shaded patio or balcony for 2-3 hours daily, gradually increasing exposure over 10-14 days. This slow transition, called hardening off, prevents shock and helps the seedling adjust to wind and fluctuating temperatures. Watch for wilting or yellowing leaves—signs it’s not ready for full sun yet.
Once the seedling tolerates 6+ hours of direct sunlight without stress, it’s time to move it outdoors permanently. Choose a spot with full sun exposure and well-draining soil. If you’re planting in the ground, dig a hole twice as wide as the pot but no deeper. Gently remove the seedling, loosen the roots if they’re circling, and place it in the hole, backfilling with soil. Water deeply to settle the roots and encourage growth. You’ll notice stronger, glossier leaves within a few weeks—a sure sign your seedling is thriving.
💧 Step 4: Maintain Ideal Growing Conditions
Delonix regia seedlings love warmth and consistent moisture but despise waterlogged soil. Water deeply once a week during the growing season, allowing the top 2 inches of soil to dry out between waterings. In hotter months, you may need to water every 4-5 days, but always check the soil moisture before watering. Overwatering is the fastest way to kill this tropical beauty, so err on the side of caution.
Fertilize lightly every 4-6 weeks during the growing season with a balanced, water-soluble fertilizer diluted to half strength. Avoid heavy-handed feeding—Delonix regia prefers lean soil and responds poorly to excess nutrients. Prune any leggy or weak growth to encourage a bushier, more compact shape. With the right care, your seedling will reward you with stunning blooms in 3-5 years, making every effort worthwhile.
Tips & tricks for growing a thriving Delonix regia seedling
These insider tricks will help you avoid common pitfalls and give your flame tree seedling the best possible start toward its stunning blooms.
The Soaking Secret: That 24-hour soak in Step 1 isn't just about softening the seed—it's about breaking dormancy. Use warm water (around 85°F) to mimic tropical conditions and speed up the process. I've found that adding a few drops of liquid seaweed fertilizer to the soaking water can boost germination rates by up to 20% without any risk to the seed.
Germination Environment: The key to successful germination lies in maintaining that perfect balance of moisture and warmth. I recommend placing your sealed bag inside a clear plastic container with a tight lid—this creates a mini greenhouse effect that maintains humidity while allowing you to monitor progress. The 75-85°F range is critical; if your home runs cooler, consider using a seedling heat mat underneath.
Transplant Timing: Waiting for those 2-3 sets of true leaves before transplanting in Step 2 ensures your seedling has developed enough energy reserves. Here's the thing: the first leaves that appear are actually the seed leaves (cotyledons), not true leaves. True leaves will look different—they'll be smaller, more numerous, and have a distinct shape. This is when you know the seedling has established its photosynthetic system properly.
Hardening Off Strategy: The gradual 10-14 day transition in Step 3 is where most beginners fail. I've seen seedlings go from thriving to wilting overnight when moved too quickly. Start with just 2-3 hours of shade in the first day, then increase by 30 minutes each subsequent day. Watch for subtle signs of stress like leaf curling or slight yellowing—these are your warnings to slow down.
Pro Tips for Delonix Regia Seedling
- These insider tricks will help you avoid common pitfalls and give your flame tree seedling the best possible start toward its stunning blooms.
- The Soaking Secret: That 24-hour soak in Step 1 isn't just about softening the seed—it's about breaking dormancy.
- Germination Environment: The key to successful germination lies in maintaining that perfect balance of moisture and warmth.
Frequently asked questions
Got questions about growing Delonix regia seedlings? You’re not alone!
Here are answers to the most common queries—from planting to troubleshooting—to help your tropical beauty thrive.
How long does it take for a Delonix regia seedling to bloom?
A healthy Delonix regia seedling typically takes 3 to 5 years to produce its first flowers, depending on growing conditions. Patience is key—ensure full sun (6+ hours daily), well-draining soil, and consistent watering (but avoid soggy roots!). With proper care, vibrant blooms will reward your efforts.
How often should I water a Delonix regia seedling?
Water your seedling 2–3 times per week during the first year, keeping soil moist but not waterlogged. Once established (after 1–2 years), reduce to once a week or when the top 2 inches of soil feel dry. Overwatering is the #1 killer—these trees hate "wet feet"!
Can Delonix regia seedlings survive cold weather?
Delonix regia (flame tree) is tropical and cannot tolerate frost. If you live in a cold climate, grow it in containers and move indoors or to a greenhouse when temperatures drop below 50°F (10°C). Young seedlings are especially vulnerable—protect them with mulch or row covers if mild freezes occur.
What’s the best soil mix for Delonix regia seedlings?
Use a well-draining mix like:
- 60% potting soil
- 30% perlite or coarse sand
- 10% compost
Why are my Delonix regia leaves yellowing or dropping?
Yellow leaves usually signal overwatering or nutrient deficiency. Check these fixes:
- Watering: Let soil dry slightly between waterings.
- Fertilizer: Use a balanced 10-10-10 or citrus-specific fertilizer every 2 months.
- Pests: Inspect for aphids or mites (spray with neem oil if needed).
Wrapping up and next steps
Growing a Delonix regia (flamboyant tree) seedling is a rewarding journey that brings vibrant tropical beauty to your space. With the right soil, watering routine, and care, you’ll enjoy stunning year-round blooms that brighten any garden. 🌺
Now that you’re equipped with the knowledge, take the next step: plant your seedling in a sunny spot and watch it thrive! Share your progress with fellow plant lovers—your flamboyant tree will be the talk of the neighborhood. Happy gardening! 🌱