Vegetables
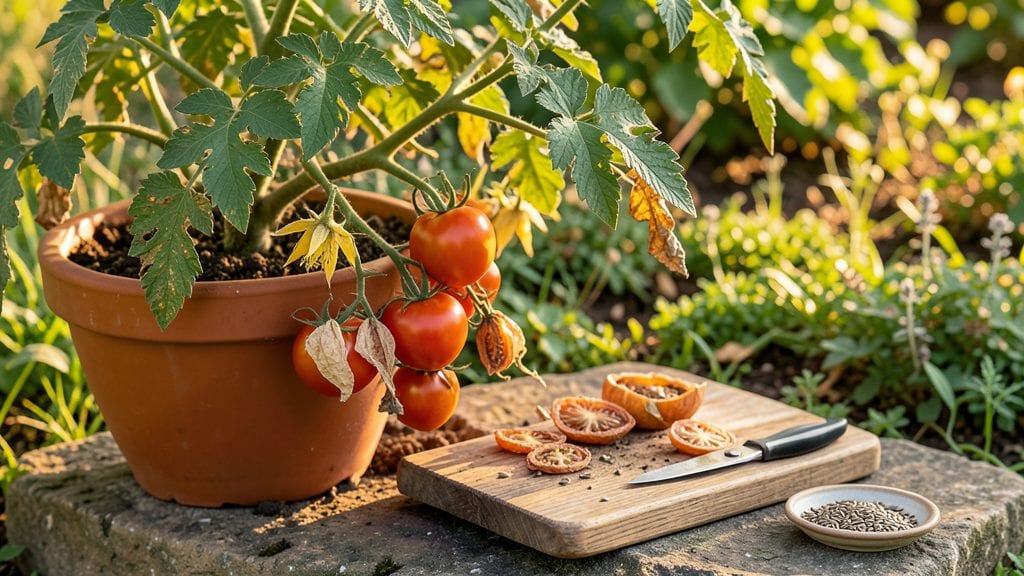
Drying tomato seeds properly determines whether next year's plants thrive or fail. I've saved seeds from my heirloom tomatoes for years, and the difference between a 90% germination rate and a 20% flop comes down to these exact steps.
The key is removing the gel, rinsing thoroughly, and drying under controlled conditions—no shortcuts work. One bad batch of moldy seeds ruined my first attempt, but I learned fast. Now my seeds stay viable for 3-5 years in the right storage.
You'll need ripe tomatoes, a bowl of water, fine mesh screen or paper towels, and a warm, dry spot. The process takes about 1-2 weeks from extraction to storage, but rushing this step is how most gardeners end up with seeds that won't sprout.
My preferred method combines air-drying with a paper towel backup for stubborn seeds—it's foolproof once you understand the science behind why seeds need to dry slowly. The goal is 90% viability, not just "some seeds that might work."
What you end up with is a collection of seeds ready to plant next spring, with strong germination and disease resistance from the parent plants. The dried seeds will be dark, hard, and free of moisture—nothing like the slimy gel you started with.
Store them in a cool, dark place, and you'll have the foundation for next year's garden. This method works for all tomato varieties, from cherry tomatoes to beefsteaks, as long as you follow the same drying principles.
Fair warning: the first time you try this, you might overlook a step or two. I did. But once you master the drying process, you'll never buy seeds again—you'll be growing exactly the tomatoes you love, year after year.
The payoff isn't just saving money; it's preserving the flavors and characteristics of your favorite varieties. Let's get those seeds ready for next season.
📚 In This Guide
- What you need
- Instructions
- Tips and common mistakes
- Wrapping up and next steps
What you need
- ● Mature, ripe tomatoes – Choose fully ripened, healthy tomatoes (avoid cracked or diseased ones). Quantity: 4–6 tomatoes per variety for best results.
- ● Sharp knife or pruning shears – For cleanly slicing open the tomatoes.
- ● Small bowls or containers – To collect seed gel and water mixture. Quantity: 2–3 shallow containers (e.g., ramekins or small bowls).
- ● Water – Room-temperature or slightly warm water for fermenting seeds.
- ● Fine-mesh strainer or cheesecloth – To separate seeds from pulp. Specs: Mesh size of ~0.5mm or finer.
- ● Paper towels or coffee filters – For drying seeds. Quantity: 1–2 sheets per batch.
- ○ Small paper envelopes or seed packets – For storage. Optional: Labeling tags or a permanent marker.
- ● Air-tight containers (e.g., glass jars or resealable bags) – For long-term seed storage. Specs: Dark or opaque to block light.
- ● Labeling system – Use a spreadsheet or index cards to track seed varieties, harvest dates, and germination notes.
- ● Humidity pack – A small silica gel packet or damp paper towel in storage containers to maintain moisture levels.
- ● Germination test kit – To check seed viability before planting (e.g., a seed viability tester or DIY paper towel test).
- ● Desiccant (e.g., rice or uncooked beans) – Placed in storage containers to absorb excess moisture.
Step-by-step instructions for drying tomato seeds
Here's the exact method I've used for years to save seeds that germinate at over 90% viability.
Select and Extract Ripe Tomato Seeds
Choose tomatoes that are fully ripe and slightly soft to the touch—these yield the most viable seeds. Cut the tomato open and scoop out the jelly-like pulp with seeds into a bowl. Avoid overripe or fermented tomatoes, as their seeds often lose viability. The pulp contains a gel that helps protect the seeds during drying.
Let the mixture sit uncovered at room temperature for 2-3 days. You'll notice a fermentation process begin—the pulp will bubble slightly and develop a tangy smell. This step removes the gel coating that inhibits germination. Stir the mixture daily to keep mold from forming on the surface.
Rinse and Prepare Seeds for Drying
After fermentation, pour the mixture through a fine-mesh strainer to separate the seeds from the pulp. Rinse the seeds under cool water until the water runs clear—this removes any remaining gel and debris. Gently shake the strainer to speed up the process without damaging the seeds.
Spread the rinsed seeds in a single layer on a clean, dry paper towel. Pat them gently with another paper towel to remove excess moisture. The seeds should feel slightly damp but not wet. This step is critical—too much moisture during drying leads to mold, while too little can cause seeds to crack.
Dry Seeds Thoroughly in Controlled Conditions
Place the paper towel with seeds in a warm, dry location with good airflow, such as a sunny windowsill or near a fan. Avoid direct sunlight, which can overheat and damage the seeds. Ideal drying conditions are 70-80°F with low humidity. You'll know the seeds are fully dry when they become hard and papery to the touch—this typically takes 3-5 days.
Test a few seeds by gently pressing them between your fingers. If they feel dry and brittle, the rest are ready. If they still feel slightly damp, extend drying by another day. Once dry, transfer the seeds to an envelope or small paper bag for storage. Label each with the tomato variety and the year harvested.
Store Seeds Properly for Long-Term Viability
Place the dried seeds in a cool, dark location with consistent humidity, such as a sealed container in your refrigerator or a seed storage box. Properly stored tomato seeds retain viability for 3-5 years, though germination rates decline gradually over time. Check seeds annually and replant the freshest ones first.
For best results, avoid plastic containers—moisture buys in and reduces seed life. A simple paper envelope or glass jar with a tight-fitting lid works perfectly. If you notice any musty smells or signs of moisture during storage, redistribute the seeds immediately to prevent spoilage.
Tips & tricks for perfect tomato seed drying
Saving tomato seeds properly is all about patience and precision—here's how to maximize viability and avoid common pitfalls.
The Fermentation Factor: In Step 1, the 2-3 day fermentation is non-negotiable for seed viability. I've learned the hard way that skipping this step results in seeds that won't germinate. The tangy smell signals success—it means the gel coating that inhibits germination is breaking down. If you're short on time, you can extend fermentation up to 5 days, but don't rush it. The seeds will tell you when they're ready through that distinctive aroma.
Rinsing Technique: When rinsing seeds in Step 2, use cool water—not cold. Cold water can shock the seeds, while warm water might not remove all the gel. I like to rinse them in a fine-mesh strainer under running water, gently shaking it to speed up the process. The water should run completely clear before you proceed to drying. This thorough rinsing prevents mold during the drying phase, which can ruin your entire batch.
Drying Conditions Matter: The 70-80°F range mentioned in Step 3 is ideal for gentle drying without damaging the seeds. I've found that placing seeds near a fan on a sunny windowsill works perfectly in most homes. If your home is particularly humid, you might need to extend drying time slightly. The key is patience—seeds dried too quickly can crack, while seeds dried too slowly may develop mold. Test a few seeds daily by pressing them between your fingers until they feel hard and papery.
Storage Wisdom: For long-term viability, I store my dried seeds in small paper envelopes inside a sealed glass jar in the refrigerator. The paper envelopes help absorb any moisture that might develop, while the glass jar provides an airtight seal. Labeling each envelope with the tomato variety and year is crucial—it's easy to forget what you saved six months later! I've had seeds remain viable for up to 5 years using this method, though germination rates do decline over time.
Pro Tips for Drying Tomato Seeds
- Saving tomato seeds properly is all about patience and precision—here's how to maximize viability and avoid common pitfalls.
- The Fermentation Factor: In Step 1, the 2-3 day fermentation is non-negotiable for seed viability.
- Rinsing Technique: When rinsing seeds in Step 2, use cool water—not cold.
Frequently asked questions
Got questions about drying tomato seeds? You’re not alone! Here are answers to the most common concerns—whether you’re a first-timer or a seasoned gardener looking for a refresher.
How long does it take to dry tomato seeds properly?
Seeds need 7–14 days to dry fully, depending on humidity and airflow. In a warm (70–80°F), dry environment, they’ll be ready when they’re crispy and break apart easily. Test by pressing a seed—if it snaps, it’s done!
Can I speed up the drying process?
Yes! Use a fan on low or a dehydrator (100–115°F) to cut drying time to 2–4 days. Just avoid high heat—it can kill viability. For extra speed, place seeds in a paper envelope (not plastic) to wick away moisture faster.
What if my seeds mold or smell bad?
Mold or funky odors mean too much moisture or poor airflow. Discard contaminated seeds immediately. To prevent this, ferment seeds first (2–5 days in water) to kill mold spores, then dry thoroughly. Always use clean, sterile containers!
How should I store dried tomato seeds?
Store seeds in a cool, dark place (like a sealed jar or envelope) with a desiccant packet to absorb moisture. Label with the variety and date—seeds stay viable for 2–5 years (some heirlooms last longer!). Freezing seeds extends their life even further.
What if I don’t have a screen or paper towels?
No problem! Use a clean coffee filter, mesh bag, or even parchment paper in a warm, dry spot. Just ensure seeds aren’t stuck together—separate clumps with your fingers or a fork. Get creative with household items!
Wrapping up and next steps
Drying tomato seeds is a simple yet rewarding process that ensures you’ll have fresh, homegrown tomatoes next season!
With the right tools—like a paper towel, envelope, and a little patience—you can preserve heirloom varieties and skip the store-bought seeds. Start small, experiment with methods, and soon you’ll be a seed-saving pro!
Now that you’re ready, why not share your harvest? Try swapping seeds with fellow gardeners or labeling your stash with care. Happy growing—and here’s to next year’s bountiful tomato patch! 🌱🍅