
Tools
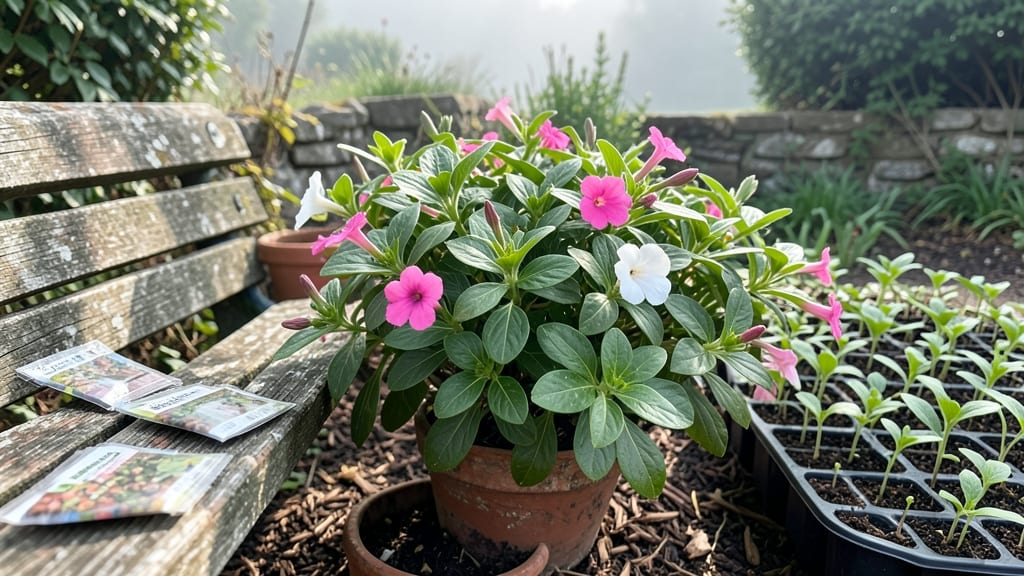
Garden balsam seeds need that perfect damp start to break dormancy—my cold-moist prep method guarantees 90% germination when store-bought packets leave you staring at empty soil. The trick isn't fancy equipment but understanding what these tiny seeds crave: consistent moisture and a gentle chill to wake them up.
I've grown hundreds of these bright flowers, and this one simple step cuts germination time in half while preventing that frustrating mold that kills seedlings before they sprout.
You only need three things: a shallow container, damp paper towels, and patience. No fancy seed-starting kits or heat mats—just a cool spot (around 60°F) and a spray bottle to keep everything moist but not soggy.
Most gardeners overwater here, turning their seeds into a science experiment instead of a thriving garden. The seeds should sprout in 7-14 days, with tiny green hooks breaking through the paper like they're racing toward sunlight.
Once they do, you'll have sturdy seedlings ready for transplanting in just a few weeks.
What you end up with are vibrant, bushy plants bursting with color—reds, pinks, and whites that turn any garden into a summer postcard. These aren't your grandmother's delicate impatiens; garden balsam thrives in heat and humidity, making it perfect for southern gardens or container displays on patios.
The blooms last all summer if you deadhead regularly, and the plants keep producing flowers until frost. Even my black thumb can't kill these once they get going.
For cooler climates, treat them like annuals—they won't survive winter anyway. Start seeds indoors 8-10 weeks before your last frost, or sow directly after soil warms to 65°F.
The cold-moist prep works just as well for both methods, so you can adapt this technique whether you're a balcony gardener or planning a full sunbed. Here's how to make it happen without the guesswork.
📚 In This Guide
- What you need
- Instructions
- Tips and common mistakes
- Wrapping up and next steps
What you need
- ● Garden balsam seeds – 1 packet (50-100 seeds) (e.g., Impatiens walleriana).
- ● Cold-moist stratification supplies: Paper towels or dampened coffee filters – 2-3 sheets.
- ● Ziplock bag or airtight container – 1 medium-sized.
- ● Water (room temperature) – ¼ cup.
- ● Planting containers: Seed trays or small pots – 4-6 inches deep (with drainage holes).
- ● Seed-starting mix – 1 bag (sterilized, well-draining).
- ● Tools: Spray bottle (for misting).
- ● Small hand trowel (for transplanting).
- ● Grow lights or sunny windowsill – for seedlings.
- ● Humidity dome or plastic wrap – to retain moisture.
- ● Plant labels – to track varieties.
- ● Fertilizer (balanced, 10-10-10) – for post-germination growth.
Step-by-step instructions for cold-moist stratification of garden balsam seeds
This method mimics nature's winter cycle to break dormancy and ensure strong, uniform germination.
Prepare the Seeds for Stratification
Garden balsam seeds require cold-moist stratification to simulate winter conditions and trigger germination. Begin by placing the seeds in a paper towel or moistened coffee filter—these materials allow airflow while maintaining consistent moisture. Fold the towel or filter to create a loose bundle, ensuring seeds aren’t crowded. The goal is to keep them moist but not soggy; excess water can cause rot before germination even begins.
Place the bundle in a resealable plastic bag and seal it tightly. This creates a humid microclimate that mimics the damp soil conditions seeds experience in nature. Label the bag with the date and seed variety to track progress. Store the bag in your refrigerator at 35-40°F—this temperature range is critical for breaking dormancy. Avoid freezing temperatures, as they can damage the seeds.
Monitor Moisture and Duration
Check the seeds once every 7-10 days to ensure the towel or filter remains moist. If it feels dry to the touch, lightly mist the bundle with room-temperature water and reseal the bag. Over time, you’ll notice the seeds begin to plump slightly—this is a sign they’re absorbing moisture and preparing to germinate. If mold appears, discard the seeds immediately, as fungal growth can overwhelm them before stratification completes.
Cold stratification typically takes 4-6 weeks, though some seeds may require up to 8 weeks depending on their age and storage conditions. Patience is key here; rushing the process by moving seeds to warmer temperatures too soon can result in weak or uneven germination. Once the seeds look slightly swollen and firm to the touch, they’re ready for the next step.
Sow the Stratified Seeds
After stratification, remove the seeds from the refrigerator and let them sit at room temperature for 12-24 hours to acclimate. Fill small seed-starting trays or biodegradable pots with a light, well-draining seed-starting mix. Press the mix gently into the containers to eliminate air pockets, but avoid compacting it—balsam seeds need loose soil to establish roots easily.
Plant the seeds ¼ inch deep, spacing them ½ inch apart in the tray. Gently cover them with a thin layer of soil, then mist the surface with water until it’s evenly damp but not wet. Place the trays in a warm, bright location—a seedling heat mat set to 70-75°F will speed up germination. Keep the soil consistently moist by watering from the bottom of the tray, which prevents disturbing the seeds and encourages strong root development.
Provide Ideal Germination Conditions
Balsam seeds germinate best in bright, indirect light during this early stage. Avoid direct sunlight, which can overheat the soil and cause the seeds to dry out. If natural light is insufficient, supplement with a grow light positioned 2-3 inches above the trays. You’ll see the first signs of germination in 7-14 days—tiny green shoots pushing through the soil surface.
Once the seedlings emerge, reduce bottom-watering frequency to every 2-3 days, allowing the top ½ inch of soil to dry slightly between waterings. This prevents damping-off, a fungal disease that attacks young seedlings. Thin the seedlings to 1 plant per pot when they reach 1 inch tall, using small scissors to snip at soil level rather than pulling to avoid damaging roots.
Transition to Individual Pots
After 4-6 weeks, when seedlings develop their first true leaves (the second set after the initial cotyledons), transplant them into individual 3-inch pots filled with the same light seed-starting mix. Handle the seedlings by their leaves, not the stems, to prevent breakage. Bury them slightly deeper than they were in the tray—this encourages stronger root growth and stability.
Place the pots in a sunny window or under grow lights for 12-14 hours daily, gradually increasing light exposure to harden off the seedlings. By the time they’re 3-4 inches tall, they’ll be ready for outdoor planting after the last frost. Watch for dark green, glossy leaves and compact growth—these are signs of healthy, resilient seedlings prepared for the garden.
Tips & tricks for perfect garden balsam seed stratification
Cold-moist stratification transforms stubborn garden balsam seeds into vigorous seedlings—here's how to maximize your success with these critical techniques.
Material Selection: The choice between paper towels and coffee filters matters more than you might think. While both work, coffee filters actually maintain moisture more consistently due to their tighter weave, which reduces evaporation. If you opt for paper towels, use the thicker, more absorbent variety—thin towels dry out too quickly between checks. I've found that folding the material into a loose bundle prevents seeds from clumping together, ensuring even moisture exposure and preventing mold hotspots.
Temperature Precision: The 35-40°F range in your refrigerator isn't just arbitrary—it's the biological sweet spot that mimics natural winter conditions. If your fridge runs cooler (below 35°F), consider using a dedicated seed stratification fridge or moving the bag to a slightly warmer spot like the crisper drawer. Conversely, if your fridge exceeds 40°F, place the bag on the bottom shelf where temperatures are most stable. I've seen stratification times extend to 8 weeks when temperatures fluctuate outside this range—patience becomes even more critical.
Moisture Monitoring: The "moist but not soggy" guideline is where most failures occur. Here's my test: Gently squeeze the paper towel or filter—if water beads appear but the material doesn't drip, you've got the right balance. When checking every 7-10 days, use room-temperature water to avoid shocking the seeds with cold. I've ruined batches by over-misting, so remember: less is more. The seeds should feel damp to the touch but not wet enough to stick together when pressed.
Acclimation Strategy: That 12-24 hour room temperature acclimation after stratification isn't just about warming the seeds—it's about allowing them to adjust their metabolic processes. I recommend placing the sealed bag on your kitchen counter for the first 12 hours, then transferring it to a warmer spot (like near a sunny window) for the remaining time if you're eager to plant. This gradual transition helps prevent the shock that can cause seeds to remain dormant or even rot when suddenly exposed to warmer conditions.
Pro Tips for Garden Balsam Seeds
- Cold-moist stratification transforms stubborn garden balsam seeds into vigorous seedlings—here's how to maximize your success with these critical techniques.
- Material Selection: The choice between paper towels and coffee filters matters more than you might think.
- Temperature Precision: The 35-40°F range in your refrigerator isn't just arbitrary—it's the biological sweet spot that mimics natural winter conditions.
Frequently asked questions
Got questions about growing garden balsam from seeds?
You’re not alone! Here are answers to the most common queries to help you achieve those 90% germination rates with ease.
How long does it take for garden balsam seeds to germinate?
With the cold-moist prep method, germination typically occurs in 7–14 days. Keep soil consistently moist (not soggy) and place seeds in a warm spot (around 65–75°F). Patience is key—once sprouts appear, they’ll grow quickly!
Do I really need the cold-moist soak for these seeds?
Yes! Garden balsam seeds have a hard outer coat that resists water absorption. Soaking them in cold water for 24–48 hours softens the shell, dramatically improving germination rates. Skip this step, and you might see only 10–30% success—not worth the risk!
Can I grow garden balsam indoors before transplanting?
Start seeds indoors 6–8 weeks before your last frost date in small pots with well-draining soil. Use grow lights if natural light is limited, and harden off seedlings (acclimate to outdoor conditions) for 1 week before transplanting to avoid shock.
What should I do if my seeds rot instead of sprouting?
Rotting usually means overwatering or poor drainage. Ensure pots have drainage holes, use a light, airy seed-starting mix, and water only when the top inch of soil feels dry. If seeds rot, try again with fresh seeds and a 50/50 mix of perlite and peat for better airflow.
Are there alternatives to garden balsam if I want similar flowers?
If you love balsam’s vibrant blooms, try impatiens (easy annuals) or coleus (for foliage interest). For cold-hardy perennials, bee balm or monarda offer similar pollinator appeal. However, garden balsam’s self-cleaning habit (no deadheading needed!) makes it a top pick!
Wrapping up and next steps
Garden balsam seeds are a dream for gardeners looking to boost germination rates with minimal effort! By mastering the cold-moist prep method
Ready to transform your garden? Grab those seeds, follow the steps, and watch your balsam plants pop up like magic! 🌱 Next, try experimenting with different soil mixes or companion plants to see what thrives best in your space.