Tools
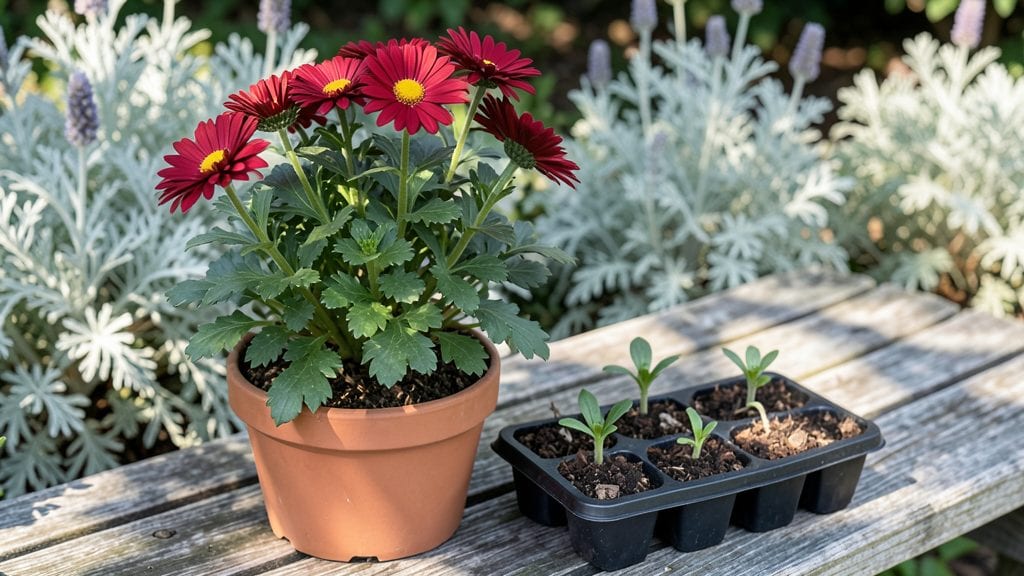
Garden chrysanthemum seeds need a cold-moist prep trick to wake up their fall-blooming potential. 🌿 I learned the hard way that skipping this step means waiting months for anything to sprout—now my plants burst into color by early October every year.
The secret isn't complicated: it's about mimicking nature's timing and keeping those seeds cozy until they're ready to grow.
You'll need a plastic bag, some damp paper towels, and patience—about 4-6 weeks of cold stratification. This isn't just about planting; it's about giving your seeds the head start they need.
Most people rush this step, but taking the time ensures stronger, more reliable seedlings. The key is keeping everything moist but not soggy—think of a damp sponge, not a swamp.
Once your seeds sprout (usually within 2-3 weeks of starting the cold treatment), you'll transplant them into well-draining soil with morning sun and afternoon shade. The payoff comes when those first deep green leaves appear, followed by blooms that last until frost.
This method works for both hardy mums and those showy florist varieties—just adjust your planting timeline based on your local first frost date.
Here's where it gets interesting—once established, these plants multiply like crazy. Divide them every 3-4 years to keep them vigorous, and you'll have more chrysanthemums than you know what to do with.
The best part? You can start this process as early as February for fall blooms, giving you months of vibrant color when most gardens are winding down.
📚 In This Guide
- What you need
- Instructions
- Tips and common mistakes
- Wrapping up and next steps
What you need
- ● Garden chrysanthemum seeds: Choose high-quality, cold-hardy varieties (e.g., 'Bonanza,' 'Daisy Mound,' or 'Seasongold'). Aim for 50–100 seeds depending on your desired coverage.
- ● Seed-starting trays or biodegradable pots: 72-cell trays or 2–3 inch pots (at least 10–15 units). Ensure they have drainage holes.
- ● Seed-starting mix: A lightweight, sterile potting mix (e.g., Pro-Mix or Fox Farm Seedling Mix). Avoid garden soil—it’s too dense!
- ● Plastic wrap or humidity dome: Keeps moisture locked in until germination. A clear plastic sheet or humidity lid works perfectly.
- ● Spray bottle: A fine-mist sprayer for gentle watering (avoid disrupting seeds).
- ● Grow lights or sunny windowsill: Chrysanthemums need 12–16 hours of light daily. A LED grow light (e.g., Spectrum 96000 Series) is ideal for indoor starts.
- ● Refrigerator or cold frame: For the cold-moist stratification step—use a crisp produce drawer (35–40°F) or a DIY cold frame.
- ○ Fertilizer (optional but recommended): A balanced, water-soluble fertilizer (e.g., 10-10-10 or fish emulsion) for post-germination growth.
- ● Plant labels: Wooden or plastic tags to track varieties (especially useful if testing multiple seeds!).
- ○ Heat mat (optional): Speeds up germination in cooler homes (70–75°F is ideal).
- ● Tweezers or seedling pickers: Helps transplant delicate seedlings without damage.
- ● Garden gloves: Protects hands from soil and sharp seedling stems.
- ● Outdoor hardening-off tray: A shaded, protected area (e.g., a mesh cage or old window frame) to acclimate seedlings before transplanting.
- ● Mulch: Straw or shredded leaves to retain soil moisture after outdoor planting.
Step-by-step instructions for cold-moist stratifying garden chrysanthemum seeds
Here's how to break dormancy and coax vibrant fall blooms from stubborn chrysanthemum seeds.
🌱 Step 1: Prepare the Seeds for Cold-Moist Stratification
Chrysanthemum seeds need 6-8 weeks of cold-moist stratification to mimic winter conditions. Start by placing the seeds in a paper towel or coir mat and dampening it thoroughly with lukewarm water. The towel should feel damp but not dripping—squeeze out excess moisture if needed.
Fold the towel or mat to create a seed packet, ensuring the seeds are evenly distributed but not overlapping. Place this packet inside a resealable plastic bag and seal it tightly. This creates a controlled environment that maintains consistent moisture without risking mold.
💧 Step 2: Store in the Refrigerator for Stratification
Place the sealed bag in the crispest part of your refrigerator, typically the top shelf or the vegetable drawer. Chrysanthemum seeds thrive at 34-40°F during stratification—this simulates the natural winter chilling period they require to break dormancy. Check the bag weekly to ensure no condensation has formed inside.
If you notice moisture beads forming on the bag's interior, open it briefly to let excess humidity escape. The goal is to keep the seeds consistently moist, not soggy. You'll see the first signs of germination as tiny white roots emerge from the seeds—this usually happens after 4-6 weeks in cold storage.
⏰ Step 3: Test for Germination and Prepare for Planting
After 6-8 weeks, remove the bag from the refrigerator and gently unfold the towel or coir mat. Look for seeds that have sprouted—these will have small white roots or tiny green shoots. If fewer than half have germinated, return the bag to the refrigerator for another 2 weeks before testing again.
For seeds that haven't sprouted yet, don't discard them. Some chrysanthemum varieties germinate slowly, and patience pays off. Once you have viable sprouts, prepare 4-inch pots filled with a mix of 50% potting soil and 50% perlite to ensure excellent drainage. This lightweight mix prevents damping-off while supporting tender roots.
🌿 Step 4: Plant Germinated Seeds and Provide Warmth
Plant each germinated seed ½ inch deep in its own pot, using a pencil or your finger to create a small hole. Cover the seed gently and press the soil around it to ensure good contact. Water lightly from the bottom of the pot to avoid disturbing the seeds, and place the pots in a warm, bright location.
Ideal germination temperatures for chrysanthemums are 65-70°F. If your home runs cooler, place the pots on a seedling heat mat set to 70°F. You should see the first true leaves emerge within 7-10 days—these will be small and rounded, signaling successful germination.
☀️ Step 5: Transition to Grow Lights and Harden Off
Once seedlings have 3-4 true leaves, transition them to 12-14 hours of grow light daily. A full-spectrum LED grow light positioned 4-6 inches above the seedlings provides the intensity they need. Keep the light on a timer to maintain consistent photoperiods—chrysanthemums flower in response to shorter daylight hours, so this training is critical.
Two weeks before your last frost date, begin hardening off the seedlings. Place them outside in a shaded, sheltered spot for 1-2 hours the first day, gradually increasing exposure over 10-14 days. Watch for leaves that darken slightly—this indicates they're adapting to outdoor conditions. Plant outdoors after all risk of frost has passed, spacing seedlings 12-18 inches apart in well-draining soil.
Tips & tricks for perfect chrysanthemum seed stratification
Cold-moist stratification isn't just about patience—it's about precision. These small adjustments make all the difference between struggling seedlings and vibrant fall blooms.
Moisture Balance is Critical: The key to successful stratification lies in maintaining that perfect dampness level. After placing your chrysanthemum seeds on the paper towel or coir mat, squeeze out any excess water until it's just damp—not dripping, not bone-dry. Think of it like wringing out a sponge: you want it to hold moisture without becoming soggy. This balance prevents both mold growth and seed dehydration during the crucial 6-8 week period. I've found that using a spray bottle for the initial dampening gives me better control than soaking.
Temperature Consistency Matters: While the instructions specify 34-40°F, I've learned that refrigerator temperatures can vary dramatically between models and locations. The vegetable drawer is typically the most stable, but if your fridge runs cold, consider placing the bag on a shelf closer to the middle where temperatures are more consistent. For extra insurance, place a small thermometer inside the bag during the first week to verify you're maintaining that critical range. Chrysanthemum seeds are particularly sensitive to temperature fluctuations during this dormancy-breaking phase.
Visual Germination Cues: Don't be discouraged if you don't see immediate signs of life after 4-6 weeks. The first indicators of successful stratification are subtle: look for tiny white root hairs emerging from the seeds, or a slight swelling of the seed coat. These are your signals that the seeds have broken dormancy. If you're unsure whether germination has started, gently unwrap the towel and place it near a sunny window—you'll often see the difference more clearly in natural light. Remember, some varieties take the full 8 weeks, so patience is truly a virtue with chrysanthemums.
Equipment Substitutions: Don't have resealable plastic bags? No problem. You can use any airtight container—a small glass jar with a lid works beautifully, or even a zip-top freezer bag. The key is maintaining that controlled moisture environment. For the coir mat, you can substitute with a clean, unbleached coffee filter if needed. Just remember to keep everything sterile to prevent mold—this is particularly important during the warm-up phase when seeds become more metabolically active.
Pro Tips for Garden Chrysanthemum Seeds
- Cold-moist stratification isn't just about patience—it's about precision.
- Moisture Balance is Critical: The key to successful stratification lies in maintaining that perfect dampness level.
- Temperature Consistency Matters: While the instructions specify 34-40°F, I've learned that refrigerator temperatures can vary dramatically between models and locations.
Frequently asked questions
Got questions about growing garden chrysanthemums from seeds? You’re not alone—these vibrant blooms are a favorite, but they need the right care! Below, we’ve rounded up the most common questions (and answers) to help you prep those seeds like a pro and enjoy stunning fall color.
When is the best time to plant garden chrysanthemum seeds?
For cold-moist prepping (stratification), sow seeds 6–8 weeks before your last frost date—typically late winter or early spring. If you’re direct-sowing, wait until soil temperatures drop to 50–60°F (10–15°C) in late summer or early fall. Chrysanthemums thrive with cooler temps, so patience pays off!
How long should I keep the seeds moist during cold stratification?
Keep seeds consistently moist (not soggy!) in a sealed container for 4–6 weeks in the fridge. Check weekly—if the paper towel dries out, spritz with water. Over-soaking can cause rot, so aim for damp, not dripping. Think of it like a cozy winter nap for your seeds!
What if my seeds don’t germinate after stratification?
Don’t panic! Try these fixes:
- Check moisture: Seeds need steady dampness—adjust your container if needed.
- Verify timing: Some varieties need up to 8 weeks of cold treatment.
- Test viability: Soak a few seeds in warm water for 24 hours—if they sink, they’re likely good.
- Try heat: After stratification, place the tray in a warm (70°F/21°C) spot to kickstart growth.
Can I grow chrysanthemums from seeds indoors first?
Start seeds indoors 8–10 weeks before transplanting (late winter). Use seed-starting mix, keep soil warm (70°F/21°C), and provide 12–14 hours of light daily. Harden off seedlings for 1 week before moving them outside—this toughens them up for cooler fall weather. →
Are there easier alternatives to growing chrysanthemums from seed?
Yes! If seeds feel too tricky, consider:
- Young plants: Buy nursery starts in early spring for instant blooms (just pinch back stems for bushiness!).
- Cuttings: Propagate from a healthy plant by snipping 4-inch stems, dipping in rooting hormone, and planting in moist soil.
- Hybrid varieties: Some, like ‘Bonanza’ or ‘Dwarf Yellow,’ are seed-friendly but may not match the parent plant’s exact traits.
Wrapping up and next steps
Growing garden chrysanthemums from seeds is a rewarding way to welcome vibrant fall colors into your space—especially with the right cold-moist prep! By following these steps, you’ll set the stage for healthy, thriving blooms that brighten up autumn. 🌸
Now that you’re equipped with the knowledge, take the next step—grab those seeds, prep your materials, and start your chrysanthemum journey today. Whether you’re a seasoned gardener or a beginner, every small effort will bloom into something beautiful. Happy planting! 🌱