Pruning
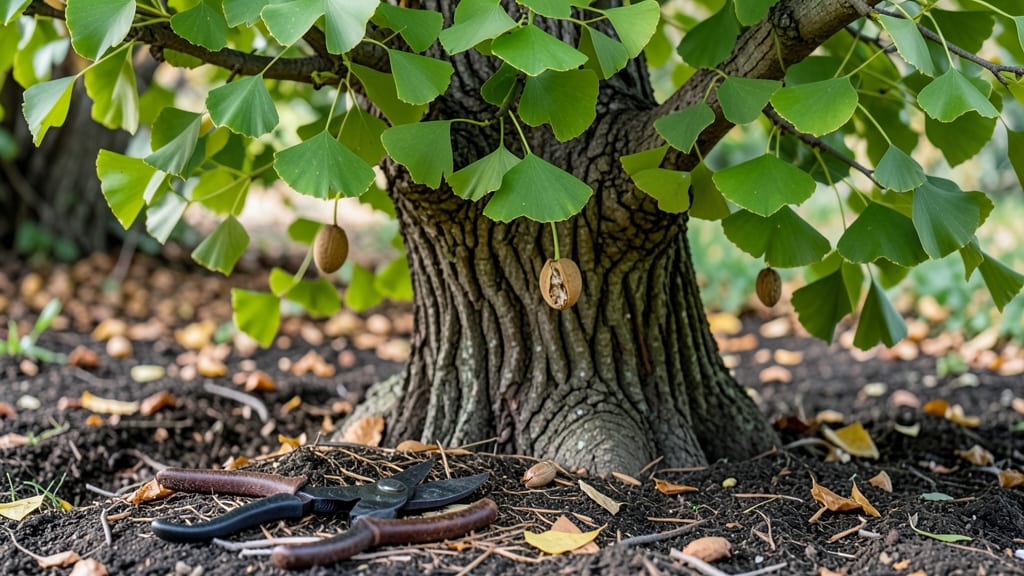
Ginko tree seeds demand patience, but with the right cold-soak trick, you’ll coax those stubborn nuts into lively seedlings faster than you’d expect—here’s how. 🌱 The key isn’t just time, but breaking dormancy the way nature intended.
The first step is collecting fresh seeds in late fall, then storing them in damp sand for 90 days in the fridge. You’ll need well-draining soil, a sunny spot, and a spray bottle to keep things moist without drowning the tiny roots.
Most people rush this part, but patience here means stronger seedlings later.
By spring, you’ll see those first pale green shoots pushing through the soil—proof the stratification worked. These seedlings grow slowly at first, but with consistent watering and protection from harsh winds, they’ll develop into sturdy trees within a few years.
The real magic happens when they finally bloom, though that takes decades.
Watch for mold on damp seeds or leggy seedlings—both signs of overwatering. If germination stalls after 3 months, try a second cold cycle. This method works best in zones 4-8, but with extra care, even colder climates can pull it off.
Start small, and you’ll have a living legacy growing in your yard.
📚 In This Guide
- What you need
- Instructions
- Tips and common mistakes
- Wrapping up and next steps
What you need
- ● Ginkgo tree seeds (Ginkgo biloba): 10–20 fresh, plump seeds (harvested in fall, ideally from ripe fruit)
- ● Note: Seeds must be fully mature—green or underripe seeds won’t germinate!
- ● Cold stratification supplies: 1–2 paper towels or coir (coconut fiber) discs (for moisture retention)
- ● 1 ziplock bag or airtight container (quart-sized or larger)
- ● Refrigerator (set to 35–40°F (2–4°C) for stratification)
- ● Potting mix: 1 seed-starting tray or small pots (3–4 inches deep) (2–3 units)
- ● 1 bag well-draining potting mix (sterile, peat-free preferred)
- ○ Optional: perlite or vermiculite (1 cup, to improve aeration)
- ● Growth essentials: 1 spray bottle (for gentle watering)
- ● 1 humidity dome or plastic wrap (to retain moisture)
- ● 1 grow light or sunny windowsill (6+ hours of indirect light daily)
- ● Seed scarification tools: Sandpaper (medium-grit, 100–120 grit) or a knife (to nick seed coats if needed)
- ● Growth aids: Fungicide (like hydrogen peroxide, 3% solution) to prevent mold
- ○ Heat mat (optional, for faster germination if indoor temps drop below 60°F/15°C)
- ● Monitoring tools: Thermometer/hygrometer (to track fridge temps and humidity)
- ● Notebook (to log seed progress and germination dates)
Step-by-step instructions for growing ginkgo tree seeds
Here’s how to break the dormancy barrier and coax these ancient seeds into life.
🌱 Step 1: Collect and Clean the Seeds
Gather fresh ginkgo seeds straight from the tree—green, fleshy ones with a thin outer skin. Rinse them thoroughly under running water to remove the sticky, yellowish pulp that surrounds them. This pulp can ferment and rot the seeds if left on too long. I like to soak them for 10-15 minutes in a bowl of lukewarm water, gently rubbing the skin with my fingers to loosen any remaining debris. The goal is to expose the hard, green seed inside without damaging it.
Once clean, lay the seeds on a paper towel to dry for 24 hours in a well-ventilated area. This prevents mold from forming during stratification. You’ll know they’re ready when the outer skin feels slightly leathery to the touch but not sticky. This step is critical—skipping it often leads to rot during cold treatment.
❄️ Step 2: Cold-Stratify the Seeds for 90 Days
Place the dried seeds in a resealable plastic bag with a moistened paper towel—just damp enough to feel slightly damp when squeezed, like a wrung-out sponge. Seal the bag and place it in your refrigerator’s crispier drawer (around 35-40°F). This mimics winter conditions and breaks the seed’s dormancy. I mark the bag with the date and store it on a shelf where it won’t get jostled.
Check the seeds every 2-3 weeks—they should remain moist but not soggy. If the paper towel dries out, add a few drops of water and reseal. After 90 days, the seeds will look wrinkled or slightly shriveled, but that’s normal. This is the moment they’re ready to germinate. Don’t rush this step—ginkgo seeds need the full cold treatment to sprout reliably.
🌱 Step 3: Plant the Stratified Seeds
Fill 4-inch pots with a sterile seed-starting mix—ginkgo seeds dislike garden soil’s density. Press the mix down lightly so it’s firm but not compacted. Plant one seed per pot, placing it ½ inch deep with the pointed end facing upward. Cover it with a thin layer of soil and water gently until the surface feels evenly moist. I use a spray bottle to avoid disturbing the seed.
Place the pots in a warm, bright location (around 65-75°F) with indirect light. A sunny windowsill works, but avoid direct midday sun, which can overheat the soil. You’ll see the first signs of life in 2-4 weeks—tiny green sprouts pushing through the soil. This is your signal that the stratification worked. If nothing emerges after 6 weeks, the seed may not have broken dormancy fully.
☀️ Step 4: Provide Consistent Care for Seedlings
Once the seedlings emerge, move them to a spot with bright, indirect light for 2-3 weeks to prevent shock. After that, gradually introduce morning sun to harden them off. Water the pots when the top inch of soil feels dry—ginkgo seedlings hate soggy roots but also won’t tolerate drying out completely. I use a small watering can with a narrow spout to target the base of the plant.
You’ll notice the first true leaves (not the initial seed leaves) appear in 4-6 weeks. These will look like small, fan-shaped fronds. At this stage, fertilize lightly with a balanced, water-soluble fertilizer (diluted to half strength) to encourage strong growth. Avoid over-fertilizing—ginkgo seedlings are sensitive to salt buildup in the soil.
🪴 Step 5: Transplant and Monitor Growth
After 6-8 weeks, when the seedlings have 3-4 sets of true leaves, transplant them into 6-inch pots with fresh seed-starting mix. Ginkgo trees grow slowly, so there’s no rush—focus on keeping the soil consistently moist and the light conditions stable. You’ll see slower but steady growth over the next year, with fronds developing into the iconic fan shapes.
Here’s the thing—ginkgo trees are long-term investments. Don’t expect rapid growth, but with patience, you’ll have a living piece of history in your garden. In 3-5 years, you can transplant them outdoors into well-draining soil, where they’ll thrive for centuries.
Tips & tricks for perfect ginkgo tree seed germination
These little-known tricks will help you navigate the delicate balance between patience and precision when growing ginkgo seeds.
Stratification Temperature: The 35-40°F range in your refrigerator's crispier drawer is perfect for mimicking winter conditions. If you notice condensation forming on the bag, move it to a slightly warmer spot in the fridge—too much moisture can lead to mold. I've found that placing the bag on a lower shelf, away from the door where temperatures fluctuate, gives the most consistent results. This steady cold is what breaks ginkgo seeds' dormancy, so don't be tempted to rush this process.
Seed Orientation Matters: When planting in Step 3, make sure the pointed end faces upward—this is where the root will emerge. I've learned this the hard way after watching seeds planted upside-down fail to sprout. The seed's natural shape gives you a clear visual cue. If you're unsure, gently press the seed into the soil until about half of it is covered, then adjust if needed. This small detail makes all the difference in successful germination.
Light Transition Strategy: The shift from indirect to morning sun in Step 4 is crucial for hardening off seedlings. Start with just 30 minutes of morning sun per day and gradually increase by 15 minutes every 2-3 days. I've seen seedlings shocked by sudden exposure to full sun, which causes yellowing leaves. This gradual approach helps them develop the resilience needed for outdoor conditions. Think of it as giving your seedlings a gentle sunburn protection routine.
Fertilizer Timing: Wait until you see those first true leaves (around 4-6 weeks) before introducing any fertilizer. The initial growth phase relies on the energy stored in the seed, so don't interfere too early. When you do fertilize, use a balanced formula diluted to half strength—ginkgo seedlings are sensitive to salt buildup. I like to fertilize every 4 weeks during the growing season, but always water thoroughly before and after application to prevent root burn.
Pro Tips for Ginko Tree Seeds
- These little-known tricks will help you navigate the delicate balance between patience and precision when growing ginkgo seeds.
- Stratification Temperature: The 35-40°F range in your refrigerator's crispier drawer is perfect for mimicking winter conditions.
- Seed Orientation Matters: When planting in Step 3, make sure the pointed end faces upward—this is where the root will emerge.
Frequently asked questions
Got questions about growing ginkgo tree seeds? You’re not alone! Here are answers to the most common queries to help you succeed with cold-stratified blooms in just 90 days.
How do I know when ginkgo tree seeds are ready to plant?
Ginkgo seeds are ready when they’re firm, plump, and turn a pale yellow or tan. Avoid seeds that are soft, shriveled, or moldy—these won’t sprout. Harvest them in fall (September–October) when they naturally drop from the tree. Pro tip: Store them in a cool, dry place before cold stratification!
What’s the best way to cold-stratify ginkgo seeds?
Cold stratification mimics winter conditions to break dormancy. Place seeds in a damp paper towel or moist sand inside a sealed plastic bag, then refrigerate for 60–90 days at 33–41°F (1–5°C). Check moisture weekly—seeds should stay damp but not soggy. Skip this step, and germination rates drop drastically!
Can I grow ginkgo trees from seeds without cold stratification?
While possible, germination rates plummet (often <10%) without stratification. If you’re impatient, try soaking seeds in lukewarm water for 24 hours before planting, but expect slower, less reliable results. For best success, always cold-stratify—it’s worth the wait!
How long does it take for ginkgo seeds to sprout after planting?
With proper cold stratification, seeds typically sprout in 2–4 weeks after planting. Keep soil 60–70°F (15–21°C), moist (but not waterlogged), and in bright, indirect light. Patience is key—some seeds may take up to 8 weeks to crack open. Use a heat mat if your home runs cool!
Why aren’t my ginkgo seeds germinating? Troubleshooting tips
If seeds refuse to sprout, check these common issues:
- Improper stratification: Did you refrigerate long enough? Minimum 60 days is critical.
- Wrong soil conditions: Overwatering causes rot; underwatering stalls growth. Aim for consistently moist (not soggy) soil.
- Old or low-quality seeds: Ginkgo seeds lose viability after 1–2 years. Use fresh, firm seeds.
- Temperature stress: Seeds need warmth to germinate—move pots to a sunny windowsill or use a seedling heat mat.
Still stuck? Try nicking the seed coat lightly with a knife to help water penetrate!
Wrapping up and next steps
Ginkgo tree seeds are a rewarding project for patient gardeners—with the right cold-stratification techniques, you can coax vibrant blooms in just 90 days! 🌱 Whether you're a beginner or a seasoned green thumb, this method unlocks faster germination while ensuring strong, healthy growth.
Now that you’re equipped with the materials and answers to common questions, it’s time to roll up your sleeves and give it a try.
Start small—plant a few seeds in pots or your garden—and watch your patience pay off with resilient ginkgo trees that’ll thrive for decades. Ready to grow? Your future shade tree (or bonsai!) is just 90 days away. 🌿