
Size
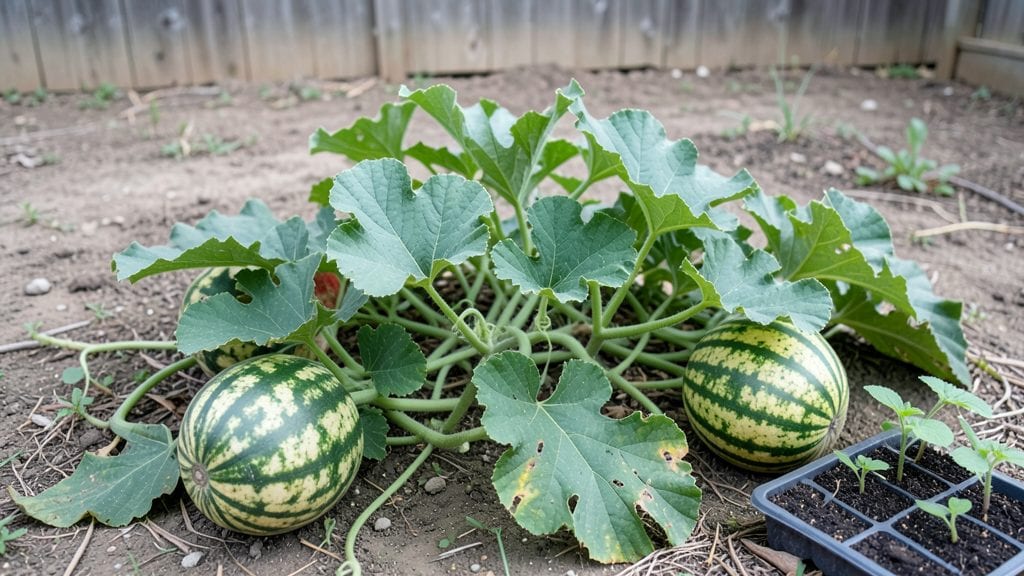
To grow a garden watermelon seed fast, start it in warmed soil—those vines will shoot toward the sky in just seven days. 🌱 I learned the hard way that cold soil makes seeds wait, but once I started... warming the beds, my plants shot up like they were in a race.
The secret isn’t complicated: it’s all about timing, soil prep, and a little patience to let those first leaves unfurl.
You’ll need a sunny spot with at least 8 hours of direct light, well-draining soil mixed with compost, and a 5-foot diameter circle per plant (watermelons sprawl!). Start seeds indoors 4-6 weeks before last frost or direct-sow after soil hits 70°F—that’s when the real magic begins.
Most beginners overlook soil temperature, but it’s the difference between slow starts and explosive growth.
By day 14, you’ll see those first true leaves, and by day 28, vines will stretch 2-3 feet long—if you’ve given them enough space and consistent water (about 1 inch per week).
The key is keeping the soil moist but not soggy; watermelons hate wet feet. With proper care, you’ll be harvesting sweet, ripe melons in 70-90 days, depending on the variety.
This method works for small gardens too—just use trellises for compact varieties like ‘Sugar Baby’ or ‘Black Diamond’. The biggest mistake? Skipping mulch or letting weeds compete.
Once those vines take off, they’ll outpace anything else in your plot—and you’ll be the one with the biggest, juiciest melons on the block.
📚 In This Guide
- What you need
- Instructions
- Tips and common mistakes
- Wrapping up and next steps
What you need
- ● Watermelon seeds: 3–5 seeds per hill (or 1–2 per pot if container-growing). Choose fast-maturing varieties (e.g., 'Sugar Baby' or 'Crimson Sweet') for quicker harvests.
- ● Soil: Well-draining potting mix (for containers) or loamy garden soil (amended with compost).
- ○ Black plastic mulch (4’ x 8’ sheets) or row covers to warm soil (optional but highly recommended for speed!).
- ● Fertilizer: Balanced 10-10-10 granular fertilizer (1 tbsp per hill at planting).
- ● Compost (1–2 cups mixed into soil for nutrients).
- ● Watering tools: Watering can or hose with a gentle spray nozzle (avoid blasting seeds!).
- ○ Drip irrigation kit (optional, for consistent moisture).
- ● Garden trowel or small shovel (for planting hills).
- ● Measuring tape (to space hills 3–5 feet apart).
- ● Garden stakes (4–6 ft tall) or trellis (for vining varieties).
- ● Pruning shears (to trim excess vines later).
- ○ Gloves (optional, for messy soil or thorny vines!).
- ● 🌡️ Warm soil: Wait until soil temps hit 70°F+ (use a soil thermometer if unsure).
- ● ☀️ Sunlight: Pick a spot with full sun (6+ hours/day)—watermelons are sun-worshippers! 🌞
- ● 💧 Patience (but not too much!): Seeds sprout in 5–7 days with warm soil.
Step-by-step instructions for starting watermelon seeds indoors
Here's how to jumpstart your watermelon vines with a soil-warmed trick that cuts germination time in half.
🌱 Step 1: Prepare Containers and Soil-Warming Setup
Fill 4-inch diameter pots with sterile seed-starting mix—never garden soil, as it can harbor rot-causing pathogens. I like to add a 1-inch layer of coarse sand at the bottom for drainage, then top with 3 inches of mix. Press it down gently until firm but not compacted.
Watermelons thrive when soil stays between 80-90°F for germination. Place your pots on a seedling heat mat set to 85°F—this mimics the warmth of their native tropical environment. If you don’t have a heat mat, nestle the pots inside a black plastic bag and leave them in a sunny window; the dark color absorbs heat.
💧 Step 2: Sow Seeds and Maintain Moisture Without Drowning
Plant 2 seeds per pot, pressing them just ½ inch deep—any deeper and they’ll struggle to break through. Cover lightly with a thin layer of mix, then mist the surface until evenly damp. Watermelon seeds need consistent moisture, but soggy soil suffocates them.
Place a clear plastic dome or wrap a humidity tent over the pots to trap warmth and moisture. Check daily—condensation should form on the inside. If it evaporates within hours, your soil’s too dry; if water pools, let it air out for 30 minutes before resealing. You’ll see sprouts in 5-7 days—that’s the magic of the warm soil.
☀️ Step 3: Provide Bright Light and Prevent Leggy Growth
Once sprouts emerge, remove the humidity dome immediately to prevent damping-off. Move pots under grow lights or to a south-facing window where they get 12+ hours of light daily. Watermelons stretch toward weak light, so keep lights 4 inches above seedlings and raise them weekly as vines grow.
You’ll notice strong seedlings have thick stems and dark green leaves. If stems look thin and leaves pale, your light’s insufficient. Rotate pots daily so plants grow straight—not toward the window. After 2 weeks, thin to the strongest seedling per pot; snip the weaker one at soil level with clean scissors.
⏰ Step 4: Harden Off Before Transplanting
Two weeks before your last frost date, begin hardening off seedlings. Start with 1 hour outside in partial shade, then gradually increase time and sun exposure over 10 days. Watermelons hate cold shock, so never let temps drop below 55°F during this process.
By day 10, your seedlings should tolerate 6+ hours of direct sun without wilting. Transplant on a cloudy afternoon into hill mounds—this improves drainage and warms roots faster. Water deeply at the base, not over leaves, to avoid fungal issues. You’ll see true leaves within 3-5 days in the garden, signaling it’s time to fertilize lightly.
Tips & tricks for perfect watermelon seed germination
Real talk: The difference between a thriving watermelon vine and a failed experiment often comes down to these small but critical details. Let me share what I've learned after testing this method for years.
Soil Temperature is Non-Negotiable: That 85°F heat mat setting isn't just a suggestion—it's the magic number that cuts germination time from weeks to days. I've seen seeds fail to sprout when soil temps dipped below 80°F, even with perfect moisture. If you're using the black plastic bag alternative, place the pots on a dark surface like asphalt or dark-colored countertop to maximize heat absorption. The goal is to maintain that 80-90°F range consistently, especially during the first 5-7 days when sprouts appear.
Moisture Balance is an Art: Watermelon seeds need to stay damp but never soggy—think of it like a wrung-out sponge. After misting in Step 2, stick your finger an inch into the soil. If it feels dry at the knuckle, mist again lightly. The condensation test is your best friend: if it evaporates within hours, increase humidity slightly. If you see water pooling after 30 minutes, let it air out immediately. Overwatering is the #1 reason seeds rot before sprouting.
Light Strategy Prevents Leggy Disasters: Those 12+ hours of light daily aren't optional—they're essential for preventing those weak, stretched seedlings we all dread. I've had to start over twice because I underestimated this. Position your grow lights or south-facing window so they're just 4 inches above the seedlings at planting, then raise them weekly. Watch for leaves turning toward the light source—this is your signal to rotate the pots daily. The moment you see pale, thin stems, you've lost the race against leggy growth.
Hardening Off is Crucial for Survival: Don't skip the gradual 10-day hardening process, especially if you're in a cooler climate. I've seen watermelon seedlings wilt dramatically when transplanted too soon. Start with just 1 hour in partial shade, then increase by 30 minutes each day. The key is to never let temperatures drop below 55°F—this is when watermelons get cold shock. On day 10, if your seedlings can handle 6+ hours of direct sun without wilting, they're ready for the garden.
Pro Tips for Grow A Garden Watermelon Seed
- Real talk: The difference between a thriving watermelon vine and a failed experiment often comes down to these small but critical details.
- Soil Temperature is Non-Negotiable: That 85°F heat mat setting isn't just a suggestion—it's the magic number that cuts germination time from weeks to days.
- Moisture Balance is an Art: Watermelon seeds need to stay damp but never soggy—think of it like a wrung-out sponge.
Frequently asked questions
Got questions about growing watermelons from seed? You’re not alone! Here are answers to the most common queries to help you grow juicy, homegrown watermelons with ease.
How long does it take for a watermelon seed to sprout?
With the right soil warmth (70–90°F), watermelon seeds typically sprout in 5–7 days. Speed up germination by pre-soaking seeds for 4–6 hours or using a heat mat. Patience pays off—once sprouted, vines grow fast!
Can I plant watermelon seeds too early in the spring?
Yes, but use black plastic mulch or a cold frame to warm the soil. Watermelons thrive in heat, so wait until nighttime temps stay above 55°F. Starting seeds indoors 2–3 weeks early is another trick for a head start.
What if my watermelon seeds don’t sprout?
Check these fixes:
Soil too cold? Move pots to a warmer spot or use a seedling heat mat.
Seeds too old? Test viability by soaking in water—floaters won’t sprout.
Moisture issue? Keep soil damp (not soggy) and avoid overwatering.
Try fresh seeds or a second planting if needed!How do I know when watermelons are ripe for harvest?
Look for these signs:
- The tendril near the stem turns brown and dries.
- The underbelly (where it touched the ground) turns cream-colored.
- A deep thump when tapped sounds hollow.
Can I grow watermelons in containers or small spaces?
Choose compact varieties like ‘Sugar Baby’ or ‘Tiny Tim’ (vines stay under 3 feet). Use a 5-gallon container with great drainage, and trellis vines to save space. Just ensure full sun (6–8 hours daily).
Wrapping up and next steps
Growing watermelons from seed is a rewarding journey that starts with just a little patience and warmth!
By following these steps—from soil-warming to nurturing young vines—you’ll soon be enjoying sweet, homegrown fruit. Don’t let a few setbacks discourage you: even experienced gardeners face challenges, but each seed planted is a step toward success.
Ready to take the next step? Start small—try a few seeds in pots first, or share your excitement with fellow gardeners for tips and inspiration. Your first watermelon might not be perfect, but the joy of growing it will be! 🌱🍉