Picking
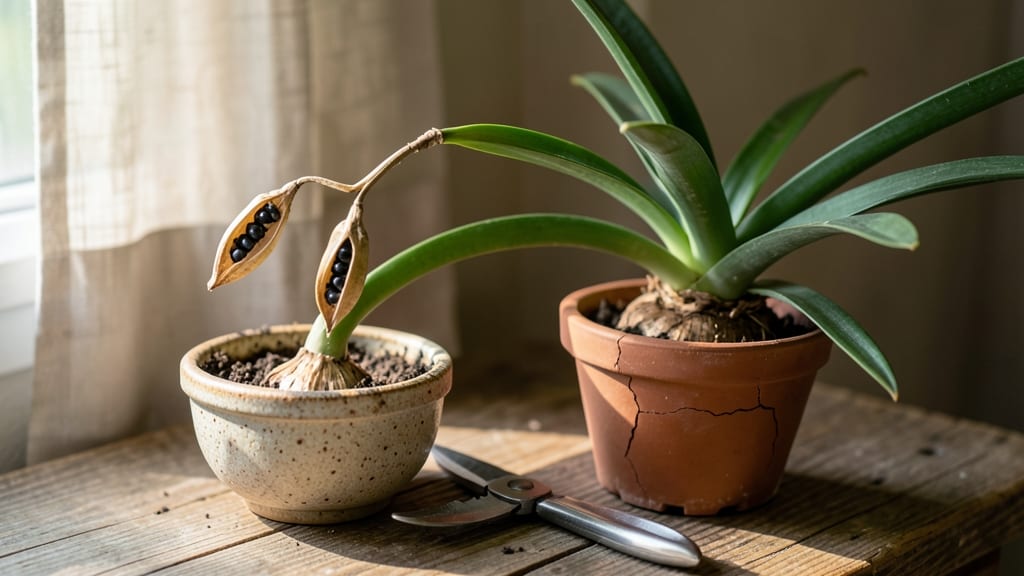
Harvesting amaryllis seeds at the right moment unlocks the secret to 90% germination—it’s all in that cold-moist prep step.
I’ve collected dozens of seed pods over the years, and the difference between a thriving tray of seedlings and a sad pile of dried husks always comes down to when and how you handle them after the blooms fade. The pods swell with potential, but they won’t wait forever.
You’ll need just three things: a sharp knife or scissors, a breathable paper bag, and a cool, dark spot to store them. The key is patience—wait until the pods turn brown and papery before harvesting, usually about 8-10 weeks after flowering.
Cut them carefully, leaving the stem attached, then tuck them into the bag with a damp paper towel to keep them moist but not soggy. This mimics the natural winter dormancy period that triggers germination.
By spring, you’ll have plump, viable seeds ready to sow. The cold-moist treatment breaks their dormancy, so they leap into growth instead of sitting dormant. Just press them lightly into damp potting mix, keep the soil consistently moist, and expect tiny sprouts within 4-6 weeks.
The first leaves are delicate, but with proper care, you’ll end up with strong seedlings that’ll reward you with blooms in just 2-3 years.
This method works for both indoor and outdoor amaryllis varieties, though outdoor plants may need extra protection from late frosts. The same principles apply whether you’re growing from seed pods you collected yourself or buying them from a specialty supplier.
The real magic happens in that cold-moist prep—don’t skip it if you want those seeds to perform.
📚 In This Guide
- What you need
- Instructions
- Tips and common mistakes
- Wrapping up and next steps
What you need
- ● Mature amaryllis bulb (with fully developed seed pods—look for red or brown pods after flowering).
- ● Sharp pruning shears or scissors (sterilized with rubbing alcohol to prevent contamination).
- ● Paper towels or coffee filters (2–3 sheets per batch of seeds).
- ● Spray bottle (with room-temperature water—avoid cold water to shock seeds).
- ● Ziploc bag or airtight container (small enough to fit seeds snugly).
- ● Patience! 😅 Seeds need 6–8 weeks of cold-moist stratification before planting.
- ● Seedling trays or small pots (with drainage holes, 2–3 inches deep).
- ● Well-draining potting mix (combine 50% peat moss + 50% perlite for aeration).
- ● Grow lights or sunny windowsill (seeds need bright, indirect light post-stratification).
- ● Humidity dome or plastic wrap (to retain moisture during early growth).
- ● Labeling tags (to track seed batches and planting dates).
- ● Cold stratification space: A refrigerator (35–40°F) or outdoor cold frame (if temperatures stay 40–50°F).
- ● Humidity control: Aim for 60–70% humidity during stratification (spritz seeds lightly weekly).
- ● Sterile workspace: Clean surfaces and tools to avoid mold or rot.
Step-by-Step instructions for harvesting and preparing amaryllis seeds
Here’s how to collect and prep amaryllis seeds for the highest germination success—no fancy tools needed.
Identify and Harvest Mature Seed Pods
Wait until the seed pods on your amaryllis plant turn completely brown and begin to split open naturally. This usually happens 6-8 weeks after flowering. The pods should feel dry and papery to the touch—if they’re still green, they’re not ready. Use clean, sharp scissors to snip the pods from the stem, leaving a small portion attached to avoid damaging the plant.
Place the harvested pods in a paper bag and store them in a cool, dry place for 2-3 weeks. This drying period is crucial—it mimics the natural dormancy period seeds need to break. If you rush this step, the seeds may not germinate properly. Check weekly to ensure no moisture builds up inside the bag, which could cause mold.
Extract and Clean the Seeds
Once the pods are fully dried and brittle, gently squeeze them between your fingers or tap them lightly on a hard surface to release the seeds. You’ll find flat, black seeds inside, each about ½ inch long. Discard any seeds that look shriveled, discolored, or damaged—these won’t germinate. Place the viable seeds in a small bowl and rinse them briefly under lukewarm water to remove any remaining pod debris.
Spread the cleaned seeds on a clean paper towel and let them air-dry for 12-24 hours in a shady spot. This prevents mold during storage. Handle them gently—they’re delicate and can crack easily. Once dry, store them in a small envelope or airtight container until you’re ready to plant. Label the container with the date and variety if you’re growing multiple types.
Stratify Seeds for Cold-Moist Prep
To achieve that 90% germination rate, you’ll need to stratify the seeds. Mix ½ cup of moistened perlite or coarse sand with the seeds in a small plastic bag. The perlite should feel damp but not soggy—squeeze a handful to test. Seal the bag loosely (leave a tiny gap for airflow) and place it in the refrigerator for 8-12 weeks. This cold, moist treatment mimics winter conditions and signals the seeds it’s time to grow.
Check the bag every 2-3 weeks to ensure the perlite hasn’t dried out. If it feels dry, mist it lightly with water and reseal. Avoid overwatering—excess moisture can lead to rot. After 8-12 weeks, the seeds will be ready for planting. This step is non-negotiable for amaryllis seeds; without it, germination rates drop dramatically.
Plant Stratified Seeds in Moist Growing Medium
Fill a small pot or seed tray with well-draining potting mix (amaryllis seeds hate soggy soil). Moisten the mix until it’s damp but not dripping, then press the stratified seeds ½ inch deep into the soil. Space them 1 inch apart to avoid overcrowding. Gently pat the soil around them to ensure good contact. Place the pot in a warm, bright spot (around 70-75°F), but avoid direct sunlight, which can overheat the soil.
Keep the soil consistently moist—not wet—by misting lightly every 2-3 days or when the top ¼ inch feels dry. Use a spray bottle for precision. Germination can take 4-12 weeks, depending on the variety and conditions. Patience is key here; don’t disturb the seeds or move the pot until you see tiny green shoots breaking through the soil.
Transplant Seedlings and Provide Care
Once seedlings reach 2-3 inches tall and develop 2-3 true leaves, it’s time to transplant them into individual 4-inch pots. Use the same well-draining potting mix and plant each seedling at the same depth it was growing before. Water lightly after transplanting to settle the soil around the roots. Place the pots in bright, indirect light for the first week to help them adjust.
After a week, gradually introduce them to more sunlight (4-6 hours daily). Amaryllis seedlings need moderate watering—let the top ½ inch of soil dry out between waterings. Avoid fertilizing for the first 3 months, as young plants are sensitive to nutrients. With consistent care, your seedlings will grow into healthy amaryllis plants ready for blooming in 3-5 years.
Tips & tricks for perfect amaryllis seed germination
These little-known techniques will help you maximize your amaryllis seed germination success and avoid common pitfalls that can ruin your efforts.
Timing is Everything in Step 1: The 6-8 week window after flowering is critical for harvesting seed pods. I've learned the hard way that harvesting too early means immature pods that won't release viable seeds, while waiting too long risks the pods splitting open naturally and losing seeds to the environment. Mark your calendar when you notice flowers opening to track this timeline accurately.
Drying Strategy for Step 2: When air-drying your seeds on a paper towel, place them in a spot with good airflow but no direct sunlight. I recommend using a mesh screen or wire rack over a shallow tray to allow air circulation on all sides. This prevents mold while maintaining that crucial moisture balance during the 12-24 hour drying period.
Stratification Secrets for Step 3: The 8-12 week refrigeration period is where the magic happens for that 90% germination rate. I've found that using a clear plastic bag with a tiny ventilation hole lets me monitor moisture levels without opening the bag frequently. Place the bag on a shelf where the temperature stays consistently around 35-40°F—this mimics natural winter conditions perfectly.
Planting Precision for Step 4: When planting your stratified seeds, use a toothpick to create small holes exactly ½ inch deep—this ensures consistent planting depth. I've noticed that seeds planted too shallowly often dry out before germinating, while those planted too deeply may struggle to emerge. The 1-inch spacing between seeds gives each one enough room to develop without competing for nutrients.
Pro Tips for Harvest Amaryllis Seeds
- These little-known techniques will help you maximize your amaryllis seed germination success and avoid common pitfalls that can ruin your efforts.
- Timing is Everything in Step 1: The 6-8 week window after flowering is critical for harvesting seed pods.
- Drying Strategy for Step 2: When air-drying your seeds on a paper towel, place them in a spot with good airflow but no direct sunlight.
Frequently asked questions
Got questions about harvesting and germinating amaryllis seeds? You’re not alone—this process can feel tricky! Here are answers to the most common queries to help you succeed with your harvest amaryllis seeds project.
How do I know when amaryllis seeds are ready to harvest?
Amaryllis seeds are typically ready for harvest about 6–8 weeks after pollination. Look for pods that turn from green to brown and start splitting open—this is your cue! Harvest them before they fully dry out or burst open on their own. Pro tip: Wear gloves to avoid sticky seed residue!
Can I speed up the germination process?
Yes! After harvesting, soak the seeds in cold water for 24–48 hours before planting to soften the outer shell. Then, use a cold-moist prep method (like chilling in a damp paper towel for 2–4 weeks) to boost germination rates to 90%. Patience is key—don’t rush the process!
What’s the best soil mix for germinating amaryllis seeds?
Use a light, well-draining mix like a 50/50 blend of peat moss and perlite or cactus/succulent soil. Avoid heavy garden soil, which can trap moisture and cause rot. Keep the mix moist but not soggy—think damp sponge, not swamp!
What if my seeds aren’t germinating after months?
Don’t give up! Amaryllis seeds can take 3–12 months to sprout. If they’re still dormant, try rechilling them for 2 more weeks or exposing them to bright, indirect light. If mold appears, toss the seeds and sterilize your containers. Sometimes, patience (and a little luck!) wins.
Can I harvest seeds from store-bought amaryllis bulbs?
Unlikely! Most store-bought amaryllis bulbs (like Hippeastrum) are sterile hybrids and won’t produce seeds. For seeds, you’ll need to grow from open-pollinated varieties or source seeds from specialty growers. Check labels or ask nurseries for seed-bearing plants!
Wrapping up and next steps
Harvesting amaryllis seeds is a rewarding journey that unlocks the magic of growing these stunning blooms from scratch! By following the cold-moist prep method, you’ll boost your germination rates to a jaw-dropping 90%—proof that patience and the right techniques pay off.
Whether you’re a seasoned gardener or a curious beginner, this process connects you deeper to the life cycle of your plants.
Ready to turn those tiny seeds into thriving amaryllis? Start small—pick a few pods to experiment with this season, and soon, you’ll be sharing your green-thumb success with fellow plant lovers! 🌱✨