Picking
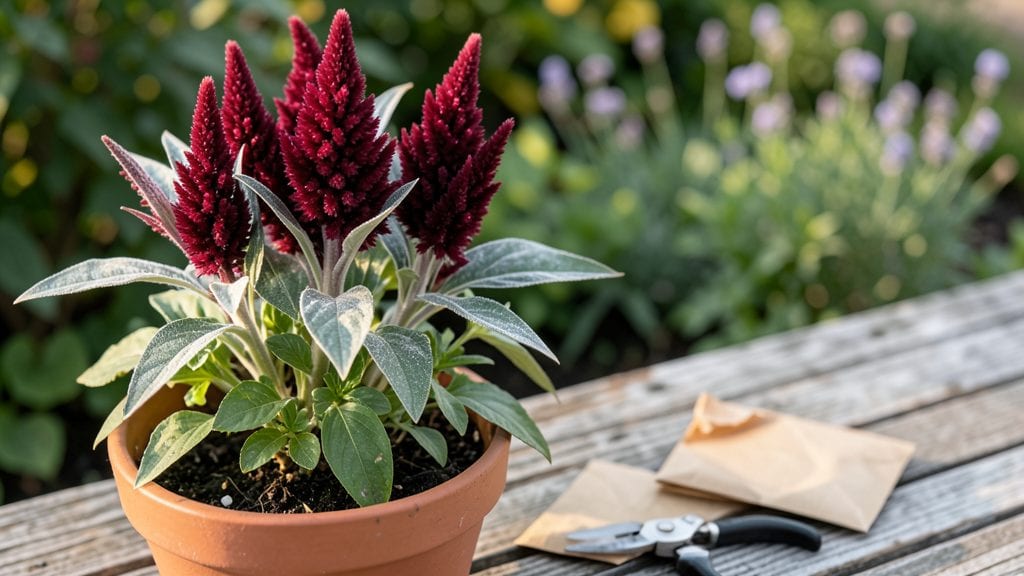
Harvesting celosia seeds at the right moment saves you money and guarantees next year’s most vibrant blooms. ✨ I’ve learned the hard way that waiting too long means brittle seed heads, while harvesting too early leaves you with nothing to store.
The key is timing—when those feathery plumes turn crisp and brown, but before they scatter like dandelion fluff.
You’ll need just a few simple tools: sharp scissors, paper bags for drying, and a cool, dark spot to store them.
The process takes about 2-3 weeks from harvest to storage, but the payoff is worth it—100+ seeds per head, ready to grow into plants that outshine store-bought varieties. My favorite part? Watching those fiery plumes return year after year, exactly as I remember them.
Once dried, store seeds in airtight containers where they’ll stay viable for 3-4 years. The trick to avoiding mold is keeping them in a 50-60°F space with low humidity—basements or seed jars work perfectly.
I’ve even labeled mine with the variety and harvest date so I never forget which celosia is which when planting time rolls around.
This method works for all celosia types, from the classic cockscomb to woolly varieties. Whether you’re saving seeds for sentimental reasons or just love the thrill of growing from scratch, this is the foolproof way to do it. Let’s get those seed heads preserved before they disappear!
📚 In This Guide
- What you need
- Instructions
- Tips and common mistakes
- Wrapping up and next steps
What you need
- ● Mature celosia plants: Choose healthy, disease-free plants with fully developed seed heads (usually Celosia argentea or Celosia cristata). Aim for at least 3–5 plants to ensure a good seed yield.
- ● Pruning shears or sharp scissors: For cleanly snipping seed heads (sterilize blades with rubbing alcohol to prevent contamination).
- ● Brown paper bags or breathable seed-saving envelopes: 5–10 bags (1–2 per plant). Avoid plastic—it traps moisture and encourages mold.
- ● Drying surface: A clean, dry, well-ventilated area like a mesh screen, cardboard box with holes, or a drying rack. Avoid direct sunlight.
- ● Fine-mesh sieve or sifter: To separate seeds from chaff once dried (a kitchen strainer works in a pinch!).
- ● Small containers with lids: Airtight jars or envelopes for long-term storage (e.g., 2–4 oz mason jars or resealable bags with silica gel packets).
- ● Permanent marker or labels: To tag seeds with the variety name, date, and location (e.g., “Plumed Celosia – 2024 – Sunny Patio”).
- ○ Optional (but helpful!): A fan or dehumidifier to speed up drying in humid climates.
- ● Desiccant packs (like those in shoe boxes) to absorb moisture during storage.
- ● Magnifying glass for inspecting seeds for pests or damage.
Step-by-Step guide to harvesting and storing celosia seeds
Here's how to save seeds from your celosia plants for vibrant blooms next season.
🌱 Step 1: Identify Mature Seed Pods
Wait until the flower heads turn completely brown and dry—this signals the seed pods are ready. Celosia seed pods look like tiny, papery sacs clustered at the base of each dried bloom. Gently pinch off these clusters when they feel crispy to the touch, not when they're still slightly green.
Harvesting too early means immature seeds that won't germinate. I always check a few pods by squeezing them—if they crumble easily, they're ready. Store harvested pods in a paper bag (not plastic) to prevent moisture buildup while you process them.
⏰ Step 2: Dry the Seeds Completely
Spread the harvested pods on a clean, dry surface in a warm, dry location with good airflow. A mesh screen or paper towel works perfectly. Celosia seeds need 1-2 weeks to fully dry—don't rush this step. You'll know they're ready when the pods open easily and seeds rattle inside.
If your climate is humid, speed up drying by placing the pods in a low-heat oven (150°F) for 1-2 hours. Just check them frequently to avoid burning. Once fully dry, the seeds will pop out effortlessly when you gently rub the pods between your fingers.
🪴 Step 3: Clean and Separate the Seeds
Empty the dried pods into a bowl and separate the seeds from chaff using a fine-mesh sieve or by gently wafting air across them. Celosia seeds are tiny and dark—almost black or deep brown. Discard any debris or empty pods, keeping only the plump, intact seeds.
I like to store seeds in small envelopes labeled with the variety and harvest date. A magnifying glass helps spot any damaged seeds to exclude. For best results, store seeds in a cool, dark place where they'll stay viable for 2-3 years.
💧 Step 4: Store Seeds Properly
Place the clean seeds in an airtight container or envelope with a silica gel packet to absorb excess moisture. I use small glass jars with tight lids for long-term storage. Label everything clearly—next year's planting will be a breeze when you know exactly what you're sowing.
Check stored seeds annually and replant them within 2-3 years for the highest germination rates. If seeds feel damp or develop mold, discard them immediately. Properly stored celosia seeds should remain dry and viable for years, ready to bring back those stunning plumes year after year.
Tips & tricks for perfect celosia seed harvesting
These little-known tricks will help you preserve your celosia seeds like a pro—no guesswork involved!
Timing Secret: In Step 1, when harvesting those crispy pods, I've learned to check them in the late afternoon. The heat of the day helps dry them out faster, and the cooler evening air prevents morning dew from remoistening them overnight. This can shave off a day or two from your drying time.
Drying Strategy: For Step 2's 1-2 week drying period, I place my mesh screens on a windowsill that gets indirect sunlight. Direct sun can overheat the pods and cause them to crack prematurely. If you're impatient (like I was my first year), the 150°F oven trick works beautifully—just set a timer for 1 hour max and check every 15 minutes. Overheating turns those precious seeds to dust!
Cleaning Hack: When separating seeds in Step 3, I've found that gently tapping the bowl against the counter while wafting air creates a mini cyclone that separates seeds from chaff more efficiently than a sieve alone. For stubborn debris, I use a small paintbrush to coax out seeds hiding in crevices. This patience pays off with purer seed batches.
Storage Wisdom: In Step 4, I've discovered that adding a tiny packet of rice to my seed containers alongside the silica gel works wonders for absorbing any residual moisture. The rice changes color when it's done its job, giving you a visual alert that it's time to refresh your storage setup. This extra layer of protection keeps seeds viable for that full 2-3 year window.
Pro Tips for Harvest Celosia Seeds
- These little-known tricks will help you preserve your celosia seeds like a pro—no guesswork involved!
- Timing Secret: In Step 1, when harvesting those crispy pods, I've learned to check them in the late afternoon.
- Drying Strategy: For Step 2's 1-2 week drying period, I place my mesh screens on a windowsill that gets indirect sunlight.
Frequently asked questions
Got questions about harvesting, drying, or storing celosia seeds? You’re not alone! Here are answers to the most common concerns—so you can save those vibrant blooms for next year’s garden.
When is the best time to harvest celosia seeds?
Harvest celosia seeds when the flower heads turn brown and dry but before they shatter or scatter. This usually happens in late summer to early fall, depending on your climate. Look for crispy, papery petals—this signals seed readiness!
How do I know if celosia seeds are fully mature?
Mature celosia seeds are tiny, black, and slightly shiny. Gently rub a dried flower head between your fingers—if seeds pop out easily, they’re ready for harvest. Avoid harvesting too early, or the seeds may not germinate well.
Can I store celosia seeds in the fridge instead of a cool, dry place?
A fridge works in a pinch, but for long-term storage (up to 3 years), opt for a cool, dry spot like a seed vault or airtight container in your pantry. Fridge humidity can cause mold—keep seeds in a sealed bag with a silica packet for extra protection.
What if my celosia seeds don’t germinate next spring?
Try these fixes: Store seeds in a paper envelope (not plastic) to prevent moisture buildup, keep them in a dark, cool place (not the freezer), and test germination by planting a few seeds in damp paper towels. If they still fail, your seeds may be too old—try buying fresh ones!
Are there any alternatives to drying celosia seeds indoors?
Yes! If you’re short on space, hang dried flower heads upside down in a mesh bag outside (sheltered from rain) for 2–3 weeks. For faster drying, place them in a paper bag with a fan on low heat—just monitor closely to avoid overheating.
Wrapping up and next steps
Harvesting celosia seeds is a rewarding way to ensure vibrant blooms for seasons to come! With the right techniques—like proper drying, seed extraction, and storage—you’ll be ready to plant with confidence. Your patience now will pay off with stunning, homegrown flowers tomorrow.
Ready to take the next step? Mark your calendar for next year’s planting season and share your newfound skills with fellow gardeners. Happy growing! 🌱✨