Picking
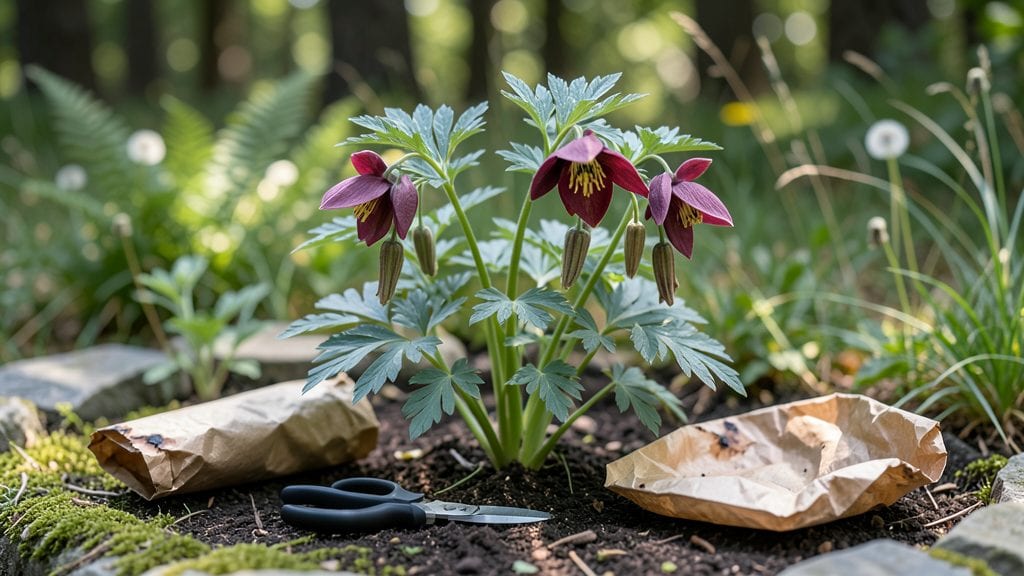
Harvesting columbine seeds at the right moment means next year’s garden will burst with those delicate, nodding blooms. 🌿 I’ve learned the hard way that waiting too long means the pods explode and scatter seeds everywhere—while harvesting too early leaves you with nothing but empty husks.
The secret is watching for those dry, papery pods that turn from green to tan, just before they crack open.
You’ll need a pair of sharp scissors or pruning shears, a paper bag for collection, and a dry day to work. Once the pods are ready, snip them off the stem and place them in the bag—no need to rush.
The seeds inside stay viable for months if stored properly, so take your time. Columbine seeds don’t need fancy stratification; a cold winter in the ground or even a few weeks in the fridge will break dormancy naturally.
By the time spring rolls around, you’ll have a tray of tiny seedlings pushing through the soil, their first leaves unfolding like tiny hands reaching for the sun.
The payoff is worth the patience—columbine spreads reliably from seed, and you’ll end up with clusters of blooms that last from early summer well into fall. Just be ready for the next harvest cycle, because these plants love to reward you.
If you’re in a drier climate, keep the collected pods in a cool, dry place until they fully dry out—sometimes they take a few extra weeks. And if squirrels or birds get to your pods first, don’t worry; just replant a few extra seeds.
Columbine is forgiving, and with the right timing, you’ll have more than enough for next year’s garden.
📚 In This Guide
- What you need
- Instructions
- Tips and common mistakes
- Wrapping up and next steps
What you need
- ● Mature columbine plants – Choose healthy, fully bloomed plants with seed pods (typically in late summer/early fall).
- ● Pruning shears or sharp scissors – For cleanly snipping seed pods (sterilize with rubbing alcohol if reusing).
- ● Paper bags or breathable mesh bags – 2–3 medium-sized bags (8"–10" wide) to collect pods and prevent moisture buildup.
- ● Permanent marker – To label bags with the variety name and harvest date.
- ● Drying tray or cardboard box – A flat, dry surface (lined with newspaper or parchment paper) for seed pod drying.
- ● Small bowl or container – For separating seeds from dried pods (wide-mouth works best).
- ○ Fine mesh sieve or colander – To sift seeds from chaff (optional but helpful for purity).
- ● Envelope or seed packet – For long-term storage (paper or Mylar with silica packets for humidity control).
- ● Disinfectant spray (e.g., 10% bleach solution) – To sterilize tools between uses and prevent fungal spread.
- ● Desiccant packets – For sealed storage containers to absorb excess moisture.
- ● Magnifying glass – To inspect seeds for pests or damage before storage.
- ● Notebook – To track germination rates, varieties, and planting notes.
- ● Humidity monitor – If storing seeds long-term (ideal range: 30–40% humidity).
Step-by-Step instructions for harvesting columbine seeds
Here's how to collect seeds properly so you'll have healthy plants next spring.
🌱 Step 1: Identify Mature Seed Pods
Wait until late summer or early fall when the columbine blooms have faded and the seed pods turn brown and papery. These pods are about 1 inch long and will feel dry to the touch. Don't harvest them too early—they need time to fully mature. I wait until they start splitting open naturally, which means the seeds inside are ready.
Gently twist the mature pods between your fingers to release the seeds. If the pod resists, it's not fully dry yet. You'll see small, round seeds inside that look like tiny beans. These are your future plants, so handle them carefully to avoid damage.
💧 Step 2: Clean and Dry the Seeds
Spread the harvested seeds on a clean, dry paper towel or mesh screen to air-dry for 3-5 days in a warm, dry place. Keep them out of direct sunlight to prevent overheating. I place mine on a windowsill where they get gentle morning light but stay protected from harsh afternoon sun.
After drying, gently rub the seeds between your fingers to remove any remaining chaff or debris. You'll notice the seeds become slightly darker as they lose moisture. Store them in a small envelope or paper bag labeled with the harvest date—this helps track their freshness for next year.
⏰ Step 3: Store Seeds Properly for Germination
Place the dried seeds in a sealed container with a desiccant packet to absorb any excess moisture. I use a small glass jar with a tight lid, stored in a cool, dark place like a pantry or basement. Columbine seeds can stay viable for 2-3 years if stored correctly, but they germinate best when planted within 1 year.
Before planting, I like to give the seeds a quick cold stratification by placing them in the refrigerator for 4-6 weeks. This mimics winter conditions and helps break dormancy. After stratification, they'll be ready to sow in early spring for the best results.
🌿 Step 4: Prepare for Spring Planting
In early spring, fill small pots with seed-starting mix and plant the seeds ¼ inch deep. Columbine seeds germinate best in cool soil, so I keep the pots in a shaded area until the first true leaves appear. This usually takes 2-4 weeks, depending on your climate.
Once seedlings emerge, move them to a sunny spot with 4-6 hours of light daily. Thin them to the strongest 2-3 plants per pot to give them room to grow. You'll see their delicate, fern-like leaves unfold within a few weeks—that's your signal they're thriving.
Tips & tricks for perfect columbine seed harvesting
A few simple tricks will help you collect healthy seeds that grow into vibrant columbine blooms next season.
The Right Timing: Those 3-5 days of drying in Step 2 are crucial—the seeds need this time to lose moisture and become dormant. I've learned the hard way that rushing this step leads to moldy seeds. Place them on a mesh screen rather than paper towels for better airflow, especially if your climate is humid.
Visual Cues for Maturity: In Step 1, look for pods that split open naturally along the seams. If you see tiny seeds peeking out or falling when you gently squeeze, that's your signal they're ready. I wait until at least 50% of the pods show this splitting—harvesting too early means immature seeds that won't germinate well.
Stratification Shortcut: The 4-6 weeks of cold stratification in Step 3 can feel like a long wait, but you can speed it up slightly by using a seed stratification kit that maintains consistent moisture. Just place the seeds in the kit and refrigerate—no need to monitor them daily. This works especially well if you're planning to plant in late winter when temperatures are still chilly.
Storage Wisdom: That 2-3 year viability window in Step 3 only applies to perfectly dried and stored seeds. I've found that labeling containers with both the harvest date and the variety name prevents mix-ups when you're ready to plant next year. Use small glass jars with tight lids—they keep out moisture better than plastic bags, which can develop condensation over time.
Pro Tips for Harvest Columbine Seeds
- A few simple tricks will help you collect healthy seeds that grow into vibrant columbine blooms next season.
- The Right Timing: Those 3-5 days of drying in Step 2 are crucial—the seeds need this time to lose moisture and become dormant.
- Visual Cues for Maturity: In Step 1, look for pods that split open naturally along the seams.
Frequently asked questions
Got questions about harvesting columbine seeds?
You’re not alone! Here are some of the most common concerns—and their answers—to help you master the process like a pro.
When is the best time to harvest columbine seeds?
Harvest seeds when the seed pods turn brown and papery (usually late summer to early fall). If you wait too long, they’ll split open and scatter seeds prematurely. Aim for dry, warm days to avoid moisture-related mold risks.
How long does it take for columbine seeds to mature?
Seed pods typically take 6–8 weeks to mature after flowering. If your columbines bloom in early summer, start checking pods around mid-to-late August. Patience is key—rushing can mean immature, non-viable seeds!
Can I harvest seeds from store-bought columbines?
Yes, but check the label first. Hybrid varieties (like ‘Queen of Hearts’) may not produce true-to-type seeds. For reliable results, opt for heirloom or open-pollinated columbines labeled as seed-saving friendly.
What if my seed pods won’t open naturally?
If pods stay closed, gently squeeze them between your fingers or use clean scissors to snip open the seam. Avoid crushing seeds—aim for a light touch. Store seeds in a paper envelope in a cool, dry place until planting.
How do I store columbine seeds for planting next year?
Keep seeds in a dry, breathable container (like a paper bag or envelope) in a cool (35–40°F) spot. Viability lasts 2–3 years if stored properly. Label with the harvest date to track freshness!
Wrapping up and next steps
Harvesting columbine seeds is a rewarding way to ensure next year’s vibrant blooms—just follow the right timing and handling techniques!
By waiting until seed pods turn brown and dry, carefully collecting them, and storing them properly, you’ll set the stage for a stunning garden comeback. Don’t let hesitation hold you back—give your columbines the gift of continuity! Ready to take the next step? Plan your planting schedule and watch your garden thrive with homegrown beauty! 🌱