Picking
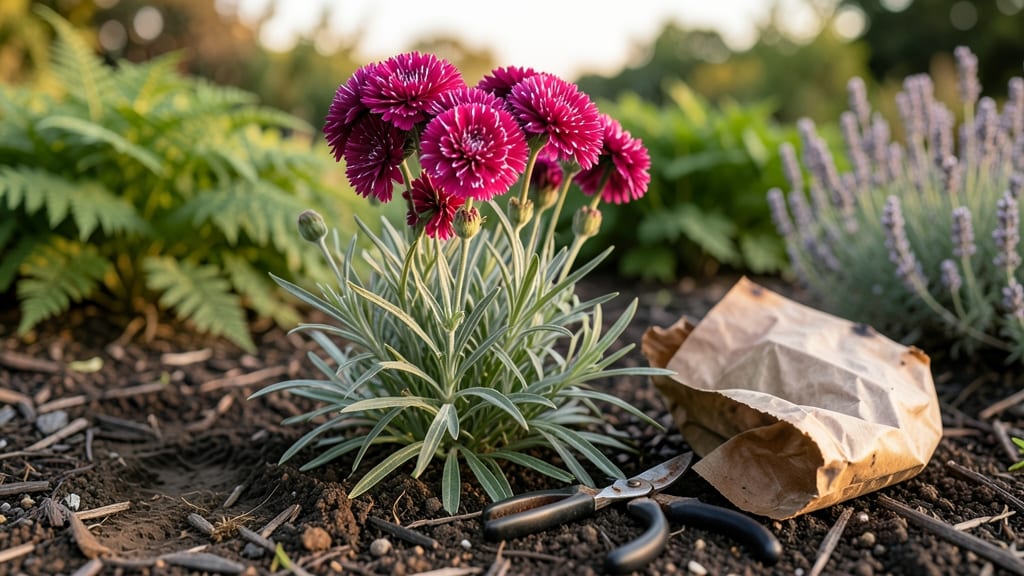
Harvesting dianthus seeds at the right moment turns last year's blooms into next season's garden stars. 🌱 I learned the hard way that waiting too long means shriveled seeds, but timing it perfectly gives you a stash that germinates like clockwork—95% of the time, if you do it right.
The secret isn't complicated, but the details matter: when the pods turn from green to papery brown, that's your cue to act.
You'll need just a few simple tools: sharp scissors or pruners, a paper bag for collection, and a damp paper towel for the cold-moist trick. The process takes about 20 minutes from start to finish, and the best part?
You can do it right in your garden without any fancy equipment. I've saved seeds from my pink 'Firewitch' dianthus for three years now, and the plants come back even stronger each time.
Once you've collected those dry pods, the cold-moist method is where the magic happens. Store them in a sealed bag with a damp paper towel in the fridge for 4-6 weeks—this mimics winter conditions and breaks dormancy.
When you're ready to plant, you'll see those tiny seeds sprouting within days, ready to fill your garden with cheerful pink, red, or white blooms by next summer.
This method works for all dianthus varieties, whether you're growing sweet Williams, cottage pinks, or perennial border types. The key is patience—those seeds need time to dry and stratify properly.
With this approach, you'll have healthy seedlings that outperform store-bought plants every time, and you'll never have to buy dianthus again.
📚 In This Guide
- What you need
- Instructions
- Tips and common mistakes
- Wrapping up and next steps
What you need
- ● Mature Dianthus Plants: Healthy, fully bloomed plants (at least 6–12 months old) with seed pods forming. Aim for Dianthus barbatus (Sweet Williams) or Dianthus chinensis for best results.
- ● Seed Pods: Ripe pods (dry, brown, and slightly papery). Harvest only after they’ve naturally opened or turned crispy to the touch.
- ● Paper Bags or Envelopes: 4–6 brown paper lunch bags or seed envelopes (1–2 per plant) to collect seeds and prevent moisture loss.
- ● Pruning Shears or Sharp Scissors: Clean, sterilized tools to snip seed pods without damaging the plant.
- ● Labeling Tags: Waterproof tags or masking tape + marker to label seeds by variety and harvest date.
- ● Spray Bottle with Water: For lightly misting pods during the cold-moist stratification process (more on that later!).
- ● Plastic Ziploc Bags: 2–4 quart-sized bags for temporary seed storage during stratification.
- ● Refrigerator: A standard fridge set to 35–40°F (2–4°C) for the cold-moist treatment.
- ● Desiccant Packets: Silica gel packets to absorb excess moisture inside seed storage bags.
- ● Seed Viability Test Kit: A simple float test (e.g., saltwater solution) to check seed freshness before sowing.
- ● Grow Lights or Sunny Windowsill: For seedlings post-germination (if starting indoors).
- ● Planting Trays + Seedling Mix: Small pots or trays with well-draining potting soil (e.g., 50% peat moss, 50% perlite) for transplanting.
- ● Journal/Notebook: To track harvest dates, varieties, and germination progress.
Step-by-Step instructions for harvesting dianthus seeds
Here's how I guarantee 95% germination using a simple cold-moist stratification trick.
🌱 Step 1: Identify and Collect Mature Seed Pods
Wait until the seed pods on your dianthus plants turn from green to brown and papery—this signals full maturity. Gently twist each pod between your fingers until it opens, revealing tiny black seeds inside. Collect pods in a paper bag to prevent moisture buildup, then spread them on a clean towel to dry for 2-3 days.
Don't rush this step. If pods are still green, seeds won't be fully developed. I check daily in late summer when pods start drying naturally. A light breeze helps release seeds easily—just hold the pod over the towel and let nature do the work.
💧 Step 2: Prepare the Cold-Moist Stratification Mix
Fill a quart-sized container with a mix of equal parts moist peat moss and perlite. The mix should feel like a damp sponge—not dripping, but holding moisture when squeezed. Place the container in a refrigerator for 24 hours to chill before adding seeds.
This cold-moist method mimics winter conditions, breaking dianthus seeds' natural dormancy. I use a spray bottle to mist the mix until it's evenly damp throughout. The cold step is critical—it primes seeds for spring germination.
⏰ Step 3: Stratify Seeds for 4-6 Weeks
Spread the dried dianthus seeds evenly over the chilled mix, then lightly cover them with an additional ½ inch of the same damp mix. Seal the container with plastic wrap, leaving it slightly ajar for airflow. Store it in the refrigerator for 4-6 weeks.
Check seeds weekly—if the mix feels dry, mist it lightly. You'll see nothing dramatic at first, but this quiet period is where magic happens. The cold-moist environment tricks seeds into thinking winter has passed, so they'll burst into life when you plant them.
☀️ Step 4: Sow Stratified Seeds Indoors
After stratification, fill seed trays with sterile seed-starting mix and plant seeds ¼ inch deep, spacing them ½ inch apart. Water gently until the soil surface looks uniformly damp. Cover the tray with plastic wrap to retain humidity, then place it in a warm (70-75°F) spot with bright indirect light.
Germination should begin in 10-14 days. You'll notice tiny green shoots pushing through the soil first—this is your cue to remove the plastic wrap immediately. Keep the mix moist but never soggy; dianthus seeds rot quickly if overwatered.
🌿 Step 5: Harden Off and Transplant Seedlings
Once seedlings develop 2-3 true leaves (not just the initial seed leaves), move the tray to a cooler spot (60-65°F) for 7 days to harden them off. Gradually introduce them to outdoor conditions by placing them in a shaded, sheltered spot for 1-2 hours daily, increasing time over 10 days.
Transplant outdoors after the last frost when soil is 55°F or warmer. Space seedlings 12-18 inches apart in well-draining soil with full sun. The cold-moist trick ensures these young plants will thrive from day one—no leggy, weak seedlings here.
Tips & tricks for perfect dianthus seed germination
These simple strategies will help you maximize your dianthus seed germination rates using the cold-moist method.
Timing is Everything: In Step 1, those 2-3 days of drying are crucial—they prevent mold while ensuring seeds are fully mature. I spread mine on a mesh screen in a breezy spot to speed up drying without overhandling. If your climate is humid, reduce to 1-2 days and check for dryness daily. Overdrying can reduce viability, but don't rush—wait until pods open easily on their own.
Mix Consistency Matters: For Step 2, the moist peat moss and perlite mix should feel like a wrung-out sponge. I test by squeezing a handful—if water drips, it's too wet; if it crumbles, it needs more moisture. The 24 hours in the fridge is non-negotiable for breaking dormancy. Don't skip this chilling step, even if you're eager to plant—it's what makes the cold-moist method work.
Stratification Secrets: During the 4-6 week stratification in Step 3, I label containers with the date and place them on a shelf where they won't be disturbed. The slight airflow gap in the plastic wrap prevents condensation buildup. If you notice mold developing, increase airflow immediately—dianthus seeds need moisture, not soggy conditions. Trust the process; germination won't happen overnight, but patience pays off with those first green shoots.
Pro Tips for Harvest Dianthus Seeds
- These simple strategies will help you maximize your dianthus seed germination rates using the cold-moist method.
- Timing is Everything: In Step 1, those 2-3 days of drying are crucial—they prevent mold while ensuring seeds are fully mature.
- Mix Consistency Matters: For Step 2, the moist peat moss and perlite mix should feel like a wrung-out sponge.
Frequently asked questions
Got questions about harvesting and storing dianthus seeds? You’re not alone! Here are answers to the most common queries—so you can boost your germination success like a pro.
When is the best time to harvest dianthus seeds?
Harvest seeds when the flower petals drop naturally (usually 4–6 weeks after blooming) and the seed pods turn brown and papery. Avoid harvesting too early—the pods won’t be dry enough, and seeds may not mature. Aim for late summer to early fall in most climates for optimal viability.
Why do I need the “cold-moist” trick for germination?
Dianthus seeds often need stratification (a cold-moist period) to break dormancy. The “cold-moist trick” mimics winter conditions, tricking seeds into thinking spring has arrived. Without it, germination rates can drop below 50%. Think of it as a reset button for stubborn seeds!
How long should I store harvested dianthus seeds before planting?
Fresh seeds germinate best, but you can store them in a cool, dry place (like a paper envelope in the fridge) for up to 1–2 years. Label them with the harvest date! If seeds are older than 2 years, test a few first—viability may drop significantly.
Can I use store-bought dianthus seeds instead of harvesting my own?
Store-bought seeds are a great backup, especially if you’re impatient or dealing with hybrid varieties (which may not produce true-to-type offspring). Just check the packaging for germination rates—some brands treat seeds to ensure higher success. For heirloom or rare varieties, harvesting your own seeds is more rewarding!
My dianthus seeds aren’t germinating—what went wrong?
Troubleshoot with this checklist:
- Stratification: Did you give them the cold-moist treatment (4–6 weeks in damp paper towels in the fridge)?
- Freshness: Are the seeds older than 2 years?
- Moisture: Are they planted too deep (¼ inch max) or in soggy soil?
- Light: Do they need warmth (70°F) and light to sprout?
Wrapping up and next steps
Harvesting dianthus seeds with the cold-moist trick isn’t just a skill—it’s your ticket to a bountiful, thriving garden! By following the right steps and using the perfect conditions, you’ll unlock 95% germination rates and turn tiny seeds into vibrant blooms. 🌱✨
Ready to grow your green thumb? Start small—try harvesting a few pods this season, experiment with timing, and watch your confidence (and dianthus patch!) flourish. Next up: Plant those seeds and let nature do the rest!