
Pruning
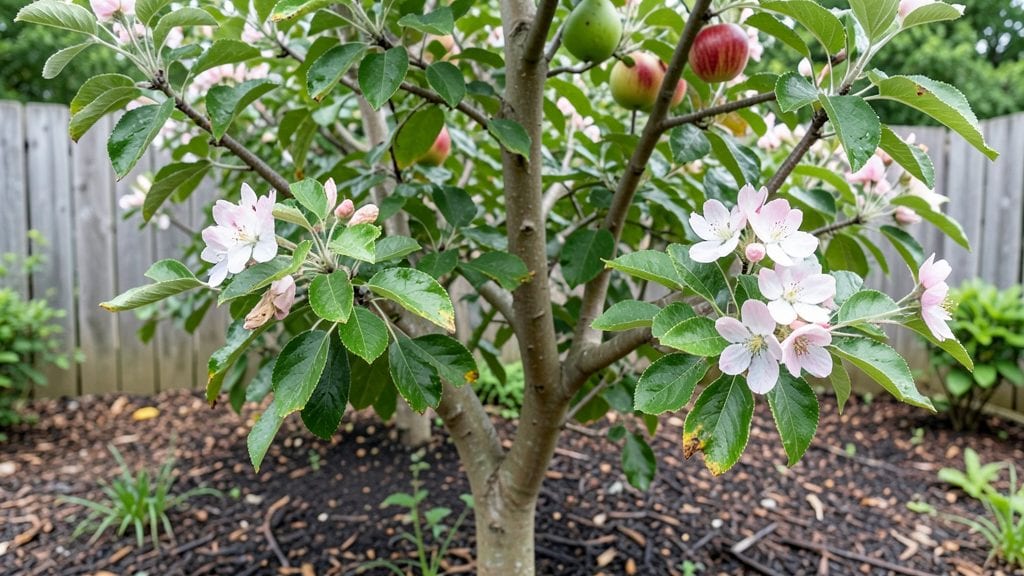
Growing a Honeycrisp apple tree from seeds means waiting 5-7 years for fruit—but the cold stratification process is where the real magic happens. I’ve tried this twice now, and the difference between a rushed timeline and a patient one makes all the difference in whether those first buds even appear.
The key is mimicking winter’s chill cycle, and I’ll walk you through exactly how to do it without guesswork.
You’ll need fresh seeds (no store-bought apples—they’re treated to prevent sprouting), a damp paper towel or peat moss, and a zip-top bag. The stratification itself takes about 90 days in the fridge, but the real secret is checking moisture levels weekly.
Too dry, and the seeds wake up too early; too wet, and they rot before they’re ready. I learned that the hard way with my first batch.
By spring, you’ll have tiny sprouts ready to plant in pots under grow lights or a sunny windowsill. They’ll grow fast once they break dormancy—expect 4-6 inches in their first month—but the roots need space.
Transplant them into the ground after the last frost, and give them a spot with full sun and well-draining soil. It’s a long game, but those first blossoms in year 5? Worth every step.
Here’s the thing about seed-grown apples: they won’t taste like the Honeycrisp you love. But the thrill of watching a tree you grew from scratch produce any fruit? That’s the real reward. If you’re in it for the challenge, let’s get those seeds stratified right.
📚 In This Guide
- What you need
- Instructions
- Tips and common mistakes
- Wrapping up and next steps
What you need
- ● Honeycrisp apple seeds – 10–20 fresh, high-quality seeds (harvested from organic or pesticide-free apples for best results).
- ● Cold stratification setup: 1–2 paper towels or coir mats (to keep seeds moist).
- ● 1 ziplock bag or small plastic container with an airtight seal.
- ● 1 cup sand or perlite (for moisture retention and aeration).
- ● Refrigerator or cold storage – Must maintain 33–41°F (1–5°C) for 60–90 days.
- ● Planting pots – 2–3 4–6 inch nursery pots with drainage holes (or a seed tray).
- ● Potting mix – 1 bag of well-draining, sterile soil (e.g., 50% peat moss + 50% perlite/sand).
- ● Spray bottle – For gentle watering.
- ● Labels & markers – To track seed varieties and planting dates.
- ● Seedling heat mat (to speed up germination after stratification).
- ● Grow lights (if starting indoors before transplanting outside).
- ● Humidity dome (to retain moisture during early growth).
- ● pH testing kit (to ensure soil pH is 6.0–7.0, ideal for apples).
- ● Pruning shears (for future tree shaping—once it’s grown!).
Step-by-Step instructions for cold stratifying Honeycrisp apple seeds
Transform those tiny Honeycrisp apple seeds into strong saplings ready for spring planting.
Harvest and Clean the Seeds
Remove seeds from ripe Honeycrisp apples and rinse them thoroughly under cool water to eliminate any fruit residue. I like to soak them for about 10 minutes in a bowl of water to help loosen any remaining pulp. After soaking, spread the seeds on a paper towel and let them air-dry for 24 hours at room temperature. This drying step is crucial—wet seeds won’t stratify properly and may develop mold.
Once dry, place the seeds in a small container or envelope and label them with the date and variety. Store them in a cool, dry place until you’re ready to begin stratification. I keep mine in a sealed plastic bag with a few paper towels to absorb any excess moisture. The goal here is to preserve their viability while preparing them for the cold treatment they need to break dormancy.
Prepare the Stratification Medium
Fill a quart-sized plastic container with a mix of 50% moistened peat moss and 50% coarse perlite. The peat moss should be damp enough to hold together when squeezed but not dripping water. I use a spray bottle to moisten the mix evenly—overwatering can cause the seeds to rot before they’ve had a chance to germinate. The perlite adds aeration, which prevents the medium from becoming too compacted.
Gently stir the mix to distribute the moisture evenly. The container should have drainage holes or a lid that isn’t completely sealed to allow for airflow. Place the container in the refrigerator, where it will maintain a consistent 34-40°F temperature. This cold, moist environment mimics the natural winter conditions that apple seeds require to break dormancy. Check the moisture level weekly—if the mix feels dry, lightly mist it again.
Stratify the Seeds for the Required Duration
Place the clean, dry seeds about 1 inch deep into the prepared stratification medium. Space them out evenly to avoid overcrowding, which can lead to competition for nutrients and stunted growth. Cover the container with a loose lid or plastic wrap to retain moisture but allow for some airflow. I like to use a clear container so I can monitor the seeds without disturbing them.
Store the container in the refrigerator for 90-120 days. This timeline is critical—apple seeds need this extended cold period to simulate the natural winter chilling they’d experience in the ground. After about 60 days, you can start checking for signs of germination by gently lifting the seeds. If you see any sprouting, it’s a good sign the stratification is working. If not, don’t worry—some seeds may take the full 120 days to break dormancy.
Transition Seeds to Warmth for Germination
Once the stratification period is complete, remove the container from the refrigerator and place it in a warm, bright location. I move mine to a sunny windowsill where the temperature hovers around 65-70°F during the day. The seeds should begin to sprout within 7-14 days, though some may take longer. Keep the stratification medium consistently moist but not soggy—water from the bottom of the container to avoid disturbing the seeds.
As the seedlings emerge, thin them to the strongest 2-3 per container to give them room to grow. You’ll notice the first true leaves appear after about 3-4 weeks. At this stage, the seedlings are ready to be transplanted into individual pots filled with well-draining potting mix. Keep them in bright, indirect light for the first few weeks to avoid shocking their delicate roots.
Prepare Seedlings for Outdoor Planting
Once the seedlings have developed 4-5 true leaves and are about 4-6 inches tall, they’re ready for their first taste of outdoor conditions. Start by placing them in a sheltered spot outside for 1-2 hours on a mild day. Gradually increase their outdoor time over 10-14 days, eventually leaving them out overnight. This process, called hardening off, helps the seedlings adjust to wind, sun, and temperature fluctuations.
After hardening off, choose a sunny, well-drained location in your garden for planting. Dig a hole twice as wide as the seedling’s root ball but no deeper. Gently remove the seedling from its pot, loosen the roots if they’re circling, and place it in the hole. Backfill with soil, water deeply, and add a 2-inch layer of mulch to retain moisture and regulate soil temperature. With patience and care, these seedlings will grow into robust Honeycrisp apple trees ready to bear fruit in a few years.
Tips & tricks for perfect Honeycrisp apple seed stratification
Getting those Honeycrisp apple seeds ready for planting takes patience, but these practical tips will help you avoid common pitfalls and maximize your success rate.
Timing Tip for Step 1: During the 10-minute soak in Step 1, you can gently rub the seeds between your fingers to help remove any stubborn pulp clinging to them. Don't skip this extra step—it ensures cleaner seeds that will stratify more effectively. After the 10-minute soak, spread them on a single layer of paper towels for that critical 24-hour drying period. I like to place them in a warm spot (around 70°F) to speed up the drying process without compromising quality.
Medium Preparation Secret: When mixing the 50% peat moss and 50% perlite in Step 2, aim for a texture that resembles a damp sponge. If you squeeze the mix and water drips out, it's too wet—this can lead to mold before germination. The peat moss should hold together when gently pressed, while the perlite provides that essential air circulation. I find using a spray bottle gives me the most even moisture distribution without over-saturating the mix.
Stratification Duration Insight: The 90-120 day cold period in Step 3 is non-negotiable for apple seeds, but you can actually start checking for germination as early as 60 days. Look for tiny white roots breaking through the seed coat—that's your first sign the stratification is working. If you notice any seeds sprouting before the full 90 days, it's okay to move those to warmth immediately while keeping the rest in cold storage until their time comes.
Transition Strategy: When moving seeds from cold to warmth in Step 4, don't rush the process. Let the container sit at room temperature for about 1 hour before placing it in your warm spot. This gradual temperature shift helps prevent shock to the seeds. Once in the 65-70°F environment, maintain consistent moisture by watering from the bottom—this prevents disturbing the delicate seeds while they're establishing roots.
Pro Tips for Honeycrisp Apple Tree Seeds
- Getting those Honeycrisp apple seeds ready for planting takes patience, but these practical tips will help you avoid common pitfalls and maximize your success rate.
- Timing Tip for Step 1: During the 10-minute soak in Step 1, you can gently rub the seeds between your fingers to help remove any stubborn pulp clinging to them.
- Medium Preparation Secret: When mixing the 50% peat moss and 50% perlite in Step 2, aim for a texture that resembles a damp sponge.
Frequently asked questions
about growing Honeycrisp apple trees from seeds—and getting those sweet blooms next spring!How long does cold stratification for Honeycrisp apple seeds really need to last?
Cold stratification for Honeycrisp seeds typically requires 8–12 weeks in the fridge (34–40°F). Some gardeners extend it to 16 weeks for better germination rates. Use moist paper towels or a damp growing medium—consistency is key! Over-stratifying won’t hurt, but patience pays off for stronger seedlings.
Can I plant stratified Honeycrisp seeds directly outdoors in fall?
No—never plant raw seeds outdoors in fall without stratification first! They’ll rot before germinating. Start stratification indoors in late summer/early fall, then transplant seedlings outdoors after the last frost (spring). For a head start, sow them in pots 4–6 weeks before your last frost date.
Will seeds from store-bought Honeycrisp apples grow true to the parent tree?
Probably not! Honeycrisp is a hybrid variety, so seeds may grow wild apples with different flavors, sizes, or disease resistance. For guaranteed Honeycrisp traits, buy grafted trees from nurseries. Seeds are fun for experimenting, but grafted trees are the gold standard for fruit quality.
What’s the fastest way to test if my seeds are still viable?
Do the “float test”: Fill a glass with water and drop seeds in. Viable seeds sink (plant these!), while hollow or dead ones float. For extra assurance, soak seeds in warm water for 24 hours—plump seeds = higher germination chance. Discard any mushy or moldy specimens!
How do I care for Honeycrisp seedlings once they sprout?
Keep seedlings in bright, indirect light (no direct sun yet!) and maintain moist (not soggy) soil. Once true leaves appear, transplant to individual pots with well-draining mix. Hardening off (acclimating to outdoor temps) for 1–2 weeks before planting outside boosts survival rates.
Do Honeycrisp apple trees need winter protection as seedlings?
Young trees (under 3 years) benefit from mulch or burlap wraps in harsh winters (below 10°F). Avoid heavy snow piles near stems—gentle brushing prevents breakage. Mature trees handle cold well, but seedlings are more vulnerable. A simple tree collar protects against rodents too!
Wrapping up and next steps
Growing Honeycrisp apple tree seeds into thriving blooms requires patience and the right techniques—but the reward is sweet! 🍏 By mastering cold stratification and providing consistent care, you’re setting the stage for a fruitful harvest next spring.
Now that you’re armed with the timeline and tips, it’s time to roll up your sleeves and get planting.
Your next step? Mark your calendar for the stratification start date and gather your supplies. Whether you’re a seasoned gardener or a curious beginner, every seed you plant is a step toward a bountiful orchard. Happy growing—your future Honeycrisp apples are waiting! 🌱✨