
Picking
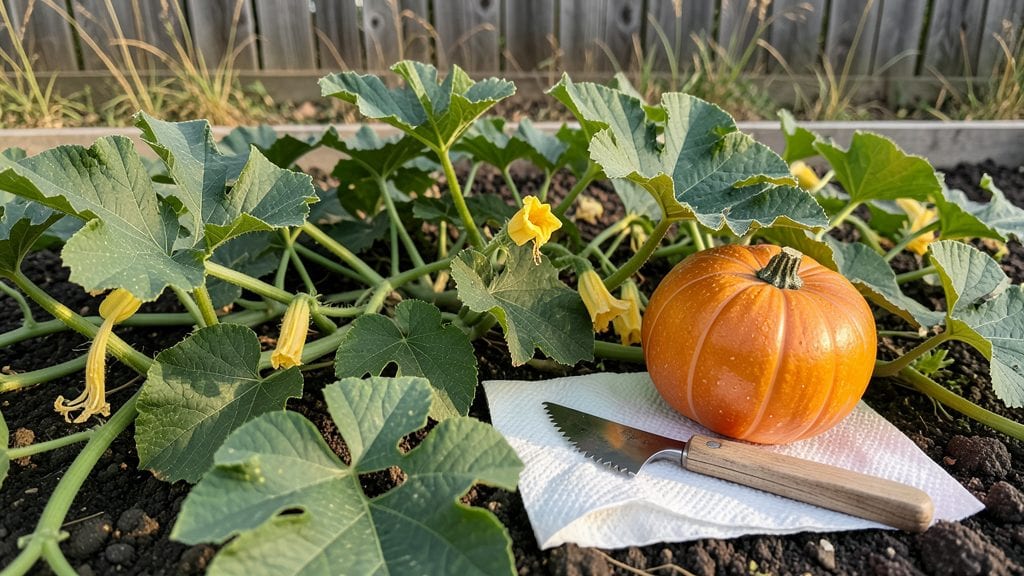
Harvesting pumpkin seeds for planting starts with the right pumpkin—look for ones that stayed on the vine until frost, their skin tough and their insides fully mature. I learned this the hard way when my first batch of seeds sprouted weak seedlings because the pumpkin was harvested too early.
The flesh should be stringy and the seeds plump, not shriveled or hollow-sounding when tapped.
Once you’ve picked your pumpkin, scoop out the seeds and surrounding pulp into a bowl, then rinse them under cool water to remove the sticky goo.
Spread them on a screen or paper towel in a single layer—this is where most people mess up by crowding them, which leads to mold. Let them dry in a warm, dark spot for about 3-5 days, stirring occasionally to prevent clumping.
After they’re bone-dry and rattling in the bowl, rub them between your palms to remove the last bits of fiber. Store them in an airtight container with a silica packet or a few grains of rice to absorb moisture—this keeps them viable for 3-5 years.
The first time I did this, I planted seeds from a 2018 harvest, and they still grew into healthy vines.
Pro tip: Label your containers with the pumpkin variety and harvest year—next season, you’ll be the one swapping seeds with neighbors instead of buying them. The key is patience; don’t rush the drying process, or you’ll end up with seeds that won’t germinate.
📚 In This Guide
- What you need
- Instructions
- Tips and common mistakes
- Wrapping up and next steps
What you need
- ● Ripe pumpkin(s) – Choose fully mature, healthy pumpkins (e.g., Cucurbita pepo, C. maxima, or C. moschata varieties). A medium-sized pumpkin (10–20 lbs) yields ~500–1,000 seeds.
- ● Knife or serrated knife – A sharp, sturdy knife (6–8 inches) for cutting open the pumpkin.
- ● Spoon or seed scoop – A metal or plastic spoon to gently scrape out seeds and stringy pulp.
- ● Colander or fine-mesh strainer – A stainless-steel colander (4–6 inches) to rinse seeds thoroughly.
- ● Baking sheet or tray – A rimmed baking sheet (13x18 inches) lined with parchment paper for drying.
- ● Paper towels or clean kitchen towels – For patting seeds dry after rinsing.
- ○ Fine-mesh screen or sieve – Optional but helpful for separating seeds from tiny pulp fragments.
- ● Air-tight containers – Glass jars (16–32 oz) or resealable plastic bags with zip locks for storage.
- ● Food-safe bleach solution – 1 tsp bleach per gallon of water for sanitizing seeds (if disease prevention is a concern).
- ● Dehydrator – Speeds up drying time (set to 135°F for 2–4 hours).
- ● Labeling tags & permanent marker – To mark varieties and harvest dates (e.g., "Jack Be Little – 2024").
- ● Glove or towel – Protects hands from sticky pumpkin guts!
Step-by-Step instructions for harvesting pumpkin seeds for planting
Here's the straightforward method I use every year to save seeds from my best pumpkins.
Select and Cut Open the Pumpkin
Choose a fully mature pumpkin that's at least 3 months old and has thick, hard rind. Cut it open with a sharp knife, making a 4-6 inch diameter circular opening on the top. I like to work outside or on a large tray to contain the mess—pumpkin guts get everywhere!
Scoop out the seeds and stringy pulp into a large bowl. Avoid seeds from cracked or diseased pumpkins—those won't produce healthy plants. The seeds should be plump and firm, not shriveled or discolored. If you see any mold or soft spots, discard those seeds immediately.
Rinse and Clean the Seeds
Fill a sink or large bowl with lukewarm water and add the seeds with their pulp. Swirl your hand through the water for 2-3 minutes to remove the stringy fibers. The water will turn cloudy—this is normal as the pulp dissolves.
Drain the water and refill with fresh lukewarm water. Repeat the swirling process until the water runs clear and you can see clean seeds at the bottom. Spread them on a clean kitchen towel or paper towel to air-dry for 1-2 hours. This removes excess moisture before curing.
Cure the Seeds for Storage
Spread the cleaned seeds in a single layer on a baking sheet lined with parchment paper. Place them in a dry, warm spot—I use my kitchen counter near the oven—for 3-5 days. The goal is to reduce their moisture content so they won't mold in storage.
Check daily and stir the seeds gently. They're properly cured when the outer shell feels hard and dry to the touch. If any seeds still feel damp after 5 days, extend the drying time by another day or two. Avoid using a dehydrator or oven, as high heat can damage the seeds.
Store the Seeds Properly
Once fully dry, transfer the seeds to a small envelope or airtight container. Label it with the pumpkin variety and the year. Store in a cool, dark place—like a pantry or seed storage box—where the temperature stays between 40-50°F. Properly stored seeds remain viable for 3-5 years, though germination rates drop after the first year.
For best results, test a few seeds for germination before planting. Place 5-10 seeds between damp paper towels in a sealed plastic bag. Keep them in a warm spot (70-75°F) and check daily. If 80% or more sprout within 7-10 days, your seeds are ready for next year's garden.
Tips & tricks for perfect pumpkin seed harvesting
A few key tricks will help you save pumpkin seeds that grow into healthy, vigorous plants next season.
Selection Tip: In Step 1, focus on pumpkins that have fully matured—at least 3 months old—with a hard, thick rind. These seeds will have the highest germination rates. I always look for pumpkins that are firm to the touch and free from any soft spots or cracks, as these can indicate internal spoilage that affects seed quality.
The Cleaning Process: During Step 2, those 2-3 minutes of swirling in lukewarm water are crucial for removing all the stringy pulp. I've found that using a colander with larger holes helps strain out the seeds more efficiently while keeping the pulp behind. This step prevents mold growth during storage, which can ruin your seeds before they even get planted.
Curing Strategy: The 3-5 day curing period in Step 3 is where many people make mistakes. I recommend placing your baking sheet near a sunny window during the day to speed up drying, but moving it to a warm spot away from direct sunlight at night. This balances moisture reduction with preventing overheating, which can damage the seeds. Check daily and stir gently to ensure even drying.
Storage Wisdom: When storing your seeds in Step 4, I've learned that adding a small packet of silica gel to your airtight container helps absorb any lingering moisture. This extra step extends viability beyond the typical 3-5 years, especially if you're storing seeds in a humid climate. Always label your containers with both the pumpkin variety and the year—trust me, you'll forget otherwise!
Pro Tips for Harvest Pumpkin Seeds For Planting
- A few key tricks will help you save pumpkin seeds that grow into healthy, vigorous plants next season.
- Selection Tip: In Step 1, focus on pumpkins that have fully matured—at least 3 months old—with a hard, thick rind.
- The Cleaning Process: During Step 2, those 2-3 minutes of swirling in lukewarm water are crucial for removing all the stringy pulp.
Frequently asked questions
When is the best time to harvest pumpkin seeds for planting?
The ideal time to harvest seeds is 10–14 days after pollination, when the pumpkin is fully mature but still on the vine. Wait until the pumpkin’s skin hardens and its color deepens—this ensures seeds are fully developed. Harvesting too early may yield underdeveloped seeds, while waiting too long risks mold or pest damage.
Can I save seeds from store-bought pumpkins?
Generally, no, unless the pumpkin is labeled as a heirloom or open-pollinated variety. Store-bought pumpkins (like those for carving) are often hybridized for uniformity and may not produce true-to-type seeds. If you’re unsure, opt for seeds from organic or seed-saving farms instead.
How long should I cure pumpkin seeds before planting?
Curing seeds for 3–6 months in a cool, dry place (like a paper envelope in the fridge) improves germination rates. Shorter curing (1–2 months) works in a pinch, but longer curing mimics natural drying cycles, reducing mold risks. Test a few seeds after 3 months to check viability before committing to full storage.
What if my seeds get moldy or develop pests during drying?
If mold appears (fuzzy spots or musty smells), discard the batch immediately—moldy seeds won’t sprout and can harm your garden. For pests (like weevils), freeze seeds for 48 hours to kill eggs/larvae, then dry them again. Store seeds in airtight containers with silica gel packets to prevent future infestations.
How do I know if my saved seeds are still viable for planting?
Test viability by placing 10 seeds in a damp paper towel, sealing them in a bag, and checking for sprouts in 5–7 days. If 80% or more sprout, your seeds are good! If fewer sprout, try planting more seeds or consider sourcing fresh ones. Viability drops after 5–7 years, so label seeds with their harvest year.
Wrapping up and next steps
Harvesting pumpkin seeds for planting is a simple yet rewarding process that ensures a fresh supply of organic seeds for your garden. By following these steps—cleaning, drying, and storing—you’ll save money and promote sustainability.
Now that you’re ready, why not plant those seeds and grow your own pumpkins next season? 🌱 Start small with a few seeds and watch your garden flourish!