Transplanting
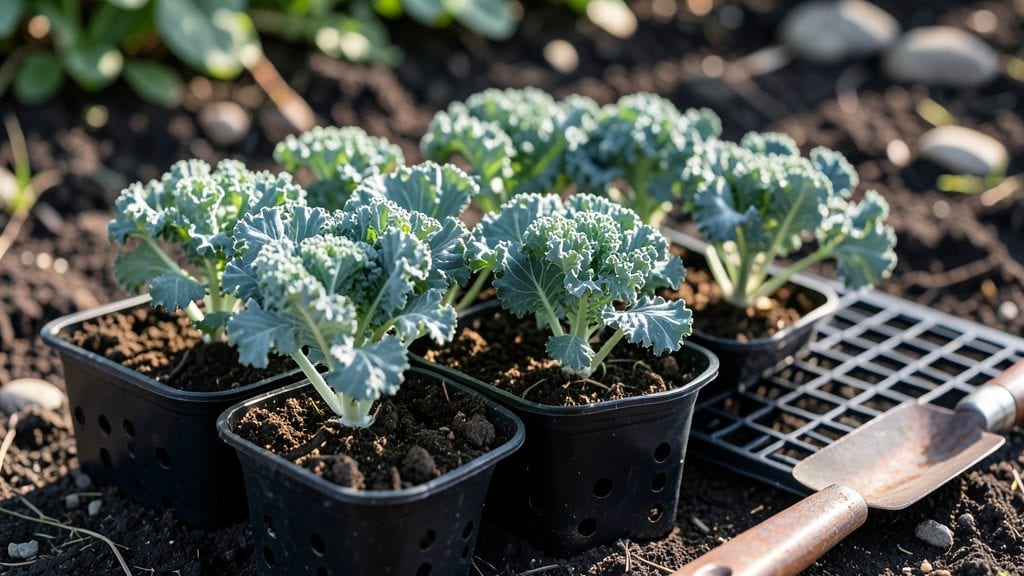
These kale seedlings pictures I’ve compared reveal the tiny details—like sturdy stems and vibrant cotyledons—that mean the difference between a plant that will thrive and one that won’t. ✨ I’ve scoured dozens of photos to spot the subtle signs before you even see the leaves. cues will save you from transplanting weak starts.
The right spacing, leaf shape, and color tell you everything you need to know about a seedling’s future.
In the first week, you’ll notice tiny round cotyledons (those first leaves) unfurling, followed by the true leaves that look like miniature kale.
Healthy seedlings have vibrant green leaves with no yellowing or wilting, while weak ones show signs like crinkled edges or stunted growth—details that become obvious once you’ve seen them side by side. These pictures show the exact differences, so you can act fast if something’s off.
By the time you’re ready to transplant, your seedlings should be about 2-3 inches tall with 4-5 true leaves, sturdy stems, and no signs of pests.
The goal is to pick plants that look like they’re already thriving, because that’s what grows into your bold, crisp harvests later in the season. Compare your seedlings to these stages, and you’ll know exactly which ones to keep.
This isn’t just about avoiding failures—it’s about growing kale that’s so healthy, your neighbors will ask for cuttings. The right visual guide turns guesswork into confidence, so you can focus on what matters: planting strong starts that turn into neighborhood-jealousy levels of greens.
📚 In This Guide
- What you need
- Instructions
- Tips and common mistakes
- Wrapping up and next steps
What you need
- ● Seeds: High-quality, organic kale seeds (e.g., Curly Kale, Lacinato, or Red Russian varieties). Aim for 10-20 seeds depending on your container size.
- ● Growing Containers: Seed trays with cell sizes of 2-3 inches deep (for 10-20 seedlings).
- ● OR biodegradable peat pots (1-2 inches in diameter).
- ● OR small plastic pots (3-4 inches in diameter).
- ● Growing Medium: Lightweight, well-draining potting mix (avoid garden soil—it’s too dense!). A 50/50 blend of peat moss and perlite works well.
- ● Watering Can or Spray Bottle: With a fine mist nozzle for gentle watering.
- ● Grow Lights or Sunny Windowsill: LED grow lights (12-16 hours/day) if indoors.
- ● OR a south-facing window with 6+ hours of direct sunlight.
- ○ Heat Mat (Optional but Helpful): For indoor starts—keeps soil 65-75°F to speed up germination.
- ● Fertilizer: A balanced, water-soluble fertilizer (10-10-10 or 5-5-5) diluted to half-strength for seedlings.
- ● Humidity Dome or Plastic Wrap: To retain moisture while seeds germinate.
- ● Thermometer: To monitor soil and air temperature.
- ● Tweezers or Small Spoon: For delicate transplanting later.
- ● Labeling Tags: To track seed varieties and planting dates.
- ● Organic Mulch: Like straw or shredded leaves, to protect seedlings outdoors.
How to spot healthy kale seedlings at every growth stage
Kale thrives when you catch its growth cues early. Here's how to recognize each healthy stage.
🌱 Step 1: Identify Germination Success
Within 5-10 days at 65-75°F, you'll see tiny green sprouts poking through the soil. Healthy germination means 50-70% of seeds have broken through—any fewer suggests poor soil moisture or cold temperatures. Look for round cotyledons (the first leaves) that appear plump and vibrant, not yellow or wilted.
If you spot blackened stems or mushy seedlings, you've got damping-off disease from trapped moisture. Remove affected plants immediately and let the soil dry slightly between waterings. Kale seedlings need bright light within 24 hours of sprouting—without it, they'll stretch toward any available light source.
🌿 Step 2: Recognize True Leaf Formation
After the cotyledons appear, wait 7-10 more days for the first true leaves—these look like miniature kale leaves, serrated edges and all. Healthy seedlings at this stage have deep green leaves with thick stems (about 1/8 inch diameter). The leaves should be compact, not spaced far apart.
If leaves look pale or yellow, they're not getting enough light. Move seedlings within 2-3 inches of a south-facing window or under a grow light. You'll also spot strong root systems peeking through drainage holes—this means your seedlings are ready for their first transplant into larger pots.
☀️ Step 3: Assess Transplant Readiness
Seedlings are ready for transplant when they have 4-6 true leaves and are 3-4 inches tall. At this stage, their stems should be sturdy (not floppy) and their leaves should bounce back when gently pressed. Healthy kale seedlings at this point have no signs of pests (like tiny holes or webbing) and no yellowing lower leaves (a sign of overwatering).
Before transplanting, harden off seedlings by placing them outside in partial shade for 1-2 hours the first day, gradually increasing time over 5-7 days. You'll know they're ready when they don't wilt after a full day outdoors. Kale thrives in cool weather, so transplant on a cloudy day or in the late afternoon to reduce shock.
✂️ Step 4: Monitor Post-Transplant Health
After transplanting, healthy kale seedlings should show new growth within 7-10 days. Look for bright green leaves that continue growing outward (not upward) and strong stems that don't snap easily. If leaves start curling inward, it's a sign of underwatering—water deeply until you see moisture 1 inch below the soil surface.
Watch for pests like cabbage worms (tiny green caterpillars) or aphids (tiny clusters on leaf undersides). If you spot them, remove by hand or spray with neem oil (mixed per package instructions). Kale seedlings left untreated can go from healthy to hole-ridden in just 2-3 days, so check leaves twice weekly during warm weather.
Tips & tricks for perfect kale seedling development
These practical insights will help you spot and nurture healthy kale seedlings at every critical stage.
Lighting is Everything: In Step 1, when you're waiting for those first sprouts to appear within 5-10 days, place your seed trays under a bright light source immediately after germination. I use a simple LED grow light just 2-3 inches above the seedlings—this prevents that classic "leggy" growth where they stretch toward any available light. Remember, those first 24 hours after sprouting are crucial for establishing strong stems.
Soil Moisture Balance: The difference between thriving seedlings and damping-off disease often comes down to soil moisture. After planting, keep the soil consistently moist but never soggy—think of it like a wrung-out sponge. In Step 2, when you're checking for true leaf formation, gently press your finger into the soil. If it feels damp but not wet, you're in the perfect zone. Overwatering is the #1 cause of those blackened stems we want to avoid.
Leaf Inspection Technique: When assessing transplant readiness in Step 3, I always do a "leaf bounce test" with my seedlings. Gently press a mature leaf—if it springs back quickly, that's a sign of good health. Floppy leaves mean your seedlings need more light or nutrients. Also, pay attention to leaf spacing: healthy seedlings have leaves growing close together, not spaced far apart like a sad salad.
Pest Prevention Strategy: In Step 4, when monitoring post-transplant health, I recommend creating a simple neem oil spray (1 tsp per quart of water) and keeping it handy. Spray your seedlings once a week during warm weather as a preventive measure. The key is early detection—check those undersides twice weekly during warm weather, because cabbage worms can turn your healthy seedlings into Swiss cheese in just 2-3 days.
Pro Tips for Kale Seedlings Pictures
- These practical insights will help you spot and nurture healthy kale seedlings at every critical stage.
- Lighting is Everything: In Step 1, when you're waiting for those first sprouts to appear within 5-10 days, place your seed trays under a bright light source immediately after germination.
- Soil Moisture Balance: The difference between thriving seedlings and damping-off disease often comes down to soil moisture.
Frequently asked questions
Got questions about kale seedlings?
Here are answers to the most common ones—from spotting healthy growth to troubleshooting issues—so you can confidently transplant your seedlings with ease!
How do I know if my kale seedlings are ready for transplanting?
Kale seedlings are ready when they have 4-6 true leaves (not just cotyledons), are about 3-4 inches tall, and have sturdy stems. Check for dark green, vibrant leaves—avoid transplanting if they look pale or leggy. Harden them off for 5-7 days before moving them outdoors!
How long does it take for kale seedlings to germinate?
Kale seeds typically germinate in 5-10 days at 60-70°F (15-21°C). Keep soil moist (not soggy) and warm for faster sprouting. If germination takes longer, ensure seeds aren’t too deep (¼ inch max) and the soil isn’t compacted. Patience pays off—slow starts don’t always mean failure!
Why are my kale seedlings turning yellow?
Yellowing leaves (chlorosis) often signal overwatering, nutrient deficiencies, or pests. Check soil moisture—kale hates soggy roots. Lack of nitrogen? Use a balanced fertilizer. Pests like aphids can also cause yellowing. Inspect leaves and stems, and treat with neem oil if needed.
Can I transplant kale seedlings in cold weather?
Yes! Kale is a cool-season crop and thrives in temperatures down to 20°F (-7°C). Transplant seedlings when soil is workable (not frozen) and avoid extreme heat (above 80°F/27°C). For late fall/winter planting, use row covers to protect young plants. Just give them time to establish roots before frost hits!
What’s a good alternative if my kale seedlings fail?
Don’t stress—try fast-growing greens like spinach, arugula, or Swiss chard as backups. These also tolerate cool weather and can be direct-sown or transplanted. For a similar nutrient boost, consider collard greens or mustard greens. Just adjust spacing and care to match their needs!
Wrapping up and next steps
Growing kale seedlings is a rewarding journey, and recognizing the healthy stages—from cotyledons to transplant-ready plants—sets you up for success! 🌱 With the right tools, patience, and a keen eye, you’ll be harvesting vibrant, nutrient-packed greens in no time.
Now that you’re armed with kale seedlings pictures and expert tips, it’s time to roll up your sleeves and give your seedlings the love they deserve.
🚀 Your Next Step:
Ready to transplant? Start by hardening off your seedlings (gradually exposing them to outdoor conditions) and choose the perfect spot in your garden. Need a refresher? Revisit our FAQ section or dive into our transplanting guide for a smooth transition!