Flowers
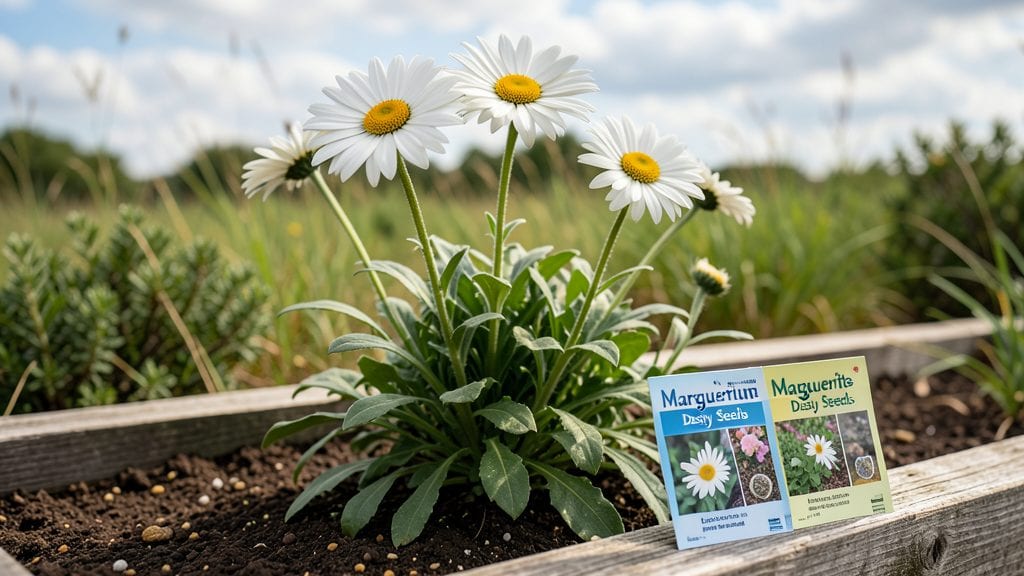
Growing marguerite flower seeds with the layered chill method guarantees those dreamy, paper-white blooms next spring. 🌿 I’ve struggled with spotty germination before—until I discovered this foolproof technique that mimics nature’s winter-to-spring cycle.
The key lies in timing: start seeds indoors in early fall, then subject them to a cold period that tricks them into thinking winter’s passed.
You’ll need a seed-starting tray, high-quality potting mix, and a plastic bag or refrigerator for the chill phase. Marguerite seeds prefer well-draining soil and gentle moisture—never soggy.
After 6-8 weeks of indoor growing, transplant seedlings outdoors after the last frost, spacing them 12-18 inches apart for full sun and air circulation. This method cuts germination time in half and boosts survival rates.
The payoff arrives in late summer when your garden bursts with clusters of daisy-like blooms in shades of white, pink, or yellow. Marguerite flowers attract pollinators and thrive in borders, containers, or cutting gardens.
With proper care, they’ll self-seed for years, creating natural drifts of cheerful color. Here’s how to make it happen without the guesswork.
This approach works best in USDA Zones 3-9, though adjustments can be made for colder or warmer climates. For example, extend the chill period in Zone 10 or use a seedling heat mat in Zone 4.
The layered chill method transforms marguerite seeds from unreliable to a guaranteed spring highlight. Let’s get those seeds planted for next year’s showstopper blooms.
📚 In This Guide
- What you need
- Instructions
- Tips and common mistakes
- Wrapping up and next steps
What you need
- ● Marguerite flower seeds – Choose high-quality, fresh seeds (e.g., Argyranthemum frutescens or Chrysanthemum leucanthemum). Aim for 50–100 seeds (adjust based on desired quantity).
- ● Seed-starting mix – 2–3 cups of a well-draining, sterile potting mix (avoid garden soil—it’s too dense!). Look for a blend labeled for seedlings or succulents.
- ● Small seed trays or pots – 4–6-inch diameter containers (or a seed tray with cells) with drainage holes. 1–2 trays/pots should suffice for 50–100 seeds.
- ● Plastic wrap or humidity dome – A clear plastic bag, lid, or DIY cover to retain moisture while seeds germinate.
- ● Spray bottle – For gentle watering (avoid over-saturating the soil!).
- ○ Fine-mesh screen or paper towels – Optional but helpful for stratification prep (see tips below).
- ● Refrigerator with a crisper drawer – For the 4–6 week cold stratification (must maintain 35–45°F / 2–7°C).
- ● Grow lights or sunny windowsill – A south-facing window or LED grow lights (12–16 hours/day) for post-chill growth.
- ○ Thermometer (optional) – To monitor soil temps during stratification (aim for 40°F / 4°C).
- ● 🔥 Seed viability check: Soak seeds in warm water for 10 mins—sinkers are viable; floaters may be old.
- ● 🌡️ Stratification shortcut: Mix seeds with slightly damp peat moss or coconut coir before refrigerating for even moisture.
- ● ✨ Labeling: Use toothpicks + masking tape to mark trays with seed type and chill start date!
How to stratify marguerite flower seeds for spring blooms
This layered chill method ensures strong germination and vibrant spring blooms.
🌱 Step 1: Prepare Seeds and Moisten Growing Medium
Marguerite seeds require stratification to break dormancy. Start by placing them in a quart-sized resealable plastic bag with 2 tablespoons of dampened potting mix—just enough moisture to feel like a wrung-out sponge. Seal the bag and label it with the seed variety and date. This mimics natural winter conditions while preventing mold.
Store the bag in your refrigerator's vegetable crisper where temperatures hover around 35-40°F. Check weekly for moisture—if the mix feels dry, add a few drops of water. After 8-12 weeks, the seeds will appear slightly swollen or cracked. This signals they've completed stratification and are ready for planting.
💧 Step 2: Sow Stratified Seeds in Containers
Fill 4-inch diameter pots with sterile seed-starting mix to within ½ inch of the rim. Press the soil surface lightly to create a firm, even seedbed. Using your finger, create ¼-inch deep furrows spaced 1 inch apart—marguerites thrive when given room to develop strong roots.
Sow 2-3 seeds per furrow, spacing them ½ inch apart. Cover them with a thin layer of fine vermiculite (about ⅛ inch deep) to retain moisture without burying the seeds too deeply. Mist the surface gently with a spray bottle until the soil looks uniformly damp but not saturated.
☀️ Step 3: Provide Controlled Warmth and Light
Place the pots in a seedling heat mat set to maintain 65-70°F soil temperatures. This warmth encourages consistent germination, which typically occurs in 14-21 days. Position a grow light 2-3 inches above the seedlings to provide 14-16 hours of light daily. Without sufficient light, seedlings stretch weakly and develop pale, elongated stems.
Watch for first true leaves—these will appear after the initial cotyledons (seed leaves). Once they emerge, reduce the heat mat to room temperature (68-72°F) and gradually move the pots 1 inch farther from the light source weekly to prevent legginess. Strong seedlings will have dark green leaves and compact growth habits.
✂️ Step 4: Thin and Harden Off Seedlings
When seedlings reach 2 inches tall, thin them to the strongest plant per pot by snipping the weaker stems at soil level with clean scissors. Avoid pulling seedlings to prevent disturbing roots. After thinning, water deeply to settle the soil around the remaining plant. This step reduces competition and ensures each marguerite develops robust blooms.
Begin hardening off 4-6 weeks before your last frost date by placing pots outside in partial shade for 1 hour daily. Gradually increase exposure over 10-14 days, moving to full sun and leaving them outdoors overnight. By the time of transplanting, seedlings will be acclimated to temperature fluctuations and wind exposure, reducing transplant shock.
🪴 Step 5: Transplant to Garden Beds
Choose a sunny location with well-draining soil amended with 2 inches of compost. Dig holes twice as wide as the root ball but only as deep as the pot's drainage holes. Gently remove the seedling, ensuring the root ball stays intact, and place it in the hole. Fill around the roots with soil, firming lightly to eliminate air pockets.
Water deeply at transplanting to encourage root establishment. Space plants 12-18 inches apart to allow for air circulation, which prevents fungal diseases like powdery mildew. Mulch with 1 inch of organic mulch to retain moisture and suppress weeds. Marguerite flowers will reward your patience with cheerful, daisy-like blooms by mid-summer.
Tips & tricks for perfect marguerite flower seed stratification
These expert insights will help you achieve reliable germination and vibrant spring blooms with your marguerite seeds.
Stratification Temperature Control: The 35-40°F range in your refrigerator's vegetable crisper is critical for successful stratification. If your fridge runs warmer, consider placing the bag on a lower shelf or in a cooler section. I've found that consistent 38°F yields the best results—use a refrigerator thermometer to monitor temperatures. The goal is to mimic natural winter conditions without risking mold growth from excess moisture.
Moisture Management Technique: In Step 1, when you're preparing the dampened potting mix, aim for moisture that feels like a wrung-out sponge—not dripping wet. Overly moist conditions can lead to mold development during the 8-12 week stratification period. I recommend checking moisture weekly by squeezing a small amount of mix—it should hold together slightly but not leave water marks on your fingers. This balance is key for preventing both mold and drying out.
Light Exposure Strategy: During Step 3's germination phase, that 14-16 hours of daily light is non-negotiable for strong seedlings. If you notice seedlings stretching toward the light source (a condition called etiolation), it's time to adjust. Move the grow light closer to just 1-2 inches above the seedlings and slightly increase the light duration to 16 hours if possible. The goal is compact, dark green growth that indicates healthy photosynthesis.
Harden Off Gradually: The 1-hour daily outdoor exposure in Step 4 should increase by only 30 minutes every 3-4 days to avoid transplant shock. I've seen seedlings that were rushed through hardening develop yellowed leaves and stunted growth. Watch for leaves that remain firm and vibrant—this indicates successful acclimation. By the final week, your seedlings should be able to handle full sun exposure without wilting.
Pro Tips for Marguerite Flower Seeds
- These expert insights will help you achieve reliable germination and vibrant spring blooms with your marguerite seeds.
- Stratification Temperature Control: The 35-40°F range in your refrigerator's vegetable crisper is critical for successful stratification.
- Moisture Management Technique: In Step 1, when you're preparing the dampened potting mix, aim for moisture that feels like a wrung-out sponge—not dripping wet.
Frequently asked questions
Got questions about growing marguerite flower seeds?
You’re not alone! Here are answers to the most common queries—from timing to troubleshooting—to help you cultivate stunning blooms next season.
When is the best time to plant marguerite flower seeds using the layered chill method?
Plant your seeds indoors in early fall (8–10 weeks before your last frost date) for the layered chill method. This mimics winter stratification, encouraging strong root growth before spring. If you miss fall, you can still refrigerate seeds for 4–6 weeks before planting in early spring.
How do I know if my seeds have been chilled long enough?
Marguerite seeds typically need 4–6 weeks in the fridge (35–40°F) for optimal germination. Check for moisture—seeds should stay damp but not soggy. If mold appears, reduce humidity or extend chill time slightly. Patience pays off: over-chilling won’t harm them!
Can I grow marguierites from seeds without a refrigerator?
Yes! Use the outdoor winter sowing method: plant seeds in clear plastic containers with moist soil, seal loosely, and place them outside in a protected spot (like a garage or porch). Nature handles the chilling for you—just rotate containers weekly for even light exposure.
Why aren’t my marguerite seeds germinating after chilling?
Try these fixes:
- Check moisture: Seeds need consistent dampness (not waterlogged). Use a spray bottle to avoid disturbing them.
- Verify warmth: After chilling, keep seeds at 65–75°F for germination. A heat mat helps if your home runs cooler.
- Test seed viability: Soak a few seeds in water overnight—if they swell, they’re likely viable. Old seeds may need a longer chill.
How do I ensure my marguierites bloom reliably next spring?
Follow these pro tips:
- Thin seedlings: Space them 12–18 inches apart to prevent overcrowding (which delays blooms).
- Hardening off: Gradually expose seedlings to outdoor conditions 1–2 weeks before transplanting to avoid shock.
- Deadhead spent blooms: Remove faded flowers to redirect energy into new growth and prolong flowering.
Wrapping up and next steps
Growing marguerite flower seeds using the layered chill method is your ticket to vibrant blooms next spring—no guesswork, just reliable results! 🌸 By following these steps, you’ll give your seeds the perfect start, ensuring strong roots and stunning flowers that brighten your garden.
Ready to see your hard work pay off? Start prepping your seeds this fall and watch your garden transform into a cheerful, fragrant paradise!
🌱 Next Step: Plan Your Planting Schedule
Once your seeds complete their cold stratification, mark your calendar for spring planting. Check your local frost dates and soil conditions to ensure your marguerites thrive from day one!