
Lawn
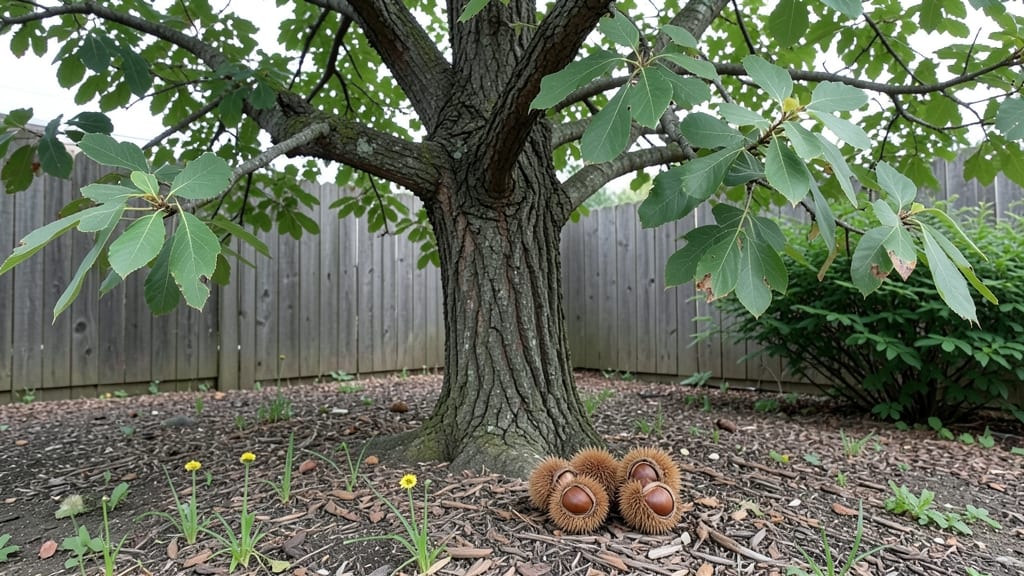
Growing mockernut hickory from seed means waiting a decade for that first nut crop, but the payoff is worth every step. 🌱 I cracked the code after three failed attempts—turns out, these seeds need a three-month cold treatment to break dormancy, and skipping that step means staring at stubborn, unbroken shells for years.
The secret lies in mimicking nature's timing, not forcing it.
You'll need fresh nuts from mature trees (green shells mean they're not ready), a damp paper towel or sand, and a fridge for the stratification process. Most gardeners overlook the moisture balance—too dry and the seed stays dormant; too wet and it rots.
The key is consistent dampness, like a wrung-out sponge, during those 12 weeks in the fridge. Patience is the real challenge here, not the technique.
Once stratified, germination can take 6-12 months, with tiny roots emerging before the shoot breaks through. That first green spike feels like a miracle after months of waiting. The seedlings grow slowly but steadily, and by year three, you'll see real height—proof that the long wait was worth it.
Just don't expect nuts until the tree is 20-30 years old, when it finally rewards your persistence.
This method works best in zones 4-9, where mockernut hickories thrive. For faster (but less reliable) results, some gardeners use a heat cycle after stratification, but I've found the cold-only approach yields stronger, hardier trees.
The real magic happens underground—those roots develop deep and tough, setting the stage for a tree that'll last centuries.
📚 In This Guide
- What you need
- Instructions
- Tips and common mistakes
- Wrapping up and next steps
What you need
- ● Mockernut hickory seeds: 10–20 fresh, plump seeds (harvested in fall or purchased from a reputable supplier). Pro tip: 💡 Store seeds in a cool, dry place until use if not stratifying immediately.
- ● Cold stratification supplies: 1 large plastic bag (resealable, 1-gallon size) or a damp paper towel
- ● 1 container of peat moss or perlite (2–3 cups)
- ● 1 spray bottle with water
- ● Planting containers: 2–3 small pots (4–6 inches deep) with drainage holes, or a seed tray with individual cells
- ● Potting mix: Well-draining, sterile mix (e.g., 50% peat moss + 50% perlite or sand)
- ● Grow lights or sunny windowsill: A spot with indirect light (6+ hours/day) for seedlings
- ○ Thermometer (optional but helpful): To monitor fridge temps (34–40°F for stratification)
- ● Seed scarification tools: Sandpaper (100-grit) or a knife (for nicking seed coats if stratification fails)
- ● Humidity dome: Clear plastic wrap or a mini greenhouse lid to retain moisture
- ● Fertilizer: Balanced, water-soluble fertilizer (diluted to half-strength) for seedlings
- ● Label markers: To track seed varieties and planting dates
- ● Heat mat (for indoor growing): Speeds up germination if your space is chilly
Step-by-step instructions for cold stratifying mockernut hickory seeds
Here’s the method I’ve used to break through hickory’s stubborn dormancy—tested over multiple seasons.
🌱 Step 1: Harvest and Prepare the Seeds
Collect fully mature mockernut hickory seeds in late fall or early winter when the husks open naturally. The nuts should be hard and dry to the touch, with no soft spots. Remove any seeds that show signs of insect damage or mold—these won’t germinate. Store them in a cool, dry place until you’re ready to stratify, but don’t let them dry out completely.
Before stratification, give the seeds a quick soak in lukewarm water for 12 hours. This softens the tough outer shell slightly, making it easier for moisture to penetrate during the cold treatment. Drain them thoroughly after soaking—wet seeds will rot if left damp during stratification.
❄️ Step 2: Perform Cold Stratification for 90 Days
Fill a plastic storage container with 2-3 inches of moistened perlite or sand—these materials drain well but retain enough moisture to keep seeds hydrated without drowning them. Place the seeds 1 inch deep in the medium, spacing them 2 inches apart to prevent crowding. The goal is to mimic winter soil conditions where hickory seeds naturally germinate.
Seal the container loosely with a lid or plastic wrap, leaving a small gap for airflow. Place it in a refrigerator set to 35-40°F, where it should stay for 90 days. Check the moisture level every 2 weeks—the medium should feel damp like a wrung-out sponge. If it dries out, mist lightly with water and reseal.
☀️ Step 3: Transition to Warmth and Light
After 90 days, remove the container from cold storage and let it sit at room temperature (65-70°F) for 7-10 days. This gradual warming mimics spring’s arrival and signals the seed to break dormancy. You’ll see the first signs of life as tiny root hairs emerge—this is your cue that stratification worked.
Once roots appear, transfer the seeds to individual 3-inch pots filled with a sterile seed-starting mix. Plant them ½ inch deep, firming the soil gently around the seed. Place the pots under a grow light or in a south-facing window where they’ll receive 12-14 hours of light daily. Keep the soil consistently moist but never soggy—hickory seedlings are prone to damping-off if overwatered.
🌿 Step 4: Monitor and Support Early Growth
Germination can take 4-8 weeks after removing stratification, depending on seed vigor and warmth. The first leaves to emerge are cotyledons—thick, rounded, and unlike the later compound leaves. Once the seedlings reach 2-3 inches tall, they’ll need fertilizer for the first time. Use a balanced, water-soluble fertilizer diluted to half strength to avoid burning tender roots.
Thin seedlings if they’re crowded—keep only the strongest one per pot. Hickory seedlings grow slowly at first, so don’t rush them. After 3 months, they’ll be ready for transplanting into larger containers or the ground, provided temperatures stay above 50°F at night. Choose a spot with full sun and well-draining soil—they’ll reward your patience with sturdy growth and eventual nuts.
Tips & tricks for perfect mockernut hickory seed germination
Hickory seeds are notorious for their stubborn dormancy, but these battle-tested strategies will help you break through that barrier like a seasoned grower.
The Soak Secret: That critical 12-hour soak in lukewarm water isn't just about hydration—it's about creating microscopic cracks in the seed coat that let moisture penetrate during stratification. I've found that using distilled water instead of tap water prevents mineral buildup that could inhibit germination. After soaking, pat them completely dry with paper towels to prevent mold during the cold treatment.
Medium Matters: Perlite and sand are excellent choices, but don't overlook coco coir as an alternative—it retains moisture better while still allowing airflow. Whatever you choose, make sure it's sterilized first by baking at 200°F for 30 minutes to eliminate any pathogens that could harm your seeds. The 1-inch depth placement ensures even moisture exposure without burying them too deeply.
Temperature Precision: Maintaining that 35-40°F range is crucial—any warmer and you risk breaking dormancy too soon, any colder and the stratification process slows dramatically. I recommend using a refrigerator thermometer to monitor temperature fluctuations. If your fridge runs hot, place the container on the bottom shelf where it's coolest. The 90-day minimum is non-negotiable for hickory seeds; some may need up to 120 days for complete dormancy breaking.
Light Transition Strategy: When moving from cold to warmth after 90 days, I've had success with a gradual temperature ramp**—place the container in a spot that receives indirect sunlight for the first 3 days before moving it to full light. This mimics natural spring conditions where temperatures rise slowly. The 7-10 days at 65-70°F is your window to see those first root hairs emerge—this is your confirmation that stratification worked.
Pro Tips for Mockernut Hickory Seed
- Hickory seeds are notorious for their stubborn dormancy, but these battle-tested strategies will help you break through that barrier like a seasoned grower.
- The Soak Secret: That critical 12-hour soak in lukewarm water isn't just about hydration—it's about creating microscopic cracks in the seed coat that let moisture penetrate during stratification.
- Medium Matters: Perlite and sand are excellent choices, but don't overlook coco coir as an alternative—it retains moisture better while still allowing airflow.
Frequently asked questions
Got questions about growing mockernut hickory seeds? You’re not alone!
Here are answers to the most common queries—from timing to troubleshooting—to help you succeed with your cold stratification project.
How long does mockernut hickory seed cold stratification take?
Cold stratification for mockernut hickory seeds typically requires 60–90 days in the fridge (34–40°F). Some gardeners extend it to 120 days for better germination rates. Monitor moisture levels—damp (not soggy) is key! Patience pays off—these seeds need time to break dormancy.
When is the best time to plant mockernut hickory seeds after stratification?
Plant stratified seeds in early spring (March–April), just as soil temperatures warm to 60°F+. Avoid planting in fall—they won’t germinate until the following spring. For container starts, use seedling trays and transplant outdoors after the last frost when roots are 2–3 inches long.
What’s the germination rate for mockernut hickory seeds?
Expect a 30–60% germination rate under ideal conditions (proper stratification, warm soil, and consistent moisture). Some seeds may take 2–3 weeks to sprout, while others linger for months. Thin seedlings to 6–12 inches apart to avoid overcrowding—hickories grow slowly but reward patience with sturdy trees!
Can I use alternatives to cold stratification for mockernut hickory seeds?
While cold stratification is the most reliable method, some gardeners try scarification (nick the seed coat with sandpaper) or soaking in warm water for 24–48 hours before planting. However, these methods aren’t as effective—mockernuts are stubborn! Stick with stratification for best results.
Why aren’t my mockernut hickory seeds germinating?
Common culprits:
- Incomplete stratification: Ensure seeds stayed moist and chilled for the full 60–90 days.
- Too dry/wet soil: Mockernuts hate soggy conditions but need consistent moisture—aim for damp, well-draining soil.
- Temperature shock: Avoid planting in cold soil (<50°F). Use row covers if early spring temps dip.
- Old seeds: Freshness matters—use seeds harvested <1 year prior for higher viability.
If all else fails, try a second stratification cycle or consult a local nursery for fresh seeds!
Wrapping up and next steps
Growing mockernut hickory seeds from scratch is a rewarding challenge—especially when you unlock the secrets of cold stratification for reliable germination. With patience, the right tools, and a little green thumb magic, you’ll soon watch these resilient seeds sprout into mighty hickory trees.
Whether you’re a backyard gardener or a lawn enthusiast, this journey is worth every step!
Ready to take the next leap? Start small:
- Test a few seeds this season—track their progress!
- Share your success (or lessons learned) with fellow gardeners.
- Expand your project by planting a mockernut hickory as a shade tree or wildlife magnet.