Watering
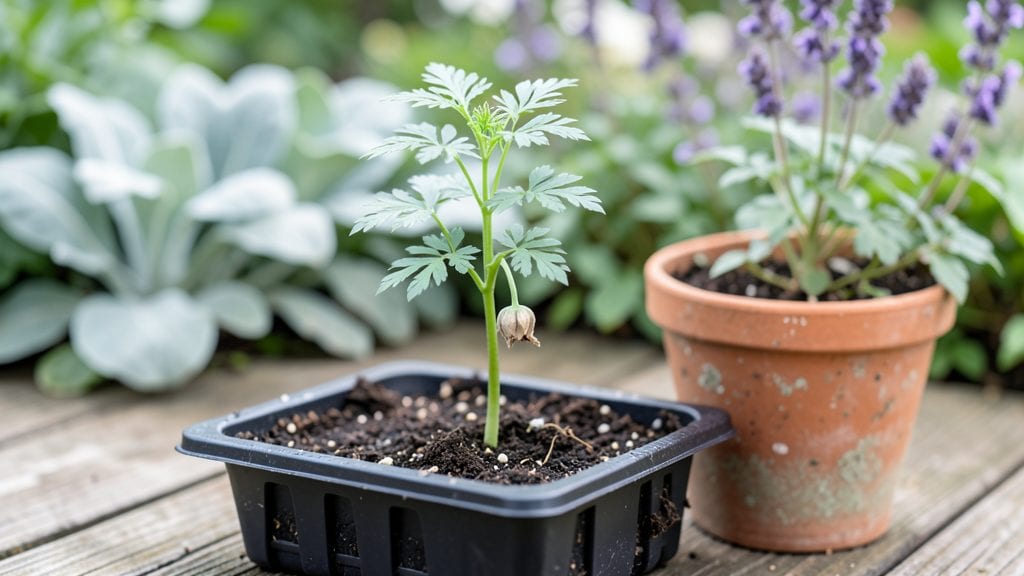
Growing a vigorous nigella damascena seedling starts with the right moisture balance—too much water drowns those delicate roots, while too little leaves them reaching desperately for dampness. 🌱 I’ve watched these seedlings go from wobbly stems to sturdy, lacy plants just by keeping the soil consistently damp (not soggy) and avoiding waterlogged trays.
The key is patience: nigella thrives when it’s moist but never waterlogged, and that’s where most gardeners trip up.
Start with a lightweight seed-starting mix that drains well but holds just enough moisture to keep those tiny seeds happy. Plant them just below the surface—no need to bury them deep—and keep them in a warm spot until sprouts appear.
Once they’ve got their first set of true leaves, you’ll notice how quickly they perk up with the right care. The secret isn’t fancy equipment; it’s watching for that perfect balance where the soil feels like a wrung-out sponge.
By the time you’re ready to transplant, your seedlings will have developed those signature feathery foliage and sturdy stems that make nigella such a standout in gardens. They’ll self-seed like crazy if you let them, creating a natural carpet of delicate blooms year after year.
The payoff? A garden that looks like it’s been dressed by a master, with almost no effort after the initial care.
Works in full sun or partial shade, and handles both city containers and open garden beds with equal grace. Here’s how to keep them thriving from seed to bloom—and troubleshoot when they start looking a little off.
📚 In This Guide
- What you need
- Instructions
- Tips and common mistakes
- Wrapping up and next steps
What you need
- ● Seeds: 10–20 Nigella damascena seeds (organic, untreated for best results).
- ● Seed-starting trays or small pots: 2–4 (3–4 inches deep) with drainage holes.
- ● Seed-starting mix: 1–2 cups of sterile, well-draining potting soil (avoid garden soil—it’s too dense!).
- ● Watering can or spray bottle: With a fine mist nozzle for gentle hydration.
- ○ Clear plastic dome or plastic wrap: To create a mini greenhouse effect (optional but helpful for humidity).
- ● Trowel or spoon: For planting seeds without crushing them.
- ● Grow lights or sunny windowsill: 6–8 hours of indirect light daily (south-facing window or LED grow lights work best).
- ○ Fertilizer (optional): A balanced, water-soluble fertilizer (5-10-5 ratio) for seedlings once they sprout.
- ● Labels & markers: To track planting dates and varieties.
- ● Temperature: Keep seedlings in a warm spot (65–75°F / 18–24°C).
- ● Humidity: Maintain moisture (not sogginess!) with regular misting or a humidity tray.
- ● Ventilation: Remove the plastic dome daily for 10–15 minutes to prevent mold.
Step-by-Step instructions for growing Nigella damascena seedlings
Mastering moisture is the secret to nurturing these delicate seedlings into sturdy, flowering plants.
🌱 Step 1: Prepare Containers and Light Soil Mix
Use small, shallow containers—2-3 inches deep—with drainage holes to prevent soggy roots. Fill them with a light, airy mix of 50% potting soil and 50% perlite or coarse sand. This blend drains quickly but holds just enough moisture to keep seeds happy. I like to press the mix gently into the container so it’s firm but not packed down—this helps seeds stay in place without sinking.
Moisten the mix lightly with lukewarm water until it feels evenly damp, like a wrung-out sponge. Avoid oversaturating it; you want moisture without pools of water. Sprinkle Nigella Damascena seeds on the surface—don’t bury them. These tiny seeds need light to germinate, so just press them into the top layer. Cover the container loosely with plastic wrap or a humidity dome to retain warmth and moisture.
💧 Step 2: Maintain Consistent Moisture Without Overwatering
Place the container in a warm spot with indirect light—think bright windowsill without harsh midday sun. Check the soil daily, keeping it consistently moist but never soggy. Stick your finger ½ inch deep into the soil; if it feels dry, mist the surface lightly. Overwatering is the biggest killer of young Nigella seedlings, so resist the urge to drench them. A spray bottle works best to avoid disturbing the seeds.
After 7-14 days, you’ll see tiny green sprouts pushing through the soil. Once they appear, remove the plastic wrap immediately—too much humidity now can cause mold or damping-off. You’ll know moisture is right when the soil surface looks slightly damp but not glistening. If condensation forms on the plastic, it’s time to air them out.
☀️ Step 3: Gradually Introduce Sunlight for Strong Growth
When seedlings show their first true leaves (the second set after the initial cotyledons), move them to a spot with bright, indirect light for 2-3 hours daily. Avoid direct sun at first—it can scorch delicate seedlings. I like to place them near an east-facing window where they get gentle morning light. Watch for leaves that look pale or stretched; this is a sign they need more light, but increase exposure slowly over 1 week.
After 3-4 weeks, when seedlings are 2-3 inches tall with 4-6 true leaves, you can introduce them to 4-6 hours of morning sun. Harden them off by placing them outside in a sheltered spot for 30 minutes daily, gradually increasing time. You’ll see stronger stems and deeper green leaves as they adapt. This slow transition prevents shock and encourages sturdy growth.
✂️ Step 4: Thin and Transplant for Optimal Spacing
Once seedlings are 3-4 inches tall and have 6-8 true leaves, it’s time to thin them. Use a small pair of scissors to snip the weaker seedlings at the base, leaving only the strongest 2-3 inches apart in each container. Nigella doesn’t like competition, so spacing is key for air circulation and preventing disease. If you’re transplanting, choose a spot with full sun to partial shade and well-draining soil.
Dig holes slightly deeper than the seedling’s root ball and water them deeply before and after transplanting. Mulch lightly with ½ inch of organic matter to retain moisture and suppress weeds. Keep the soil evenly moist for the first 2 weeks, then taper off to normal watering once they’re established. You’ll know they’re thriving when they develop their characteristic feathery foliage and begin branching out.
Tips & tricks for perfect Nigella damascena seedlings
Here's what nobody tells you about keeping these finicky seedlings happy and thriving.
Soil Mix Secret: The 50/50 blend of potting soil and perlite isn't just about drainage—it's about creating the perfect moisture sponge. I've found that adding a handful of coco coir to the mix (about 10% of the total volume) helps retain moisture better than perlite alone, especially in dry climates. This keeps the soil consistently damp without risking soggy roots. Press the mix firmly enough that it holds its shape when you touch it, but don't pack it down like you're tamping soil for a garden bed.
Moisture Testing: That finger test in Step 2 is your best friend, but here's the thing—your finger isn't always reliable. After the seeds sprout, I recommend using a moisture meter for accuracy. Aim for readings between 40-50% moisture content. If you don't have one, the "wrung-out sponge" test works well: squeeze a handful of soil—it should hold together but not drip water. Too much condensation on the plastic wrap? That's your signal to remove it immediately, even if sprouts haven't appeared yet.
Light Transition Strategy: The gradual light increase in Step 3 is crucial, but timing matters just as much. I've learned that moving seedlings to their new light spot in the evening helps them adjust overnight. By morning, they're already acclimating to the brighter conditions. For the first week, place them where they'll get morning sun only—this prevents the shock of sudden intense light. Watch for leaves that look like they've been stretched too thin; this is your cue to increase light exposure by 30 minutes every other day.
Thinning Technique: When it's time to thin in Step 4, don't just grab and pull—use sharp, clean scissors to snip at the base. This prevents disturbing the roots of your remaining seedlings. I like to thin on an overcast day when temperatures are cooler; the plants handle the stress better. After thinning, give the remaining seedlings a light misting with water to help them recover. The key spacing of 2-3 inches might seem generous, but trust me—Nigella plants will spread and fill that space beautifully as they mature.
Pro Tips for Nigella Damascena Seedling
- Here's what nobody tells you about keeping these finicky seedlings happy and thriving.
- Soil Mix Secret: The 50/50 blend of potting soil and perlite isn't just about drainage—it's about creating the perfect moisture sponge.
- Moisture Testing: That finger test in Step 2 is your best friend, but here's the thing—your finger isn't always reliable.
Frequently asked questions
Got questions about nurturing your Nigella damascena seedlings? You're not alone!
Here are answers to the most common concerns—from watering woes to troubleshooting tips.
How often should I water my Nigella damascena seedlings?
Keep the soil consistently moist but not soggy. Water lightly every 2–3 days, ensuring the top inch of soil stays damp. Overwatering can cause rot, so always check moisture with your finger before adding more. Pro tip: Use a spray bottle for seedlings to avoid disturbing delicate stems!
When will my Nigella damascena seedlings bloom?
With proper care, seedlings typically bloom 8–12 weeks after planting. Early blooms appear in late spring to early summer, depending on your climate. Patience is key! Ensure they get full sun (6+ hours/day) and well-draining soil to speed up flowering.
What if my seedlings look leggy or weak?
Leggy seedlings usually mean too little light. Move them to a brighter spot immediately—even a sunny windowsill helps. If they’re already planted outdoors, thin them to reduce competition for light. Bonus: A gentle pinch of fertilizer (low-nitrogen) can boost growth.
Can I grow Nigella damascena from store-bought seeds?
Store-bought seeds work just fine—just ensure they’re fresh and labeled as "Nigella sativa" or "black cumin" (common names for Nigella damascena). Soak them overnight for faster germination, then plant ¼ inch deep in well-draining soil.
Why are my seedlings turning yellow or wilting?
Yellowing leaves often signal overwatering or poor drainage. Let the soil dry slightly between waterings, and ensure pots have drainage holes. Wilting can also mean underwatering or heat stress. Move seedlings to partial shade if temps exceed 85°F (29°C).
Still stuck? Drop your question in the comments—we’re happy to help your seedlings thrive!
Wrapping up and next steps
Growing a vigorous Nigella damascena seedling boils down to one golden rule: mastering moisture balance. Whether you’re a seasoned gardener or just starting, these seeds reward patience with delicate, fragrant blooms—just remember to keep soil consistently damp (not soggy!) and provide good drainage. 🌱
You’ve got this! Now’s the time to watch your seedlings thrive and enjoy the process. Ready for the next step? Transplant your seedlings once they’ve sprouted their first true leaves and are sturdy enough to handle outdoor conditions—just ensure they’re in a spot with full sun and well-draining soil.
Happy gardening! 🌞