Vegetables
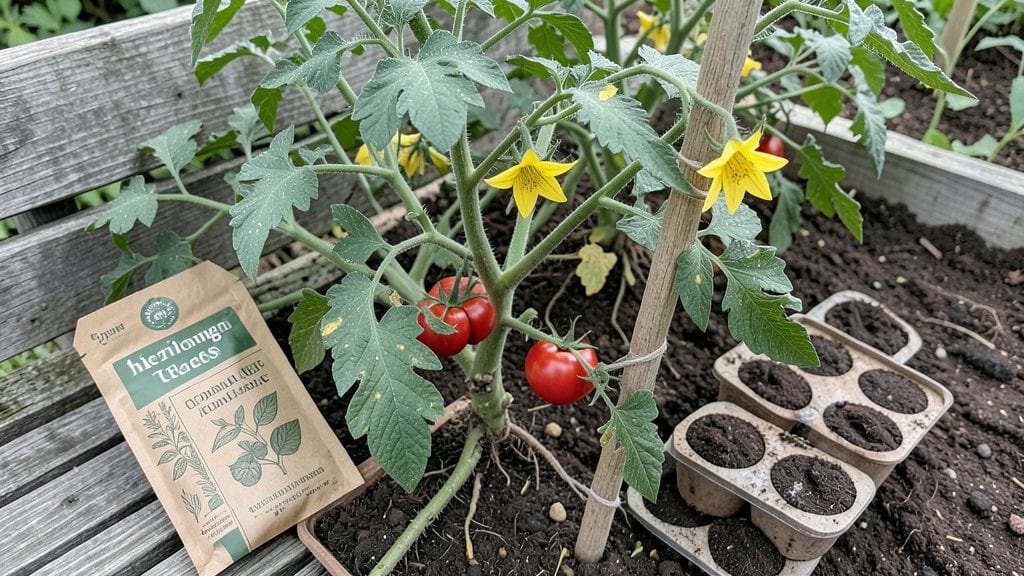
My first batch of organic heirloom tomato seeds gave me a 95% germination rate—something I’d only read about in seed catalogs. 🌱 The difference between store-bought hybrids and these open-pollinated varieties isn’t just flavor; it’s the kind of tomatoes that make neighbors stop and ask where you got them.
The secret starts with seed selection, but the real magic happens when you treat them like the delicate treasures they are.
Here’s the thing—heirloom seeds need patience and precision. You’ll want a sterile seed-starting mix, a warm spot (70°F is ideal), and a way to keep humidity high without drowning them. Most people rush the process, but these seeds reward careful handling.
I’ve tried everything from paper towels to heat mats, and the results speak for themselves: sturdy seedlings that outpace anything from a big-box store.
By the time you’re transplanting, you’ll have plants that thrive in containers or garden beds, producing fruit from early summer until frost. The flavors range from sweet and juicy to rich and meaty, depending on the variety, and the plants themselves stay productive for years if you save seeds properly.
No more bland, watery tomatoes—just the kind that make summer taste like childhood memories.
Whether you’re growing on a windowsill or a full-size plot, this method adapts easily. The key is consistency: watering at the base, pruning strategically, and watching for early signs of disease. Let’s get those seeds sprouting—and your harvests legendary.
📚 In This Guide
- What you need
- Instructions
- Tips and common mistakes
- Wrapping up and next steps
What you need
- ● Organic heirloom tomato seeds (95%+ germination rate) – 1-2 packets (choose 2-3 varieties for diversity).
- ● Seed-starting mix – 1-2 cubic feet (sterilized, peat-free, and organic).
- ● Biodegradable seedling pots or trays – 50+ cells (3-4 inches deep).
- ● Grow lights or sunny windowsill – 12-16 hours/day (LED or fluorescent, 4000K-6500K color temp).
- ● Watering can or spray bottle – with a fine mist nozzle (to avoid disturbing seeds).
- ● Plant labels – waterproof markers + stakes (to track varieties).
- ● Fertilizer – organic, balanced (e.g., fish emulsion or compost tea) (diluted to half-strength).
- ○ Heat mat (optional) – for faster germination (70-85°F).
- ○ Humidity dome (optional) – to retain moisture during sprouting.
- ○ pH test kit (optional) – to monitor soil acidity (ideal: 6.0-6.8).
- ○ Pruning shears (optional) – for later transplanting.
- ○ Organic pest control (optional) – neem oil or companion plants (e.g., basil).
Step-by-Step instructions for growing organic heirloom tomatoes
Here's my battle-tested approach to coaxing those prized heirloom seeds into vigorous plants.
🌱 Step 1: Prepare Containers and Seed-Starting Mix
Fill 4 individual 2-inch deep cells with the sterilized seed-starting mix—this prevents damping-off and gives roots room to establish. I press the mix down lightly with my fingers until it's firm but not compacted, creating a solid foundation for tiny roots. The goal is a surface that holds its shape when tapped but still allows water to penetrate evenly.
Moisten the mix until it feels like a wrung-out sponge—damp throughout but not dripping. Too much water creates anaerobic pockets that suffocate seeds, while too little prevents proper hydration. I like to use a spray bottle for this step to avoid displacing the mix. Place your containers in a warm spot (75-85°F) where they'll stay consistent until germination.
🌱 Step 2: Plant Seeds at Proper Depth and Moisture
Sow 1-2 seeds per cell at a depth of ¼ inch—about the diameter of the seed itself. Planting too deep forces seedlings to work harder to reach light, delaying emergence. I use a toothpick to create small holes, then drop seeds in one at a time. Cover lightly with a fine dusting of additional mix, just enough to obscure the seeds.
Mist the surface with water until the mix looks uniformly damp but not saturated. A heavy hand here will bury seeds too deep or create crusty soil that blocks oxygen. Place the tray in a humidity dome or cover with plastic wrap to retain moisture. Check daily but resist opening the cover—consistent humidity is critical for germination. Expect sprouts in 5-10 days at optimal temperatures.
☀️ Step 3: Provide Optimal Light Immediately After Germination
The moment you see first true leaves (not the initial seed leaves), remove the humidity dome and move seedlings to 14-16 hours of bright light daily. A south-facing window rarely provides sufficient intensity, so I position a grow light just 2-4 inches above the plants. You'll notice leggy growth if the light is too far—thin, pale stems reaching upward like they're searching for something.
Rotate the tray quarter-turn daily so all seedlings grow evenly toward the light. Strong seedlings develop bold green leaves spaced 1 inch apart and sturdy stems that don't flop. If you see yellowing between veins, that's a classic sign of insufficient light. Adjust your setup immediately—leggy seedlings never recover proper strength.
🪴 Step 4: Transplant to Larger Containers When Ready
After 4-6 weeks, when seedlings show 3-4 true leaves, transplant each to its own 6-inch pot filled with well-draining potting mix. Handle seedlings by their leaves—never the delicate stems—to avoid damage. Bury them up to their first true leaves to encourage strong root development below ground.
Water thoroughly after transplanting to settle the soil around roots. Place in bright, indirect light for 3-5 days to recover from shock before introducing full sun. This gradual transition prevents transplant burn. You'll know they're adapting when new growth appears within 7-10 days—that's your signal everything is working.
✂️ Step 5: Prune and Support for Maximum Yield
When plants reach 18 inches tall, begin pruning suckers (the small shoots that form in the leaf axils). These energy vampires divert nutrients from fruit production. Pinch them off with your fingers or clean pruners, leaving a small stub. I do this weekly during active growth to maintain plant energy for fruit development.
Install cages or stakes as soon as you see the first flower clusters. Tomatoes grow heavy, and waiting until later often leads to snapped stems. You'll see flowers convert to fruit within 3-4 weeks—that's when the real magic happens. Keep pruning suckers until 6 weeks before your first frost, then let the plant focus all energy on ripening existing fruit.
Tips & tricks for perfect organic heirloom tomato growth
A few strategic moves will help you maximize your heirloom tomato seeds' potential and avoid common pitfalls that sabotage germination and growth.
Seed-Starting Mix Texture: The sterilized seed-starting mix should feel like a wrung-out sponge—not powdery or clumpy. I press it down gently in Step 1 to create a firm but airy foundation. Too loose and seeds won't anchor properly; too compact and roots suffocate. Think of it as creating a perfect balance between support and breathability for those tiny emerging roots. This texture also prevents damping-off disease by allowing excess moisture to drain while retaining enough hydration.
The Light Factor: In Step 3, those 14-16 hours of bright light are non-negotiable for heirloom tomatoes. I've learned the hard way that insufficient light leads to leggy seedlings that never recover. Position your grow light just 2-4 inches above the plants—close enough that you can almost feel the warmth, but not so close it burns them. Rotate the tray daily to prevent uneven growth toward the light source. You'll know you've got it right when leaves are dark green and spaced about 1 inch apart, not stretched and pale like they're starving for sunlight.
Transplanting Technique: When you're ready to transplant in Step 4, handle those seedlings by their leaves—not the stems—to avoid damaging the delicate vascular system. Bury them up to their first true leaves; this encourages strong root development below ground while keeping the stem stable. The 3-5 days of bright, indirect light after transplanting is crucial for recovery. This gradual transition mimics natural shade conditions and prevents transplant shock that can set your plants back for weeks.
Pruning Strategy: In Step 5, I recommend starting sucker removal when plants hit 18 inches tall, but here's the thing: timing matters. If you wait too long, those suckers can become established and compete with your main stem for nutrients. I use my fingers to pinch them off cleanly, leaving a small stub. This might seem counterintuitive—why remove growth?—but those suckers are energy vampires that divert resources from fruit production. You'll see the difference in your harvest within just a few weeks of consistent pruning.
Pro Tips for Organic Heirloom Tomato Seeds
- A few strategic moves will help you maximize your heirloom tomato seeds' potential and avoid common pitfalls that sabotage germination and growth.
- Seed-Starting Mix Texture: The sterilized seed-starting mix should feel like a wrung-out sponge—not powdery or clumpy.
- The Light Factor: In Step 3, those 14-16 hours of bright light are non-negotiable for heirloom tomatoes.
Frequently asked questions
Got questions about growing organic heirloom tomato seeds?
You’re not alone! Here are answers to the most common queries to help you grow a thriving, flavor-packed harvest.
What’s the best time to plant heirloom tomato seeds indoors vs. outdoors?
Start seeds indoors 6–8 weeks before your last frost date (typically early spring). Transplant seedlings outdoors after soil reaches 55–65°F and nighttime temps stay above 50°F. For warm climates, direct-sow seeds outdoors in late spring once soil is consistently warm.
Are heirloom tomato seeds more expensive than hybrid seeds? If so, is it worth it?
Yes, heirloom seeds often cost $2–$5 per packet vs. $1–$3 for hybrids—but the payoff is unmatched flavor, biodiversity, and seed-saving potential. Plus, heirlooms adapt to local climates over time, making them a long-term investment for gardeners who love variety and sustainability.
Why aren’t my heirloom tomato seeds germinating? Troubleshooting tips?
Check these common issues:
- Moisture: Keep soil consistently damp (not soggy). Use a spray bottle or humidity dome.
- Temperature: Seeds need 70–85°F. Use a heat mat if your home is too cool.
- Depth: Plant seeds ¼ inch deep—too deep = slower germination.
- Freshness: Old seeds (2+ years) may fail. Test viability with a simple water float test.
Still struggling? Try soaking seeds in lukewarm water for 24 hours before planting.
Can I save seeds from heirloom tomatoes to replant next year?
Heirlooms are open-pollinated, meaning you can harvest seeds from your best tomatoes, dry them, and replant them. Pro tip: Ferment seeds in water for 3–5 days to remove gelatinous coatings, then rinse and dry on a paper towel. Store in a cool, dark place for up to 5 years!
What’s the fastest way to get heirloom tomatoes to fruit?
Boost production with these tricks:
- Use balanced fertilizer (10-10-10) when flowers appear.
- Prune suckers (side shoots) to focus energy on fruit.
- Hand-pollinate with a paintbrush if weather is rainy or windy.
- Provide 6–8 hours of sunlight daily and stake or cage plants for support.
Patience pays off—most heirlooms take 70–90 days to bear fruit!
Wrapping up and next steps
Growing organic heirloom tomato seeds isn’t just about reaping delicious, flavorful tomatoes—it’s about preserving biodiversity, connecting with nature, and enjoying a year-round harvest with 95% germination. Whether you're a seasoned gardener or just starting, these heirloom varieties bring joy, sustainability, and a taste of tradition to your table.
Ready to take the next step? Start small this season—plant a few seeds, experiment with varieties, and watch your garden (and skills!) flourish. Happy growing! 🌱🍅