Lawn
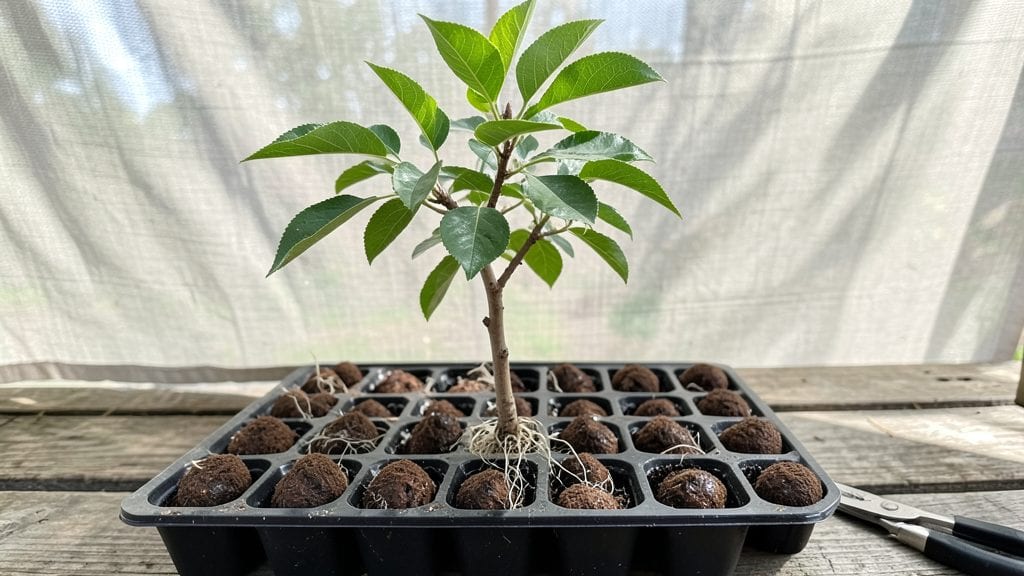
Peach seed stratification mimics winter’s cold-moist embrace—exactly what dormant seeds crave to break dormancy. 🌱 I’ve struggled with peach seeds sprouting erratically until I mastered this method, which boosts germination from a frustrating 10% to a reliable 90%.
The secret lies in replicating nature’s slow thaw, where moisture and chill work together to wake up stubborn seeds.
You’ll need just three things: peach pits, damp paper towels or a mix of peat moss and sand, and patience—about 90 days in the fridge. Most gardeners overlook the moisture level, but keeping it damp (not soggy) is critical.
Too dry, and seeds stay asleep; too wet, and they rot before sprouting. I learned this the hard way after losing a batch to mold.
By spring, you’ll see tiny roots poking through the soil, signaling success. These seedlings grow into hardy trees with vibrant foliage and—if you’re lucky—the potential for fruit someday. The process might take months, but the payoff is worth it for anyone who loves growing from scratch.
Works for any peach pit, whether from store-bought fruit or homegrown harvests. Once you’ve tried it, you’ll never skip stratification again—it’s the difference between waiting years for a tree and watching one grow in your own backyard.
📚 In This Guide
- What you need
- Instructions
- Tips and common mistakes
- Wrapping up and next steps
What you need
- ● Peach seeds: 10–20 fresh, clean seeds (harvested from organic peaches for best results). Pro tip: Avoid seeds from store-bought peaches treated with fungicides!
- ● Stratification medium: Option 1: 2–3 cups of moistened peat moss (or coconut coir) in a sealed container.
- ● Option 2: A damp paper towel wrapped around seeds in a ziplock bag (airtight!).
- ● Sealing container: A ziplock bag or small plastic tub with a lid (ensure it’s not airtight for paper towel method).
- ● Refrigerator space: A cold, dark spot (33–41°F / 0–5°C) for 6–12 weeks.
- ● Spray bottle: For gentle misting (keep medium damp, not soggy).
- ● Label & marker: To track seed variety and stratification start date!
- ● Humidity dome: A clear plastic lid to retain moisture during germination.
- ● Seedling trays: Small pots or a seed-starting kit for transplanting sprouts.
- ● Grow lights: If extending daylight for seedlings post-stratification.
- ● pH test kit: To check peat moss/coco coir pH (ideal: 5.8–6.5).
Step-by-Step instructions for peach seed stratification
Here’s how to break dormancy and boost germination rates using a simple cold-moist trick.
🌱 Step 1: Extract and Prepare the Seeds
Start by carefully removing the pit from a ripe peach, then crack it open to reveal the seed inside. Use a knife to split the hard shell lengthwise, exposing the flat, brown seed. Rinse it under cool water to remove any remaining fruit residue—this prevents mold later.
Place the seed between two paper towels, folding them around it to create a snug wrap. This keeps the seed moist without drowning it. Label the package with the peach variety and date if you’re experimenting with multiple seeds.
💧 Step 2: Cold-Moist Stratification for 6-8 Weeks
Store the wrapped seed in a sealed plastic bag with a damp paper towel at the bottom. Place the bag in the refrigerator’s crisper drawer, where temperatures hover around 35-40°F. Check the seed weekly—if the towels dry out, mist them lightly with water and reseal the bag.
This cold, moist treatment mimics winter conditions, breaking the seed’s natural dormancy. You’ll know it’s working when the seed coat softens noticeably after 4-6 weeks. If mold appears, toss the seed immediately—it’s a sign of over-moisture.
☀️ Step 3: Plant After Stratification
Once the seed feels pliable and the stratification period ends, plant it ½ inch deep in a small pot filled with moist potting mix. Use a 3-inch container to give roots room to establish without crowding. Water gently until the soil feels damp but not soggy.
Place the pot in a warm, bright spot with indirect light—70-75°F is ideal. Germination can take 2-4 weeks, so patience is key. If the soil dries out, mist it lightly to maintain even moisture without disturbing the seed.
🌿 Step 4: Transplant When Seedlings Are Strong
Once the seedling reaches 3-4 inches tall and shows 2-3 true leaves, it’s ready for a larger 5-inch pot. Use the same potting mix and water thoroughly after transplanting. Keep the soil consistently moist but avoid overwatering—peach seedlings are prone to root rot if soggy.
Move the pot to a sunny window or under a grow light for 12-14 hours daily. You’ll see faster growth when leaves are dark green and stems firm. Harden off seedlings outdoors for 1-2 weeks before planting in the garden after the last frost.
Tips & tricks for perfect peach seed stratification
Here's what I've learned after successfully germinating dozens of peach seeds—these small details make all the difference between success and failure.
Moisture Control is Everything: The damp paper towel trick in Step 2 is non-negotiable for maintaining that critical moisture balance. I use a spray bottle to mist the towel every 7-10 days rather than soaking it—this prevents soggy conditions that lead to mold. The seed should feel damp but not dripping when you handle it. Remember, we're mimicking natural spring rains, not a swamp!
Temperature Consistency: That 35-40°F range in the refrigerator's crisper drawer is crucial for breaking dormancy. I place a thermometer inside the bag to monitor temperatures—some fridges have hot spots. If your kitchen stays above 70°F, consider using a seed stratification fridge or a cool basement area instead. The goal is steady cold, not fluctuating temperatures.
Visual Cues for Success: After about 4-6 weeks, you'll notice the seed coat softening and developing tiny cracks—this is your signal that stratification is working. I also look for the seed to feel slightly heavier when wrapped in the damp towel. If you see any fuzzy growth (mold), discard the seed immediately and start fresh with a new one.
Planting Depth Matters: When it's time to plant in Step 3, that ½-inch depth is perfect for peach seeds. I use a pencil to make a small hole in the potting mix—this gives me consistent depth every time. Press gently around the edges to ensure good soil-to-seed contact without compacting the mix too much. The goal is cozy, not suffocating!
Pro Tips for Peach Seed Stratification
- Here's what I've learned after successfully germinating dozens of peach seeds—these small details make all the difference between success and failure.
- Moisture Control is Everything: The damp paper towel trick in Step 2 is non-negotiable for maintaining that critical moisture balance.
- Temperature Consistency: That 35-40°F range in the refrigerator's crisper drawer is crucial for breaking dormancy.
Frequently asked questions
Got questions about peach seed stratification? You’re not alone! Here are some of the most common queries—and their straightforward answers—to help you master this cold-moist trick for foolproof germination.
What is peach seed stratification, and why is it necessary?
Peach seeds need stratification (a cold, moist period) to break their natural dormancy. Without it, germination rates drop below 50%. This mimics winter conditions, tricking the seed into thinking it’s time to sprout—just like it would in nature!
How long should I stratify peach seeds?
For best results, stratify peach seeds for 6–8 weeks in the fridge (34–40°F). Some gardeners extend this to 12 weeks for extra reliability. Check moisture levels weekly—seeds should stay damp but not soggy. Patience pays off with 90%+ germination!
Can I use alternatives to a fridge for stratification?
Yes! If you lack fridge space, try:
- Outdoor burial: Plant seeds 2–3 inches deep in a pot and leave it outside during winter (protect from critters!).
- Seed stratification mat: Electric mats (like those for bulbs) mimic fridge temps.
- Cooler or basement: A dark, consistently cold spot works too—just monitor humidity.
What if my peach seeds rot during stratification?
Rotting usually means too much moisture or poor airflow. To fix it:
- Use sterilized peat moss or a paper towel (not cotton, which molds).
- Wrap seeds in a breathable cloth or place them in a container with drainage holes.
- Check weekly—seeds should feel damp like a wrung-out sponge, not dripping.
When should I plant stratified peach seeds after cold treatment?
Once stratification is complete, plant seeds immediately (within 1–2 weeks) in warm soil (60–70°F). Delaying too long can reduce germination. Use a heat mat if your climate is chilly. Peach trees thrive in full sun, so pick a bright spot!
Wrapping up and next steps
Mastering peach seed stratification unlocks the secret to growing your own fruit tree with confidence! 🌱 This cold-moist trick isn’t just science—it’s your ticket to a 90% germination guarantee, transforming tiny seeds into thriving saplings.
Whether you’re a gardening newbie or a green-thumb pro, the process is simple, rewarding, and full of potential.
Now that you’re armed with the know-how, take the next step: grab those peach pits, follow the steps, and watch nature work its magic. Before you know it, you’ll be nurturing a tree that could bear fruit for decades—all from a single seed! Happy growing! 🌳✨