Transplanting
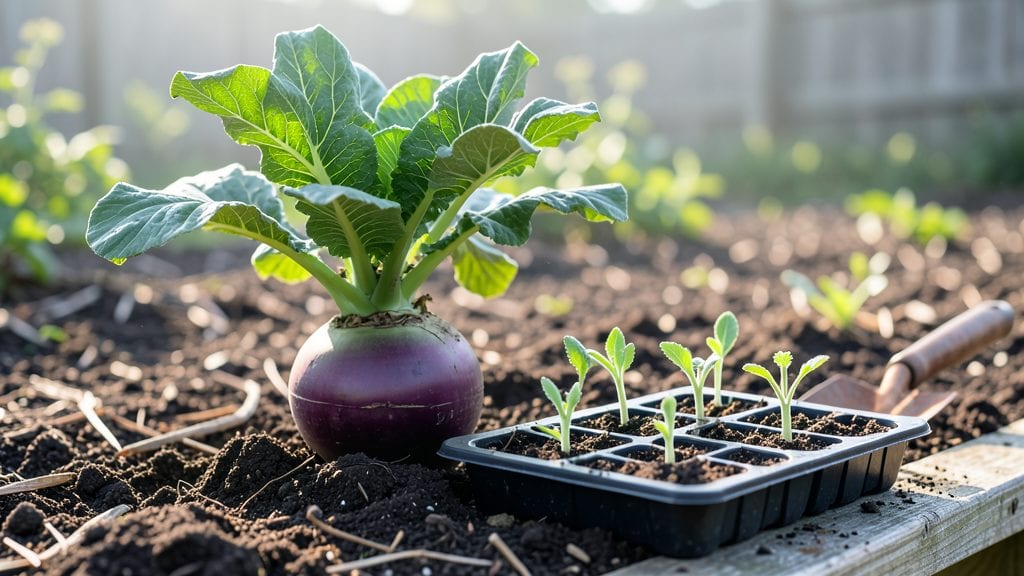
Planting kohlrabi seedlings gives you a head start on a harvest that’s shockingly lush and ready in just 50 days. 🌱 I’ve learned the hard way that skipping the hardening process or planting too deep leads to leggy, struggling plants—but when done right, these seedlings thrive like nothing else in the garden.
The secret starts with well-drained soil rich in compost, spaced 12–18 inches apart in full sun. After hardening off your seedlings for a week, plant them at the same depth they grew in their containers, pressing soil gently around the stems to eliminate air pockets.
Water deeply right after transplanting to help roots establish.
Within two weeks, you’ll see new growth signaling success. Kohlrabi’s thick stems store energy like a battery, so keep soil consistently moist but never soggy—overwatering is the fastest way to rot those bulbs before they even form. The payoff? Crisp, nutty-tasting harvests that outperform store-bought by a mile.
This method works from early spring until midsummer in most climates, and container gardeners can adapt by using 5-gallon pots. The key is patience—rushing leads to bitter stems, but timing it right means you’ll be harvesting before summer’s heat sets in.
📚 In This Guide
- What you need
- Instructions
- Tips and common mistakes
- Wrapping up and next steps
What you need
- ● Kohlrabi seedlings: 6–12 healthy, hardened-off seedlings (age: 4–6 weeks old, with 2–3 true leaves).
- ● Garden plot or containers: Full-sun location (6+ hours of sunlight daily) with well-draining soil.
- ● Raised beds or containers (minimum 12" deep) if your soil is heavy or poorly draining.
- ● Transplanting tools: Trowel or small garden spade (for digging holes).
- ● Garden gloves (to protect your hands from soil and sharp edges).
- ● Fertilizer: Balanced organic fertilizer (e.g., 5-5-5 or compost) to enrich the soil.
- ○ Optional: Slow-release granular fertilizer for long-term nourishment.
- ● Watering supplies: Watering can or hose with a gentle spray nozzle.
- ● Mulch (straw, grass clippings, or shredded leaves) to retain moisture.
- ● Plant markers: Small stakes or labels to track varieties (especially useful if planting multiple types).
- ● Row cover or shade cloth: To protect seedlings from pests or harsh afternoon sun during the first week.
- ● Epsom salt or magnesium sulfate: A pinch mixed into the planting hole for extra vigor (1 tsp per seedling).
- ● Companion plants: Pre-planted onions, radishes, or cabbage to deter pests naturally.
Step-by-Step instructions for planting kohlrabi seedlings
Kohlrabi thrives when planted with care—here’s how to get your hardened-off seedlings into the garden for a bountiful harvest.
🌱 Step 1: Prepare the Planting Site
Choose a location with full sun to partial shade—kohlrabi tolerates light shade better than many brassicas. Work the soil to a depth of 12 inches, loosening it so roots can spread easily. Kohlrabi prefers slightly acidic to neutral soil with a pH of 6.0 to 7.0. If your soil is heavy clay, mix in 2-3 inches of compost to improve drainage and fertility.
Remove any weeds or debris from the area, as competition will stunt your seedlings. I like to rake the surface smooth—this helps prevent soil-borne diseases from splashing onto young leaves. Kohlrabi also benefits from a balanced fertilizer (10-10-10) worked into the soil at planting time, but don’t overdo it—too much nitrogen encourages leafy growth at the expense of the bulb.
🪴 Step 2: Dig Holes and Plant Seedlings
Dig holes just deep enough to accommodate the seedlings’ root balls without burying the stems. For 4 seedlings, space them 18 inches apart in rows that are 24 inches apart. Kohlrabi needs room to grow—crowding leads to small, misshapen bulbs. Gently remove each seedling from its container, loosening the roots if they’re tightly bound.
Place each seedling in its hole, ensuring the top of the root ball sits even with the soil surface—burying the stem too deeply can cause rot. Press the soil lightly around the base to eliminate air pockets, then water deeply to settle everything. You’ll know it’s right when the soil looks firm but not compacted, and the seedling stands upright without leaning.
💧 Step 3: Water and Mulch for Stability
After planting, water the seedlings 1 inch deep to help them establish roots in their new home. Kohlrabi is sensitive to moisture fluctuations—consistent watering is key to preventing cracks or bitter flavors. I like to water in the early morning so the foliage dries quickly, reducing the risk of fungal diseases like downy mildew.
Spread 1-2 inches of organic mulch (like straw or shredded leaves) around each plant, keeping it 2 inches away from the stem to prevent rot. Mulch conserves moisture, regulates soil temperature, and suppresses weeds. Replenish the mulch as it breaks down—this ensures your kohlrabi stays hydrated without frequent watering.
☀️ Step 4: Monitor and Protect Young Plants
Keep an eye on your seedlings for the first 7-10 days—this is when they’re most vulnerable to stress. If leaves yellow or wilt, check the soil moisture; kohlrabi needs 1-1.5 inches of water per week, more in hot, dry weather. Avoid overhead watering once seedlings are established—direct water to the base to keep foliage dry.
Watch for pests like cabbage worms or flea beetles, which can chew holes in leaves. If you spot damage, handpick larger pests or apply neem oil as a preventative spray. Kohlrabi also benefits from row covers if temperatures dip below 50°F—they protect tender young plants from frost while still allowing light and air to pass through.
⏰ Step 5: Thin and Maintain for Bulb Development
As the plants grow, thin them to 12 inches apart if they become overcrowded—this ensures each bulb has enough space to develop properly. Kohlrabi bulbs form at the stem base, so avoid disturbing the roots once growth begins. Harvest when bulbs reach 2-3 inches in diameter, before they become woody or bitter.
Fertilize lightly 4-6 weeks after planting with a low-nitrogen, high-potassium fertilizer (like 5-10-10) to encourage bulb swelling rather than leafy growth. Stop fertilizing 2 weeks before harvest—excess nutrients can make the bulbs tough. With consistent care, your kohlrabi will be ready to pick in 50-60 days, delivering crisp, sweet bulbs straight from the garden.
Tips & tricks for perfect kohlrabi planting
These game-changing tips will help you avoid common pitfalls and ensure your kohlrabi seedlings thrive from day one.
Soil Preparation Secret: In Step 1, when loosening soil to 12 inches, don't just scratch the surface—break up any compacted layers with a broadfork. Kohlrabi roots need deep access to moisture and nutrients, especially in clay soils. I also like to add a handful of pelletized chicken manure (optional) to the bottom of each hole—this gives roots a nutrient boost right where they'll grow most actively. The key is creating a loose, crumbly texture that mimics the ideal growing conditions.
Planting Depth Matters: During Step 2, resist the urge to bury seedlings deeper than their root ball—this is where most gardeners go wrong. The top of the root ball should sit exactly even with the soil surface. If you bury too deeply, you'll invite rot at the stem base. I've seen this happen when planting in loose soil that settles after watering, so always press firmly around the base after planting to eliminate air pockets. This ensures immediate root-to-soil contact.
Watering Wisdom: The 1-inch deep watering in Step 3 is just the beginning. For the first 7-10 critical days, maintain this moisture level daily—kohlrabi seedlings are particularly sensitive to moisture stress. I use a rain gauge to track exactly how much water I'm applying, and I always water in the morning so foliage dries completely by evening. This simple habit prevents fungal issues that can devastate young plants. Consider installing a drip irrigation system if you're planting multiple rows—it delivers consistent moisture without the risk of overhead splashing.
Frost Protection Strategy: When temperatures dip below 50°F in Step 4, don't wait until morning to cover plants—act immediately at nightfall. I've learned this the hard way after losing entire batches to overnight frost. Use lightweight row covers that allow light penetration but block wind chill. For extra insurance, create a mini greenhouse effect by placing clear plastic domes over individual plants. This creates a microclimate that maintains warmth while still allowing photosynthesis.
Pro Tips for Planting Kohlrabi Seedlings
- These game-changing tips will help you avoid common pitfalls and ensure your kohlrabi seedlings thrive from day one.
- Soil Preparation Secret: In Step 1, when loosening soil to 12 inches, don't just scratch the surface—break up any compacted layers with a broadfork.
- Planting Depth Matters: During Step 2, resist the urge to bury seedlings deeper than their root ball—this is where most gardeners go wrong.
Frequently asked questions
Got questions about planting your kohlrabi seedlings? You’re not alone! Here are some of the most common concerns—and straightforward answers—to help you grow confidently.
When is the best time to transplant kohlrabi seedlings outdoors?
Plant your hardened-off seedlings 2–3 weeks after your last frost date when soil temperatures are at least 50°F (10°C). Kohlrabi thrives in cool weather—avoid transplanting if nighttime temps dip below 45°F (7°C) or exceed 75°F (24°C). Early spring or late summer (for fall harvests) are ideal windows.
How long does it take for kohlrabi seedlings to establish after transplanting?
Seedlings typically take 7–14 days to recover and start growing vigorously post-transplant. Watch for new leaf growth and sturdy stems—these are signs they’ve rooted well. Mulch lightly to retain moisture and reduce stress during this phase.
Can I harvest kohlrabi bulbs while they’re still small, or do I need to wait?
Yes! Kohlrabi bulbs are best harvested when 2–3 inches wide (about 4–6 weeks after transplanting) for tender, sweet flavor. Wait too long, and they’ll become woody. Pro tip: Harvest in the morning for crispness, and leave a few plants to mature for seeds if you’re saving them.
What should I do if my kohlrabi seedlings look wilted or yellow after transplanting?
Wilt or yellowing often signals transplant shock, overwatering, or pests. Check soil moisture (it should be damp but not soggy) and inspect leaves for aphids or flea beetles. If needed, trim damaged foliage and apply neem oil. Harden seedlings longer next time to toughen them up!
Are there any companion plants that help (or hurt) kohlrabi seedlings?
Kohlrabi loves companions like cabbage, onions, and lettuce, which deter pests. Avoid planting near tomatoes, strawberries, or cabbage family members (like broccoli) to prevent disease spread. Use straw mulch to suppress weeds and retain moisture—kohlrabi hates competition!
Wrapping up and next steps
You’ve got everything you need to plant your kohlrabi seedlings with confidence! 🌱 From choosing the right spot to spacing them properly, these steps ensure strong, healthy plants ready to thrive in your garden. Remember, consistency in watering and care will pay off with a bountiful harvest.
Now that your seedlings are hardened off and ready to go, roll up your sleeves and get planting! Once they’re in the ground, keep an eye on them and enjoy the satisfaction of watching your homegrown kohlrabi grow. Happy gardening! 🌟