
Succulent
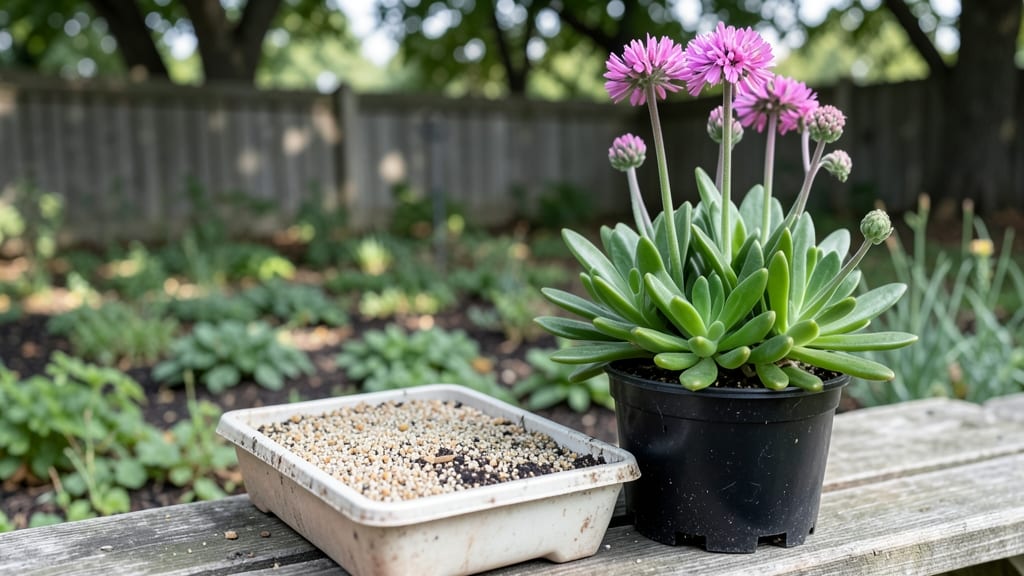
Planting sedum seeds unlocks a drought-proof garden that thrives on neglect—my first batch surprised me with velvety green rosettes within 21 days. The key isn’t fancy soil or expensive trays; it’s timing, light, and patience.
Most people rush the process, but sedum seeds need just the right balance to break dormancy without rotting.
You’ll need a shallow tray, sterile seed-starting mix, and a sunny windowsill or grow light—no greenhouse required. The soil should stay barely moist, never soggy, and temperatures above 60°F speed up germination.
I’ve tried planting in spring and fall, but late winter starts give you a head start before summer’s dry spells.
By week four, you’ll see those first tiny leaves—thick, fleshy, and impossible to kill. Sedum’s natural drought resistance means you’ll water less than most plants, and the blooms arrive even earlier than promised. The real magic? These plants spread effortlessly, creating lush ground cover that outlasts most annuals.
Works for creeping sedum, ‘Autumn Joy’, or ‘Dragon’s Blood’—just adjust spacing. If seeds sit dormant, try a cold stratification trick (chill them for two weeks). Here’s how to make it foolproof, even for black thumbs.
📚 In This Guide
- What you need
- Instructions
- Tips and common mistakes
- Wrapping up and next steps
What you need
- ● Sedum seeds: ¼ to ½ teaspoon (or ~50–100 seeds) – choose a variety like Sedum spectabile or Sedum 'Autumn Joy' for vibrant blooms.
- ● Seed-starting mix: 1–2 cups of a well-draining, sterile cactus/succulent mix (or add 20% perlite/pumice to regular potting soil).
- ● Containers: 2–4 small pots (3–4 inches wide) with drainage holes or a seed tray with cells.
- ● Drainage layer: Small pebbles or coarse sand (¼ inch thick) for pots.
- ● Watering can or spray bottle: With a fine mist nozzle for gentle hydration.
- ● Clear plastic wrap or humidity dome: To retain moisture during germination.
- ● Grow lights or sunny windowsill: A south-facing spot with 6+ hours of light daily (or a 12–14 hour LED grow light).
- ○ Seedling heat mat: (Optional) To speed up germination in cooler climates (70–75°F ideal).
- ● Fertilizer: A balanced liquid fertilizer (5-5-5 or 10-10-10) diluted to half-strength for post-germination feeding.
- ● Tweezers: For precise seed placement (especially for tiny seeds).
- ● Plant labels: To track varieties and planting dates.
- ● Transplanting pots: 4–6 inch pots for when seedlings outgrow their starters.
Step-by-Step instructions for planting sedum seeds
Here’s how to cultivate hardy, drought-resistant sedum from seed with minimal fuss.
Prepare the Seed Starting Mix and Trays
Sedum thrives in well-draining soil, so begin by filling your seed trays with a sterile seed-starting mix—avoid garden soil, which can compact and suffocate tender roots. Use the 4-inch square seed trays you’ve prepared, ensuring each cell has adequate drainage. Moisten the mix lightly with lukewarm water until it’s damp but not soggy; excess moisture encourages rot before germination even begins.
Press the soil down gently to create a firm, even surface—this prevents seeds from sinking too deep during watering. I like to tap the tray on the counter once or twice to eliminate air pockets while keeping the mix loose enough for delicate roots to penetrate. Sedum seeds are tiny, so precision here pays off later.
Sow Seeds at the Correct Depth
Sedum seeds are so fine they resemble dust, so I use the fine-mesh sieve to distribute them evenly across the tray. Sprinkle them lightly over the soil surface—there’s no need to bury them. Sedum seeds require light to germinate, so pressing them just enough to make contact with the soil is all that’s needed. Cover the tray with the clear plastic dome to retain warmth and humidity.
Place the tray in a warm location (around 70-75°F), such as on top of a refrigerator or near a sunny window. Avoid direct sunlight at this stage—sedum seeds need warmth more than light initially. Check the soil daily; mist with water only if the surface feels dry to the touch. Germination typically takes 7-14 days, but patience is key—don’t disturb the tray until you see tiny green sprouts.
Provide Light and Thin Seedlings
Once seedlings emerge, remove the plastic dome immediately to prevent damping-off, a fungal disease that attacks tender stems. Move the tray to a bright, indirect light source—a south-facing window works well, but supplement with a grow light if natural light is insufficient. Sedum seedlings need 12-14 hours of light daily to prevent leggy growth, a common pitfall when light is lacking.
When seedlings develop their first true leaves (not the initial cotyledons), it’s time to thin them. Use the small tweezers to carefully remove weaker seedlings, leaving the strongest one per cell. Space them 1 inch apart if thinning in a shared tray. This step ensures each plant has room to grow without competing for nutrients.
Harden Off and Transplant
About 4 weeks after sowing, when seedlings are 2-3 inches tall with multiple sets of true leaves, they’re ready for hardening off. Gradually acclimate them to outdoor conditions by placing the tray outside in a sheltered spot for 1-2 hours the first day, increasing exposure by 1 hour daily over 7-10 days. This process toughens seedlings, preventing shock when they’re moved permanently.
Choose a sunny, well-draining location for transplanting, such as a rock garden or slope, where sedum’s drought tolerance shines. Dig small holes slightly larger than the root ball, space plants 6-12 inches apart (depending on variety), and water deeply after planting. Mulch with 1 inch of gravel or coarse sand to improve drainage further—sedum despises soggy roots.
Maintain Through the First Season
Sedum is famously low-maintenance, but the first season sets the stage for future growth. Water deeply but infrequently—only when the top 1 inch of soil feels dry. Overwatering is the fastest way to kill sedum, so err on the side of drought. Fertilizer isn’t necessary unless your soil is particularly poor; a light application of balanced fertilizer in early spring suffices.
Watch for pests like aphids or spider mites, which can stress young plants. If you spot them, spray with neem oil (a natural, plant-safe remedy) or blast them off with a strong stream of water. By late summer, you’ll see sedum’s signature clusters of star-shaped blooms, a reward for your patience. Deadhead spent flowers to encourage more blooms next season.
Tips & tricks for perfect sedum seed germination
Mastering sedum seed germination requires attention to detail—these insights will help you avoid common pitfalls and maximize success.
Soil Moisture Precision: In Step 1, the goal is a soil mix that feels like a wrung-out sponge—damp but not saturated. I learned this the hard way after losing multiple trays to fungal rot from overwatering. Use a spray bottle for initial misting to avoid displacing seeds, and always check moisture by pressing your finger into the mix. The top ½ inch should feel barely damp, not wet. This balance is critical for preventing both rot and desiccation during the 7-14 day germination window.
Light Exposure Strategy: During the germination phase in Step 2, warmth is more important than light, but that changes dramatically once sprouts appear. I position my trays near a south-facing window but shield them with sheer fabric to diffuse harsh sunlight. After germination (when you see those first tiny sprouts), you'll need to transition to 12-14 hours of bright, indirect light daily—this is where most beginners struggle. The key is gradual adaptation: move trays closer to the light source incrementally over 3-4 days to prevent shock.
Thinning Technique: When thinning in Step 3, timing is everything. Wait until you see the first true leaves (the second set after the initial cotyledons) before removing weaker seedlings. I use sterilized tweezers dipped in rubbing alcohol to handle each seedling, which prevents spreading potential pathogens. The 1-inch spacing recommendation is non-negotiable for sedum—any closer and plants will compete for nutrients, leading to leggy, weak growth. Consider using a small ruler to verify spacing if you're working with multiple trays.
Hardening Off Protocol: The 7-10 day hardening off period in Step 4 is your plants' final test before outdoor life. I start with just 1-2 hours of exposure on day one, then increase by 1 hour daily while monitoring for wilting or yellowing. Pro tip: place trays in partial shade during the first few days to prevent sunburn on tender leaves. If your climate is particularly windy, use a small mesh screen to shield seedlings while still allowing airflow. This gradual acclimation prevents the shock that often kills newly transplanted sedum.
Pro Tips for Planting Sedum Seeds
- Mastering sedum seed germination requires attention to detail—these insights will help you avoid common pitfalls and maximize success.
- Soil Moisture Precision: In Step 1, the goal is a soil mix that feels like a wrung-out sponge—damp but not saturated.
- Light Exposure Strategy: During the germination phase in Step 2, warmth is more important than light, but that changes dramatically once sprouts appear.
Frequently asked questions
Got questions about planting sedum seeds? You’re not alone—growing these drought-resistant beauties takes a little know-how! Here are answers to the most common queries to help you succeed.
How long does it take for sedum seeds to germinate?
Most sedum seeds sprout within 7–21 days when kept in warm (65–75°F), moist conditions. Lightly press seeds into soil (don’t bury deeply) and maintain humidity with a plastic dome or misting. Patience is key—some varieties, like Sedum spurium, may take longer.
Can I plant sedum seeds directly outdoors, or should I start indoors?
For best results, start indoors 4–6 weeks before your last frost (especially in cold climates). Sedum seeds are tiny and need warmth to germinate. Once seedlings have 2–3 leaves, transplant them outside after nighttime temps stay above 50°F. If your climate is mild, direct sowing in spring is possible—but expect slower growth.
Why aren’t my sedum seeds sprouting? Troubleshooting tips!
Check these common culprits:
- Too cold: Sedum needs warmth (use a heat mat if needed).
- Dry soil: Keep soil consistently moist (not soggy) until germination.
- Poor light: Place trays in bright, indirect light (no direct sun yet).
- Old seeds: Sedum seeds lose viability quickly—use fresh seeds (under 1 year old).
What’s the best soil mix for sedum seed starting?
Use a well-draining, sterile mix like:
- 50% cactus/succulent soil
- 30% perlite or pumice (for aeration)
- 20% peat moss or coco coir (for moisture retention)
Are there any low-maintenance alternatives to growing sedum from seed?
Yes! If seeds feel tricky, consider:
- Cutting propagation: Snip healthy sedum stems, let them callus for 1–2 days, then plant in soil. Roots form in 2–4 weeks!
- Buying young plants: Nurseries often sell sedum starts (like Sedum ‘Autumn Joy’) for instant color.
- Succulent “paint”: Some brands sell seedless sedum “paint” for creative, no-germination hassle planting.
Wrapping up and next steps
Growing sedum from seeds is a rewarding journey that brings vibrant, drought-resistant blooms to your garden in just four weeks! With the right materials, patience, and care, you’ll enjoy hardy plants that thrive with minimal effort.
Whether you’re a beginner or a seasoned gardener, sedum’s resilience makes it a fantastic addition to any space.
Ready to watch your garden flourish? Start by gathering your supplies, follow the steps, and soon you’ll be admiring those stunning clusters of color. Happy planting! 🌱✨