
Lawn
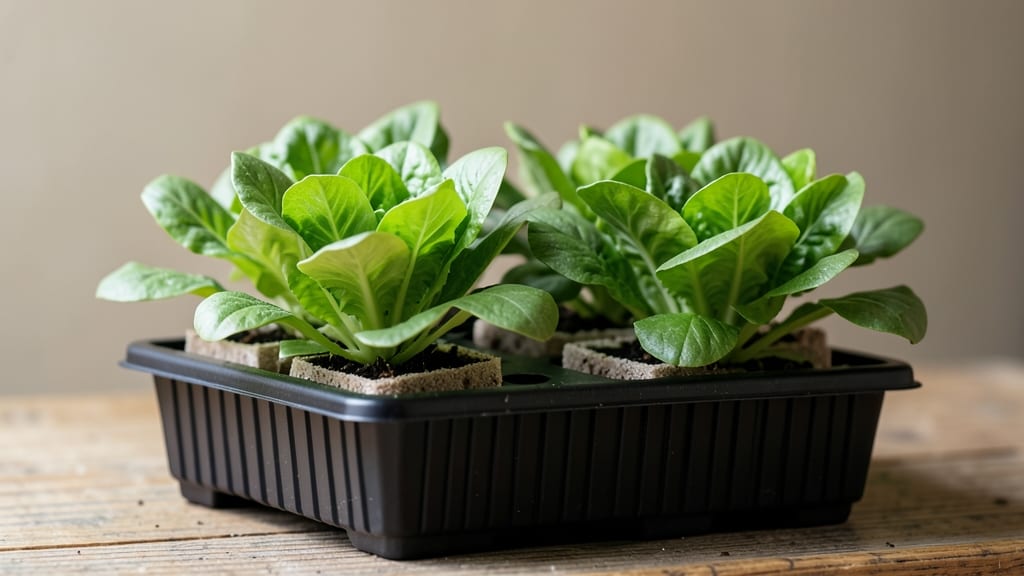
Soilless seed starter cubes cut my seedling time in half last spring—no more waiting weeks for stunted, leggy sprouts. 🌱 The key is their perfect balance of moisture retention and aeration, which keeps roots happy while you wait for true leaves.
Most beginners overwater these cubes, but the trick is gentle misting until they’re damp—not soggy—every other day.
You’ll need just three things: a tray or container with drainage, your starter cubes, and seeds. No fancy soil mixes or sterilizing equipment—just rinse the cubes before planting to wash away any preservatives.
The cubes work best for tiny seeds like lettuce or tiny flowers, but even tomatoes and peppers get a strong start this way.
Within a week, you’ll see sturdy seedlings with vibrant green leaves, ready to transplant without shock. The cubes dissolve right into the garden, so no root disturbance. I’ve saved hundreds of seedlings this way, and the cost per plant drops to almost nothing compared to store-bought transplants.
Works for both indoor windowsills and greenhouse setups—just adjust light and temperature. Here’s how to avoid the most common pitfalls and get flawless results every time.
📚 In This Guide
- What you need
- Instructions
- Tips and common mistakes
- Wrapping up and next steps
What you need
- ● Seed starter cubes – 1 pack (typically 20-50 cubes, depending on your needs). Look for biodegradable or coir-based options for eco-friendliness.
- ● Seeds – Choose fast-growing varieties like basil, lettuce, or marigolds for best results.
- ● Spray bottle – A 16-ounce misting bottle works perfectly for gentle hydration.
- ○ Clear plastic dome or plastic wrap – To create a mini greenhouse effect (optional but helpful for humidity).
- ● Tray or container – A shallow seedling tray (with drainage holes) or even a repurposed plastic container (e.g., a takeout box).
- ● Light source – A grow light (LED or fluorescent) or a sunny windowsill (south-facing is ideal).
- ● Tweezers or small spoon – For gently placing seeds into the cubes.
- ○ Fertilizer (optional) – A balanced liquid fertilizer (5-5-5 or 10-10-10) diluted to half-strength for early feeding.
- ● Labeling tags – To track seed varieties if growing multiple types.
- ○ Heating mat (optional) – Useful for slow-germinating seeds like tomatoes or peppers.
- ● Scissors – For trimming cubes to fit snugly in trays (if needed).
Step-by-Step instructions for using seed starter cubes
Here's how to get your seedlings off to a flying start with these handy soilless cubes.
🌱 Step 1: Soak the Starter Cubes
Place the seed starter cubes in a shallow tray and add enough water to cover them completely. Let them soak for about 15-20 minutes until they expand to roughly 1.5 times their original size. You'll know they're ready when they feel firm and hold their shape—no more crumbling like dry sponge.
Don't skip this step. Soaking ensures the cubes are fully hydrated, which helps seeds germinate faster and prevents them from drying out during the early stages. If you're in a hurry, you can speed this up by using warm water instead of room temperature.
💧 Step 2: Load the Cubes into a Tray
Once the cubes are fully soaked, transfer them to a seed-starting tray with a clear lid or humidity dome. Arrange them so they fit snugly, leaving no gaps. The tray should hold 4 cubes, so place each one in its own well if using a modular tray. If you're using a flat tray, just press them into place.
This setup keeps everything organized and makes it easy to move the tray around as your seedlings grow. The clear lid helps maintain humidity, which is especially important during the first week while seeds germinate. Just make sure to remove the lid once sprouts appear to prevent damping-off disease.
☀️ Step 3: Plant Your Seeds
Follow the seed packet instructions for planting depth—usually twice the diameter of the seed. Use a toothpick or your finger to make a small hole in the center of each cube. Drop 1-2 seeds per cube and cover lightly with a tiny bit of the moist starter material from the cube itself.
Here's the thing—don't press too hard when covering the seeds. You just want to tuck them in lightly so they stay in place. Over-pressing can bury them too deep, which slows down germination. If you're planting delicate seeds like lettuce or petunias, just press them into the surface without covering at all.
🌿 Step 4: Provide Warmth and Light
Place the tray in a warm spot with a temperature between 65-75°F. A seedling heat mat set to 75°F can speed up germination, especially for slower starters like parsley or carrots. Keep the cubes moist by misting them lightly with water every 1-2 days—just enough to keep the surface damp but not soggy.
Once seeds sprout, move the tray to a bright location with at least 12-14 hours of light daily. A south-facing window or a grow light works best. You'll see the first true leaves (not the initial seed leaves) appear in 7-14 days, depending on the plant. This is your signal that the seedlings are ready for more light and less humidity.
✂️ Step 5: Transplant When Ready
When seedlings develop 2-3 sets of true leaves (usually after 3-4 weeks), they're ready to move to larger pots or the garden. Gently squeeze the sides of the cube to release the seedling—no need to disturb the roots. Plant the entire cube into your soil or pot, then water lightly to help it settle.
The beauty of starter cubes is that they break down naturally in the soil, so you don't have to worry about removing them. Just make sure to harden off your seedlings by gradually exposing them to outdoor conditions for 5-7 days before planting outside. This helps them adjust to temperature and light changes without shock.
Tips & tricks for perfect seed starter cubes
A few quick tricks that'll help you get the fastest, most reliable starts with your seed starter cubes.
The Soaking Secret: During that 15-20 minute soak in Step 1, I like to use a spray bottle to gently mist the cubes while they absorb water. This helps them expand more evenly and prevents air pockets that can trap seeds too deeply. Don't let them dry out during this time—just enough water to keep the surface damp until they're fully expanded.
Cube Organization Tip: For Step 2, if your tray doesn't have dividers, create your own by pressing the cubes into place first, then gently drawing lines with a toothpick around each cube. This keeps them neatly separated and makes transplanting easier later. I've found this prevents cubes from merging together as they expand.
Temperature Matters: That 75°F heat mat recommendation in Step 4 is your secret weapon for fast germination. If you don't have one, place your tray on top of your refrigerator (not inside) for consistent warmth. For cooler climates, a sunny windowsill with a clear plastic wrap tent can create a mini greenhouse effect to maintain that ideal temperature range.
Lighting Hack: When you're waiting for those first true leaves in Step 4, position your grow light just 2-3 inches above the seedlings. You'll notice they'll naturally grow toward the light—this is called phototropism. Rotate the tray daily so all seedlings get even light exposure, preventing them from leaning toward one side.
Pro Tips for Seed Starter Cubes
- A few quick tricks that'll help you get the fastest, most reliable starts with your seed starter cubes.
- The Soaking Secret: During that 15-20 minute soak in Step 1, I like to use a spray bottle to gently mist the cubes while they absorb water.
- Cube Organization Tip: For Step 2, if your tray doesn't have dividers, create your own by pressing the cubes into place first, then gently drawing lines with a toothpick around each cube.
Frequently asked questions
Got questions about seed starter cubes?
You’re not alone! Here are answers to the most common queries—so you can grow confidently, whether you’re a gardening newbie or a seasoned green thumb.
What are seed starter cubes made of?
Seed starter cubes are typically crafted from biodegradable materials like peat moss, coconut coir, or a blend of organic fibers. These cubes are designed to retain moisture while allowing airflow—perfect for nurturing delicate seedlings without soil mess. Always check the label for specifics, as some brands add nutrients or mycorrhizal fungi for extra growth boosts.
How long do seed starter cubes last before seeds sprout?
Most seeds sprout within 5–14 days in starter cubes, depending on the plant type. Fast growers like lettuce or radishes may sprout in 3–7 days, while slower varieties (e.g., tomatoes or peppers) can take 10–14 days. Keep them in a warm, humid environment with indirect light for best results. If nothing emerges after 3 weeks, your seeds may be old or damaged.
Do I need to water seed starter cubes differently?
Yes! Unlike soil, cubes dry out much faster. Water them gently from the bottom (place the tray in ¼-inch of water for 10–15 minutes) to avoid displacing seeds. Avoid soggy cubes—drain excess water to prevent root rot. A spray bottle works for top-ups, but consistency is key: keep the cubes consistently moist, not soaked.
Can I reuse seed starter cubes?
Most starter cubes are single-use because they break down as roots grow. However, some peat-based cubes can be sterilized and reused for fast-growing herbs (like basil) if you:
- Rinse them thoroughly to remove debris.
- Soak in a 10% bleach solution (1 part bleach to 9 parts water) for 10 minutes, then rinse well.
- Let them dry completely before replanting.
Pro tip: If reusing, skip heavy feeders like tomatoes—they’ll deplete nutrients quickly.
Why are my seedlings leggy or weak in starter cubes?
Leggy seedlings usually mean too little light or overcrowding. Fix it by:
- Moving cubes within 1–2 inches of a grow light (12–16 hours/day).
- Thinning seedlings if they’re touching—snip with scissors at soil level.
- Ensuring cubes aren’t overwatered (root rot weakens stems).
If stems are already stretched, bury them deeper when transplanting—they’ll grow stronger from the base!
Wrapping up and next steps
Seed starter cubes are a game-changer for gardeners looking to boost germination rates and grow stronger seedlings with minimal fuss! 🌱 Whether you're a beginner or a seasoned pro, these soilless cubes offer a clean, efficient, and eco-friendly way to kickstart your plants.
With the right setup and a little patience, you’ll be transplanting vibrant, healthy seedlings in no time.
Ready to take the next step? Start small—try a few cubes with your favorite fast-growing herbs or veggies, like basil or lettuce. Once you’ve mastered the basics, experiment with larger batches or even unusual plants like succulents or microgreens.
Happy growing—your future garden (and your plants!) will thank you! 🌿✨