Companion Plants
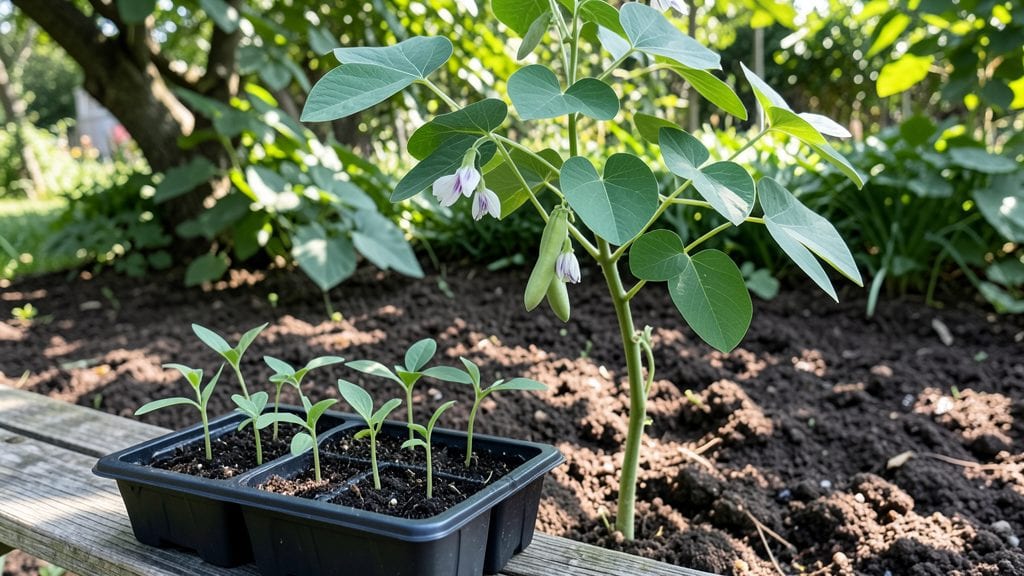
Turning seeds into plants faster than you thought possible. ✨ I’ve watched tiny specks of life push through soil in half the usual time using this layered cold moisture trick—no fancy equipment, just a few simple steps that trick seeds into waking up early.
The secret lies in mimicking nature’s own germination cues: damp, cool soil that signals it’s time to grow. You’ll need a shallow tray, some damp paper towels, a plastic bag, and your seeds—nothing more.
This method works for everything from lettuce to tomatoes, and it’s especially game-changing for slow starters like parsley or peppers.
By the time you’re ready to transplant, you’ll have sturdy seedlings with real leaves—not just weak sprouts. The soil stays moist without drowning roots, and the whole process cuts germination time by 30-50%. No more waiting weeks for tiny shoots to appear.
Works just as well indoors or outdoors, so whether you’re starting a windowsill garden or prepping for spring planting, this trick saves time and frustration. Let’s get those seeds sprouting!
📚 In This Guide
- What you need
- Instructions
- Tips and common mistakes
- Wrapping up and next steps
What you need
- ● Seeds: Choose fresh, high-quality seeds (organic or heirloom work great!). Aim for 10–20 seeds per variety to maximize success.
- ● Growing Medium: Peat pellets (1–2 inches in diameter) OR
- ● Coconut coir discs (biodegradable and eco-friendly)
- ● Seed-starting mix (lightweight, sterile blend—avoid garden soil)
- ● Containers: Seed trays (with drainage holes) OR
- ● Small pots (2–4 inches in diameter) OR
- ● Repurposed containers (yogurt cups, egg cartons—just poke holes for drainage!)
- ● Water: Room-temperature, dechlorinated water (let tap water sit out for 24 hours or use filtered water).
- ● Spray bottle (16 oz, with a fine mist setting for gentle hydration).
- ● Plastic wrap or humidity dome (to retain moisture during cold stratification).
- ● Plastic bag or airtight container (for storing seeds during the cold phase).
- ● Labeling supplies: Toothpicks + permanent marker OR plant tags (to track varieties!).
- ● Heat mat (for post-cold-germination warmth, if needed).
- ● Grow lights (LED or fluorescent, 12–16 hours/day once sprouts emerge).
- ● Seedling fertilizer (diluted to half-strength, like fish emulsion or seaweed extract).
- ● Thermometer/hygrometer (to monitor temps/humidity—ideal range: 40–50°F (4–10°C) for cold stratification).
- ● Compost or worm castings (for nutrient boost once seedlings sprout).
Step-by-Step instructions for layered cold moisture germination
This method speeds up germination by mimicking natural soil moisture—no fancy tools required.
🌱 Step 1: Prepare Your Seeds and Materials
Start by selecting 4 seed varieties that benefit from cold stratification (like poppies, delphiniums, or some wildflowers). Soak the seeds in lukewarm water for 12 hours—this softens the outer coating and kickstarts hydration. I use a small bowl and cover it loosely with plastic wrap to keep moisture in while preventing mold.
While the seeds soak, prepare a 1-gallon container with a mix of 50% peat moss and 50% perlite. This blend holds moisture without compacting. Moisten it until it feels like a damp sponge—squeeze a handful, and just a few drops should escape. This ensures the seeds stay hydrated without becoming waterlogged.
💧 Step 2: Layer Seeds in Moistened Soil
Spread the dampened mix in the container to a depth of 2 inches. Create shallow grooves about ¼ inch deep and space them 1 inch apart—this prevents overcrowding as roots develop. Place the soaked seeds in the grooves, spacing them ½ inch apart within each groove. Cover them lightly with a thin layer of the moist mix, just enough to bury them but not smother them.
Here’s the trick: Gently press the soil over the seeds with your fingers to ensure full contact. You’ll see the grooves disappear slightly—this ensures consistent moisture reaches every seed. Avoid packing it down too firmly, or you’ll restrict airflow and risk mold. A light mist with a spray bottle keeps everything evenly damp.
⏰ Step 3: Apply the Cold Moisture Layer
Once the seeds are covered, add a 1-inch layer of moistened perlite on top. This layer acts as a moisture reservoir while allowing airflow to prevent rot. Perlite’s porous nature also mimics the natural cold, moist conditions many seeds need to germinate. Place the container in a refrigerator set to 34-40°F—this triggers the cold stratification process.
Check the container after 7 days. The perlite should still feel damp but not soggy. If it’s dry, lightly mist it with water and return it to the fridge. Some seeds may start to sprout during this phase—don’t be alarmed. This is normal and indicates the cold treatment is working. Leave them in the fridge for a total of 2-4 weeks, depending on the seed type.
☀️ Step 4: Transition to Warmth for Germination
After the cold treatment, move the container to a warm, bright location like a sunny windowsill or under a grow light. The temperature should now be 65-75°F—this shift signals the seeds to break dormancy and germinate. Keep the perlite layer moist but not wet; you’ll see condensation form on the container’s sides, which is a good sign.
Germination typically occurs within 7-14 days after moving to warmth. You’ll notice tiny green shoots pushing through the perlite first, followed by the seed leaves. Once the seedlings reach 1 inch tall, carefully remove the perlite layer and transplant them into individual pots with potting mix. This step is delicate—use a small spoon to lift the seedlings gently by their roots.
🌿 Step 5: Care for New Seedlings
Place the transplanted seedlings under grow lights or in a spot with 6+ hours of sunlight daily. Water the soil when the top ½ inch feels dry—this prevents overwatering, which can cause damping-off. You’ll see the seedlings grow more vigorously once they’ve adjusted to their new environment. Fertilize lightly with a balanced liquid fertilizer diluted to half-strength after 4 weeks.
Real talk: Some seedlings may struggle or fail to germinate, even with this method. If that happens, don’t panic—just replant a few extra seeds to ensure you have enough strong starts. Within 6-8 weeks, your seedlings should be ready to transplant outdoors or into larger containers, depending on your growing plans.
Tips & tricks for perfect layered cold moisture germination
Here's what nobody tells you about getting every last seed to sprout—these tricks make all the difference between a few sad sprouts and a thriving seedling army.
The Soaking Secret: Don't skip the 12-hour soak—this is where the magic begins. I learned this the hard way after trying to rush the process. The lukewarm water should feel like bathwater, not scalding. If you're short on time, you can extend the soak to 24 hours for extra-tough seed coats, but don't go beyond that or you risk over-hydrating.
Layering Like a Pro: In Step 2, when you're creating those grooves, make them just deep enough to hold the seeds without burying them completely. Think of it like making tiny trenches—you want the seeds to peek through slightly. This ensures they get both moisture and light once they start sprouting. The ¼-inch depth is perfect for most seeds, but if you're working with larger seeds like poppies, you can go slightly deeper.
Cold Treatment Precision: That 34-40°F refrigerator range is critical—any warmer and you're not doing proper cold stratification. I keep mine at exactly 38°F by placing the container on the bottom shelf. Check the perlite layer after exactly 7 days, not a minute sooner. If it feels dry, give it a light mist with water and return it immediately. Some seeds will start sprouting during this phase, which is actually a good sign—they're breaking dormancy early.
Transplanting Without Trauma: When those seedlings hit 1 inch tall in Step 4, handle them like they're made of glass. Use a small spoon to gently lift them from the perlite—never pull from the top. The roots will be delicate but determined. This is where most people lose seedlings, so take your time. A pair of tweezers can help if you're feeling particularly nervous about handling them directly.
Pro Tips for Seeds Into Plants
- Here's what nobody tells you about getting every last seed to sprout—these tricks make all the difference between a few sad sprouts and a thriving seedling army.
- The Soaking Secret: Don't skip the 12-hour soak—this is where the magic begins.
- Layering Like a Pro: In Step 2, when you're creating those grooves, make them just deep enough to hold the seeds without burying them completely.
Frequently asked questions
Got questions about transforming seeds into thriving plants using the layered cold moisture method? You’re not alone! Here are some of the most common queries—and their straightforward answers—to help you grow with confidence.
What’s the best way to layer seeds for cold moisture stratification?
Place seeds in a damp paper towel or sphagnum moss, then sandwich them between layers of moistened peat moss or coconut coir in a sealed container. Keep it in the fridge (34–41°F) for 4–12 weeks, depending on the seed type. Pro tip: Label your containers to track germination progress!
How long does it take for seeds to sprout using this method?
Germination timelines vary by seed type—some (like maple or oak) may take 8–12 weeks, while others (e.g., wildflowers) sprout in 2–4 weeks. Check weekly for signs of life (tiny roots or green sprouts) and adjust moisture as needed.
Can I reuse the cold moisture setup for multiple seed types?
Not ideal! Different seeds need specific moisture levels and stratification durations. For example, eucalyptus seeds thrive with high humidity, while apple seeds prefer drier conditions. Use separate containers to avoid cross-contamination or uneven results.
What if my seeds rot instead of sprouting?
Over-moisture is the culprit! Ensure your setup has drainage holes and avoid soggy conditions. If mold appears, discard the batch and start fresh with fresh, sterile moss. Pro tip: Spritz lightly with a spray bottle instead of soaking.
Are there seeds that don’t need cold stratification?
Tropical seeds (e.g., avocado, citrus, or hibiscus) and many annuals (like marigolds or sunflowers) germinate best at room temperature. Check seed packets for instructions—some even say “no stratification needed!”
Wrapping up and next steps
Transforming seeds into thriving plants is a rewarding journey, and the layered cold moisture trick gives you an edge by mimicking nature’s best conditions for faster, stronger germination. 🌱 Whether you’re a seasoned gardener or just starting, this method saves time and boosts success—so grab those seeds and let your green thumb shine!
Ready to take the next step? Start small with a few easy-to-grow seeds like beans or marigolds, then expand your garden as confidence (and harvests!) grow.