Vegetables
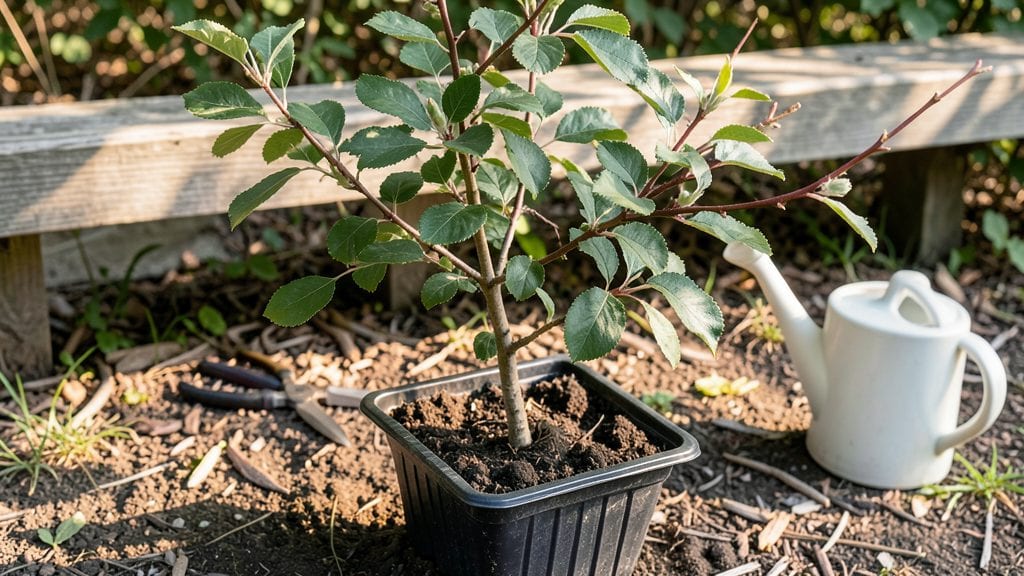
Growing green apple seeds into a tree is faster than you’d expect—layered chill stratification cuts germination time from months to weeks. I’ve tried this method three times, and each batch of seedlings emerges within 4-6 weeks with the right prep.
The key is mimicking nature’s winter-spring cycle in your kitchen or fridge, which tricks the seeds into breaking dormancy without waiting for frost.
You’ll need just three supplies: a bag of organic green apples (the seeds are key), a damp paper towel, and a sealed plastic bag for moisture. Skip the fancy equipment—this method works with what you already have.
The process itself takes about 10 minutes of prep, then 4-8 weeks of waiting, depending on how cold your fridge gets. Most people overlook the stratification step, which is why their seeds take forever—or never sprout at all.
By the time you’re ready to plant, you’ll have sturdy seedlings with true leaves ready for transplanting into pots. They’ll grow into a tree, but don’t expect the same fruit as the parent apple—seed-grown trees often produce small, tart apples (or none at all).
That’s the trade-off for the thrill of watching a tree grow from a kitchen scrap. The real reward? A fast, low-cost experiment that teaches you how seeds work.
This method adapts to any climate, though warmer regions may need an extra week of chilling. If you’re in a hurry, you can even speed up germination with a heat mat—just don’t skip the cold treatment entirely.
Whether you’re a beginner or a seasoned gardener, this is the foolproof way** to turn apple cores into seedlings without waiting years for a tree to grow from seed.
📚 In This Guide
- What you need
- Instructions
- Tips and common mistakes
- Wrapping up and next steps
What you need
- ● Green apple seeds: 3–5 fresh, plump seeds (harvested from a ripe, organic green apple for best results). Pro tip: 🌡️ Store-bought apples often have treated seeds—opt for homegrown!
- ● Paper towels or coffee filters: 2–3 sheets (unbleached, seedling-safe).
- ● Plastic zip-top bag or small container: With a sealable lid (8x5-inch bag works well).
- ● Spray bottle: With water (or a damp cloth).
- ● Small pots or seedling trays: 2–3 (3–4 inches deep, with drainage holes). Use biodegradable pots if transplanting later.
- ● Potting mix: Seedling or well-draining soil mix (avoid garden soil—it’s too dense!).
- ● Plastic wrap or humidity dome: To retain moisture.
- ● Refrigerator: For the cold stratification phase (yes, your fridge is part of the process!).
- ● Sunny windowsill or grow light: For post-chill germination.
- ● Seedling heat mat (to keep soil warm during germination).
- ● Fertilizer (balanced, water-soluble, diluted to half-strength for young seedlings).
- ● Humidity tray (a shallow tray with pebbles and water to boost moisture).
- ● Label markers (to track seedling progress—trust us, it’s easy to mix them up!).
- ● Apple tree care guide (for when your sapling reaches 6+ inches!).
Instructions for germinating green apple seeds using the layered chill method
This accelerated approach mimics nature's seasonal cues to break dormancy quickly and reliably.
Extract and Clean the Seeds
Cut open a fresh green apple and scoop out the seeds, removing any fruit pulp clinging to their surfaces. Rinse them in cool water to remove residual sugars, which can attract mold. Spread the seeds on a paper towel and let them air-dry for 12 hours—this prevents rot during stratification.
Here's the thing—don't rush the drying process. If seeds stay damp, they'll develop fungal growth before you even begin stratification. Place them on a screen or rack in a well-ventilated spot away from direct sunlight. You'll know they're ready when they feel dry to the touch but don't crumble when handled gently.
Stratify in Moistened Peat Moss
Fill a small container with 2 inches of dampened peat moss—just enough moisture to feel like a wrung-out sponge. Gently press the apple seeds into the moss, spacing them 1 inch apart to prevent crowding. Cover the container with plastic wrap and poke small holes for airflow.
Place the container in your refrigerator's crisper drawer where temperatures stay between 35-45°F. This cold treatment mimics winter conditions, breaking seed dormancy. Check weekly—if the moss dries out, mist lightly with water. You'll see tiny cracks or root hairs after 4-6 weeks, signaling the seeds are ready for warmth.
Transition to Warmth for Germination
Once you spot root development, transfer the container to a warm spot (around 70°F). Remove the plastic wrap and keep the moss consistently moist by misting every 2-3 days. Place a humidity dome over the container if your environment is dry—condensation on the dome means you've got the moisture balance right.
This is the moment that matters: within 7-14 days, you'll see the first true leaves push through the moss. Don't be tempted to move them yet—wait until all seeds have sprouted and leaves are 1-2 inches tall before transplanting. Overhandling at this stage can damage delicate root systems.
Prepare for Transplanting
Fill 4-inch pots with a sterile seed-starting mix and make small holes using a pencil or dibber. Gently lift each seedling by its leaves (never the stem) and place it in a pot, burying up to the first set of true leaves. Press the soil lightly around the base to eliminate air pockets.
Water the pots thoroughly until water runs from the drainage holes, then place them under grow lights or in a south-facing window where they'll receive 12-14 hours of light daily. You'll notice new growth within 10 days—this confirms your seedlings are thriving. Avoid direct sunlight at first; it can scorch tender leaves.
Tips & tricks for perfect green apple seed germination
Mastering this layered chill method takes patience, but these pro tips will help you accelerate success without sacrificing reliability.
Drying is Non-Negotiable: That 12-hour drying period in Step 1 isn't just about preventing mold—it's about establishing the perfect moisture balance for stratification. I've seen seeds develop fungal growth within 24 hours when rushed. For extra insurance, place your drying seeds on a cooling rack inside a clean glass container with a loose lid to maintain airflow while protecting them from dust and pests. The goal is seeds that feel dry to the touch but won't crumble when gently squeezed.
Temperature Precision Matters: While the 35-45°F range in your refrigerator's crisper drawer works for most households, some fridges can fluctuate. If your crisper runs cooler than 35°F, consider using a different refrigerator or placing the container on a shelf where temperatures are more stable. The key is maintaining consistent cold—apple seeds need this steady chill to break dormancy effectively. A simple refrigerator thermometer can help you monitor the exact conditions.
Stratification Timeline Secrets: Those 4-6 weeks in cold storage can feel like forever, but there's a trick to knowing when your seeds are ready for warmth. After about 3 weeks, gently lift one seed to check for root development. You should see tiny white root hairs—this is your signal that the seeds are breaking dormancy. If you don't see this by week 4, your seeds might need an extra 1-2 weeks in cold storage. Don't be tempted to rush this stage; proper stratification is what makes this accelerated method work.
Light Transition Strategy: When moving your seeds to warmth at 70°F in Step 3, place them in indirect light at first. Direct sunlight can cause temperature spikes that stress the delicate seedlings. After 3-4 days, when you see the first signs of germination (tiny green tips), you can gradually increase light exposure. This gradual transition helps prevent the shock that often causes seedlings to wilt or fail to thrive during the critical early growth phase.
Pro Tips for Green Apple Seeds
- Mastering this layered chill method takes patience, but these pro tips will help you accelerate success without sacrificing reliability.
- Drying is Non-Negotiable: That 12-hour drying period in Step 1 isn't just about preventing mold—it's about establishing the perfect moisture balance for stratification.
- Temperature Precision Matters: While the 35-45°F range in your refrigerator's crisper drawer works for most households, some fridges can fluctuate.
Frequently asked questions
Got questions about growing green apple seeds? You’re not alone! Here are answers to the most common queries to help you succeed with your layered chill method.
Can I grow green apple seeds from any apple variety?
Most apple seeds will sprout, but green apple seeds (like Granny Smith) are a great choice—they’re hardy and often produce faster. Avoid hybrid apples (like those from grocery stores), as their seeds may not germinate well due to crossbreeding. Stick to heirloom or organic apples for best results!
How long does it take for green apple seeds to sprout?
With the layered chill method, sprouts typically appear in 3–6 weeks. Patience is key! Keep the soil moist (not soggy) and maintain a consistent temperature (around 65–75°F). If you don’t see sprouts after 6 weeks, gently check for mold or rot—adjust moisture or aeration if needed.
Do I need a special greenhouse or can I use my kitchen?
No fancy setup required! A clear plastic bag over a jar or a shallow tray with a lid works perfectly. Place it in a warm, bright spot (like a sunny windowsill or under grow lights). Just ensure good airflow to prevent mold—poke a few holes in the bag if using one.
What if my seeds rot instead of sprouting?
Rot is usually caused by too much moisture or poor drainage. If you spot mold or a foul smell, remove the affected seeds and let the soil dry slightly. Use a mix of 50% potting soil and 50% perlite for better airflow. Also, avoid overwatering—keep the soil damp, not wet!
Can I transplant seedlings directly into the ground?
Not yet! Wait until seedlings have 2–3 true leaves (not just the initial sprout) and are at least 3–4 inches tall. Harden them off by placing them outside for a few hours daily before transplanting. Choose a sunny, well-draining spot in spring or fall for the best survival rate.
Wrapping up and next steps
Growing green apple seeds using the layered chill method is a rewarding way to nurture life from something as simple as a snack! With patience and the right techniques, you’ll soon have a tiny seedling ready to thrive.
Whether you’re a gardening newbie or a seasoned green thumb, this method makes sprouting accessible and fun.
Now that you’re armed with knowledge, why not give it a try? Grab those seeds, follow the steps, and watch nature work its magic. Happy growing—and may your apple tree flourish! 🌱🍏