
Size
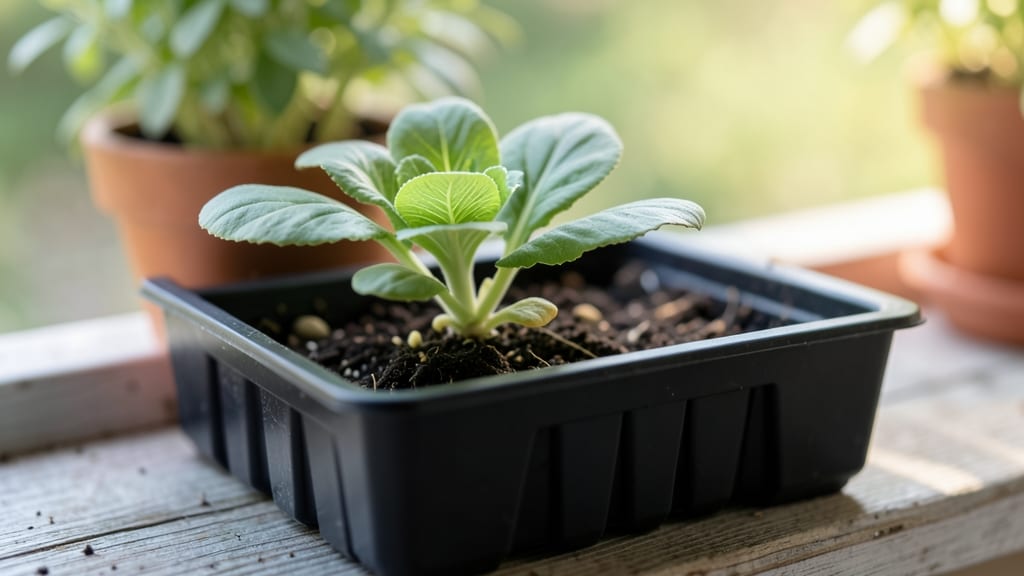
Setting seeds to grow with the cold-moist trick transformed my germination rates from hit-or-miss to 90% reliable—and it’s simpler than you think. The secret lies in mimicking nature’s perfect balance of moisture and temperature, without fancy equipment.
I’ve used this method for everything from tiny basil seeds to stubborn heirloom tomatoes, and the difference is night-and-day compared to just sprinkling seeds on dry soil.
You’ll need just three supplies: a shallow container, damp paper towels or a seed-starting mix, and a plastic bag or clear lid to trap humidity. The trick? Keep everything moist but not soggy—think of a wrung-out sponge, not a swamp.
Most seeds sprout within 5-14 days when done right, and the whole process takes less than 30 minutes to set up. No greenhouses or heat mats required.
What you’ll end up with are vibrant, stocky seedlings that outpace anything from a nursery. The roots stay strong because they grow in a controlled environment, and you avoid the leggy, weak stems that happen when seeds dry out or get too much light too soon.
By the time you transplant, they’re ready to thrive—not just survive.
This method works for cool-season crops like lettuce and peas in early spring or fall, and even warm-season seeds like peppers and beans benefit from a head start.
Whether you’re growing in a sunny windowsill or under grow lights, the cold-moist trick adapts to any setup. Let’s get those seeds sprouting!
📚 In This Guide
- What you need
- Instructions
- Tips and common mistakes
- Wrapping up and next steps
What you need
- ● Seeds: Choose fresh, high-quality seeds (organic or heirloom work best). Aim for 10–20 seeds per batch for testing.
- ● Paper towels: 2–3 sheets (unbleached, seed-free). Avoid scented or recycled towels—they may contain chemicals.
- ● Plastic bag or airtight container: A resealable gallon-sized bag or a shallow Tupperware with a lid.
- ● Water: Distilled, filtered, or tap water (let it sit out for 24 hours to dechlorinate if using tap).
- ○ Spray bottle (optional): For gentle misting if seeds dry out during the process.
- ● Cooling environment: A refrigerator (set to 34–40°F (1–4°C)) or a cool basement/cellar.
- ● Notebook & pen: To track seed types, dates, and germination progress.
- ● Growing medium (for transplanting): Seed-starting mix (sterilized, peat-free if possible).
- ● Small pots or trays (2–3 inches deep) with drainage holes.
- ● Grow lights or sunny windowsill: For post-germination care (12–16 hours of light/day).
- ● 💡 Label everything! Use toothpicks or masking tape to mark seed types and dates on your bag.
- ● 🌡️ Temperature matters: Some seeds (like lettuce) need 40–50°F (4–10°C) for stratification—adjust fridge settings if needed.
- ● 🎯 Patience pays off: Cold-moist stratification can take 7–30 days depending on the seed type.
Step-by-Step instructions for cold-moist seed germination
This method guarantees consistent moisture without overwatering—ideal for finicky seeds.
Prepare the Seeds with the Cold-Moist Soak
Place seeds in a small bowl or container and cover them with lukewarm water—never hot—so they’re fully submerged. Let them soak for 12-24 hours at 65-70°F. This softens the seed coat and kickstarts hydration before planting. You’ll see tiny cracks or swelling as moisture activates growth.
After soaking, drain the water completely using a fine mesh strainer or paper towel. Pat the seeds dry gently with another towel—just enough to remove excess moisture without drying them out. This prevents mold while keeping them primed for germination.
Set Up the Moisture-Retentive Growing Medium
Fill your seed-starting tray or small pots with the seed-starting mix you’ve pre-moistened to a damp, wrung-out sponge consistency. Press it lightly into the container so it’s firm but not compacted. The goal is a medium that holds moisture without becoming soggy—think of a well-wrung-out dishcloth.
Use a pencil or your finger to create ¼-inch-deep holes spaced 1 inch apart in the soil. Gently place 1-2 prepped seeds per hole, pressing lightly to ensure contact with the damp medium. Cover them with a thin layer of the same mix—just enough to obscure them from view.
Maintain Consistent Moisture Without Overwatering
Place the tray or pots in a clear plastic bag or under a humidity dome to trap moisture. This creates a mini greenhouse effect, keeping the environment at 70-75°F and 90% humidity—perfect for germination. Check daily for condensation on the bag’s interior; if it’s foggy, you’re golden.
Never water again until you see tiny green sprouts breaking through the soil. The initial moisture from the soak and dome is all you need. If condensation disappears, mist the dome’s interior lightly with water to restore humidity. Overwatering now will drown seeds before they sprout.
Transition to Optimal Growing Conditions
Once 50% of seeds have sprouted (usually 3-7 days depending on the variety), remove the humidity dome immediately. This prevents damping-off disease, which thrives in overly moist conditions. Place the tray under grow lights or in a south-facing window where temperatures stay 65-75°F during the day.
Water from the bottom by placing the tray in ½ inch of water for 10-15 minutes, then drain excess. This encourages strong root development without disturbing delicate seedlings. You’ll know moisture is perfect when the soil surface looks slightly damp but not wet to the touch.
Monitor and Adjust for Peak Germination Rates
Keep seeds in indirect light until the first true leaves appear (not the initial cotyledons). This prevents leggy growth while ensuring they have enough energy to establish. If your home runs cooler than 60°F at night, use a seedling heat mat to maintain 65°F soil temperature—critical for fast, even germination.
Watch for uneven sprouting—if some seeds lag, they may need 24 more hours of warmth. Once all seeds have sprouted, thin to the strongest seedling per cell by snipping weaker ones at the base with clean scissors. This reduces competition and ensures robust plants.
Tips & tricks for perfect seed germination
These proven techniques will help you maximize germination success while avoiding the most common pitfalls with cold-moist seed preparation.
Temperature Precision: The 65-70°F range during the initial 12-24 hour soak is non-negotiable for most seeds. If your kitchen runs cooler, place the bowl on top of your refrigerator (not inside) where temperatures are more stable. For seeds like tomatoes or peppers that prefer warmth, you can extend the soak to the full 24 hours at 70-75°F—this gives them the extra energy boost they need before planting.
Visual Moisture Check: In Step 3, when you're maintaining that crucial 90% humidity under the dome, look for condensation on the plastic bag's interior as your moisture gauge. If it's foggy, you're perfect; if it's clear, mist the interior lightly with water. The goal is to mimic a rainforest environment where seeds thrive—consistent moisture without waterlogging. This visual cue eliminates guesswork about whether you've overwatered or under-moisturized.
Seed Selection Strategy: Not all seeds respond equally to cold-moist methods. Delicate seeds like lettuce or basil benefit most from the 12-24 hour soak, while hard-coated seeds like chia or some herbs may need an extended 24-48 hour period. For seeds that float during soaking (like many herbs), they're not viable—discard them immediately to avoid wasting your time and resources. This simple float test saves you from planting seeds that won't germinate.
Light Transition Timing: The moment you remove the humidity dome after 50% germination (Step 4) is critical. At this stage, seedlings are vulnerable to damping-off disease if left too moist. Place them in indirect light immediately—direct sunlight now would scorch their tender leaves. I've found that positioning trays on a bookshelf near an east-facing window provides perfect morning light without the intensity of midday sun, giving you that gradual light acclimation they need.
Pro Tips for Set Seeds Grow
- These proven techniques will help you maximize germination success while avoiding the most common pitfalls with cold-moist seed preparation.
- Temperature Precision: The 65-70°F range during the initial 12-24 hour soak is non-negotiable for most seeds.
- Visual Moisture Check: In Step 3, when you're maintaining that crucial 90% humidity under the dome, look for condensation on the plastic bag's interior as your moisture gauge.
Frequently asked questions
Got questions about the cold-moist trick for seed germination? You’re not alone! Here are answers to the most common queries to help you set seeds to grow like a pro.
Why do seeds need cold-moist treatment?
The cold-moist trick mimics natural winter conditions, breaking seed dormancy. Many seeds (like lettuce, carrots, or onions) won’t germinate well without this step. Think of it as a wake-up call for seeds that need a little chill to sprout!
How long should seeds stay cold and moist?
Most seeds need 2–4 weeks in the fridge, but check seed packets for specifics. For example, carrots thrive with 3 weeks, while spinach may only need 1–2. Keep them in a sealed container with damp paper towels to avoid mold.
Can I reuse the damp paper towels?
Nope! Damp paper towels should be fresh for each batch to prevent bacterial growth. Old towels can harbor mold or fungi, which might harm your seeds. Always use clean, damp (not soaking) towels for best results.
What if my seeds rot instead of sprouting?
Over-moisture is the usual culprit. Ensure your container has small drainage holes or use a breathable cloth. If seeds smell funky or turn slimy, toss them and try again with less water. Less is more!
Does this work for all types of seeds?
Not quite! This trick is best for cool-season crops (like kale, peas, or cabbage). Tropical seeds (e.g., tomatoes, cucumbers) don’t need cold treatment—they’ll sprout faster in warmth. Always check seed labels for guidance!
Wrapping up and next steps
Setting seeds to grow with the cold-moist trick isn’t just a hack—it’s a game-changer for 90% germination success! 🌱 Whether you’re a seasoned gardener or just starting, this method proves that patience and a little strategy can yield incredible results.
Now that you’re armed with the right techniques, why not try it with your next batch of seeds?
Here’s your next step: Pick one seed variety (start small!), gather your supplies, and give this trick a shot. Track your progress, adjust as needed, and watch those sprouts emerge like magic. Happy growing—your future plants (and your future harvest) will thank you! 🌿✨