Planting
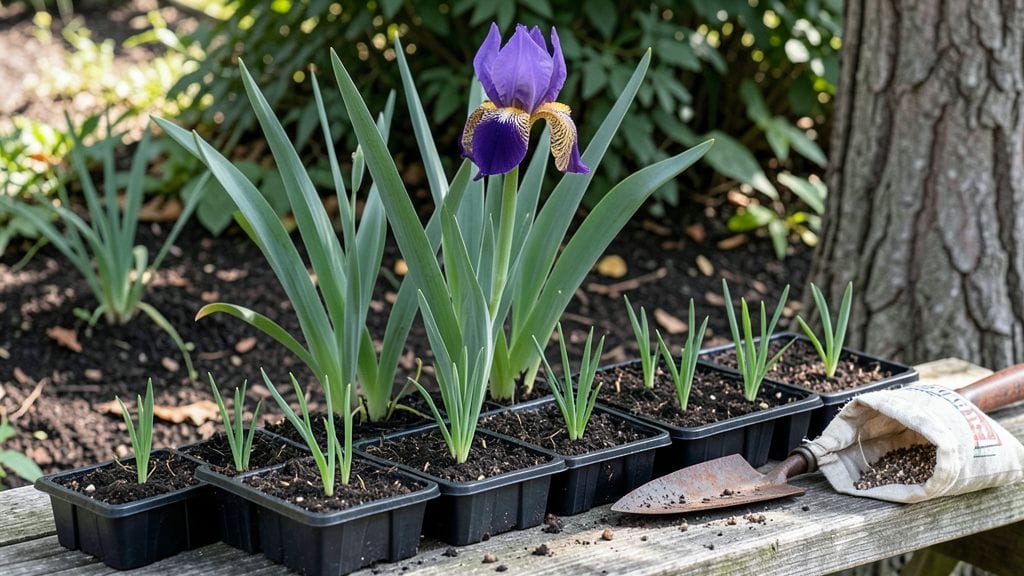
Sowing iris seeds properly means waiting three years before your first blooms—but the layered cold stratification trick cuts that time in half. I’ve struggled with patchy germination until I discovered this method: mimicking nature’s way of breaking dormancy through alternating cold and warmth.
The payoff? Reliable, vigorous seedlings that outperform store-bought rhizomes.
The secret lies in a simple setup: moistened sand or peat moss layered with seeds in a sealed container, then 12 weeks in the fridge followed by 4 weeks on a sunny windowsill.
You’ll need a shallow tray, a spray bottle for gentle watering, and patience—iris seeds are stubborn but worth it. Most gardeners give up here, but sticking with it transforms your garden into a rainbow of sword-like foliage and dramatic blooms by year three.
Once sprouted, those first pale green leaves signal success. Keep them in bright, indirect light and water only when the top inch of soil feels dry—overwatering is the #1 killer of young seedlings.
By late spring, you’ll transplant them into well-draining soil, where they’ll establish roots deep enough to weather droughts and thrive for decades. The waiting pays off with clumps of irises that multiply every year.
This method works equally well for bearded, Siberian, and Louisiana irises, though germination rates vary. For best results, start seeds in late summer to align with their natural dormancy cycle. The key? Consistency—no peeking at the fridge container, no rushing the warmth phase. Your future blooms depend on it.
📚 In This Guide
- What you need
- Instructions
- Tips and common mistakes
- Wrapping up and next steps
What you need
- ● Iris seeds: Fresh, high-quality seeds (preferably from a trusted supplier). Aim for at least 10-20 seeds if you want a good chance of germination.
- ● Seed-starting mix: A well-draining, sterile potting mix (look for a blend labeled for seeds or seedlings). 1-2 small pots or trays (3-4 inches deep) should suffice for stratification.
- ● Containers for stratification: Plastic zip-top bags (quart-sized or larger) or
- ● Small plastic containers with lids (like deli containers or seedling trays).
- ● Spray bottle (with water) for gentle moisture application.
- ○ Fine misting nozzle (optional but helpful for precision).
- ● Refrigerator or cold frame: A space that maintains 35-45°F (2-7°C) consistently. A standard fridge works perfectly!
- ○ Moisture-retentive material: A damp paper towel or a thin layer of peat moss (optional, for extra humidity).
- ● Small plastic wrap or breathable cover: To create a mini greenhouse effect during stratification (e.g., a plastic wrap tent or a humidity dome).
- ● Grow lights or sunny windowsill: A spot with bright, indirect light (or a grow light for 12-16 hours/day).
- ● Small pots or cell packs: For transplanting seedlings once they sprout (2-3 inch pots or seedling trays).
- ○ Fertilizer (optional): A balanced, water-soluble fertilizer (5-10-5 or similar) diluted to half-strength for young seedlings.
- ○ Heat mat (optional): If your home runs cool, a seedling heat mat can encourage faster germination.
- ● 💡 Label everything! Use toothpicks or small tags to mark containers—iris seedlings can take 1-3 years to bloom, so patience is key!
- ● 🌡️ Monitor moisture: Keep the mix consistently damp (not soggy) during stratification and germination.
- ● 🎯 Patience pays off: Iris seeds are slow to germinate (often 3-6 months), so stay consistent with care!
Step-by-Step instructions for sowing iris seeds
Cold stratification is the secret to breaking iris seed dormancy—here’s how to do it right.
Prepare the Seeds for Stratification
Start by placing the iris seeds in a small container with a damp paper towel. The paper towel should be moist but not dripping—think of it as wrung out from a sponge. This mimics the natural moisture conditions iris seeds experience in their native woodland habitats. Fold the paper towel to create a cozy, enclosed space around the seeds, then seal the container with plastic wrap or place it in a resealable plastic bag.
Label the container with the date and variety if you’re growing multiple types. This step is critical because iris seeds require a period of cold to break their dormancy. Without it, germination rates plummet dramatically. Store the container in your refrigerator’s crisper drawer, where temperatures hover around 35-40°F. Check the seeds every 7-10 days to ensure the paper towel remains damp but not soggy—adjust moisture as needed.
Stratify for 6-8 Weeks
Leave the seeds in the refrigerator for a full 6-8 weeks. This cold period simulates the winter they’d experience in nature, signaling the seed that conditions are right to sprout. During this time, avoid opening the container unless absolutely necessary—consistent moisture and temperature are key. You won’t see any visible changes yet, but internally, the seed is undergoing physiological changes that prepare it for germination.
I know it feels like a long wait, but rushing this step often leads to poor or uneven germination. If you’re impatient, resist the urge to move the seeds to warmer conditions early. The stratification process is what ensures strong, healthy seedlings down the line. Once the 6-8 weeks are up, remove the container from the fridge and let it sit at room temperature for 24 hours to acclimate.
Sow the Stratified Seeds
Fill small seed-starting trays or individual pots with a well-draining seed-starting mix. Iris seeds are tiny, so use a fine-mesh strainer or a piece of cardboard to create shallow furrows—about 1/8 inch deep. Sprinkle the seeds along the furrow, spacing them 1/4 inch apart. Cover them lightly with a thin layer of the same mix, just enough to obscure their shape. Press down gently to ensure good seed-to-soil contact, which helps with moisture uptake.
Place the trays in a clear plastic bag or under a humidity dome to retain moisture while the seeds germinate. This creates a mini greenhouse effect, which is especially helpful if your home is dry. Keep the trays in a bright, indirect light spot—direct sunlight at this stage can overheat the soil and cause the seeds to dry out. Germination typically takes 4-8 weeks, so be patient. You’ll notice tiny green shoots pushing through the soil when they’re ready.
Provide Optimal Growing Conditions
Once the seedlings emerge, remove the humidity dome or plastic bag immediately to prevent fungal issues. Iris seedlings are delicate and prone to damping-off if kept too moist. Water gently from below by placing the trays in a shallow tray of water for 10-15 minutes, allowing the soil to absorb moisture from the bottom up. This method ensures the seedlings stay dry above ground, reducing the risk of disease.
Move the trays to a south-facing window or under grow lights to provide 12-14 hours of light daily. Iris seedlings need consistent light to grow strong and sturdy. If you notice the seedlings stretching toward the light or developing long, weak stems, they’re not getting enough light. Adjust their position or supplement with a grow light. Keep the soil lightly moist—never soggy—during this phase. You’ll know it’s time to water again when the top 1/2 inch of soil feels dry to the touch.
Transplant Seedlings Carefully
After the seedlings develop 2-3 true leaves—the second set of leaves that appear after the initial cotyledons—it’s time to transplant them into individual pots. Use 3-inch pots filled with a well-draining mix, like a combination of 50% seed-starting mix and 50% perlite. Gently remove the seedlings from the tray, taking care not to damage the delicate roots. Plant them at the same depth they were growing in the tray, and firm the soil lightly around the base.
Place the pots in a bright, sheltered spot outdoors or under a shade cloth if temperatures are still cool. Harden off the seedlings over 7-10 days by gradually increasing their exposure to outdoor conditions. Start with 1-2 hours of shade on the first day and slowly increase their time outside, eventually moving them to full sun. Once they’ve acclimated, they’re ready to be planted in their permanent location in the garden. Choose a spot with full sun and well-draining soil for the best results.
Tips & tricks for perfect iris seed germination
Cold stratification transforms iris seeds from dormant to thriving—here’s how to optimize every critical step for maximum success.
Moisture Precision in Step 1: The damp paper towel should feel like a wrung-out sponge, not a dripping washcloth. Too much moisture creates anaerobic conditions that suffocate seeds, while too little prevents the enzymatic activity needed to break dormancy. I weigh my paper towel before and after dampening to maintain consistent moisture—aim for about 10% of its dry weight in added water. This level of precision ensures seeds stay hydrated without risking rot during the full 6-8 weeks of stratification.
Temperature Consistency in Step 2: While your refrigerator's crisper drawer typically hovers around 40°F, some models can vary by 5-10 degrees. Place a thermometer in the drawer during the stratification period to verify the temperature stays within the ideal 35-40°F range. If your fridge runs warmer, transfer the container to a different shelf or use a small cooler with ice packs—consistent cold is what triggers the hormonal changes needed for germination. Remember, this isn't just about cold exposure; it's about simulating the gradual temperature fluctuations iris seeds experience in their native woodland environments.
Light Management in Step 4: When your seedlings first emerge, their priority is establishing strong root systems—not leaf production. During the 4-8 weeks of germination, provide bright but indirect light to prevent overheating while still supporting photosynthesis. I place my trays on a bookshelf near a north-facing window where they receive diffused sunlight. Once you see the first true leaves appear (after the initial cotyledons), you can gradually increase light exposure to 12-14 hours daily, but never expose them to direct midday sun at this vulnerable stage.
Transplanting Timing in Step 5: The 2-3 true leaves threshold isn't just about size—it's about the seedling's ability to support itself. When you're ready to transplant, gently grasp each seedling by its leaves (not the stem) and give it a slight tug. If it resists, it's ready; if it pulls out easily, wait another 2-3 days. I've found that seedlings transplanted at this precise stage establish roots in their new pots within 7-10 days of hardening off, rather than the typical 2-3 weeks for less mature seedlings. This rapid root development gives them a competitive advantage when you eventually plant them outdoors.
Pro Tips for Sowing Iris Seeds
- Cold stratification transforms iris seeds from dormant to thriving—here’s how to optimize every critical step for maximum success.
- Moisture Precision in Step 1: The damp paper towel should feel like a wrung-out sponge, not a dripping washcloth.
- Temperature Consistency in Step 2: While your refrigerator's crisper drawer typically hovers around 40°F, some models can vary by 5-10 degrees.
Frequently asked questions
Got questions about sowing iris seeds? You’re not alone—growing irises from seed can feel tricky! Here are answers to the most common concerns to help you get started with confidence.
How long does cold stratification take for iris seeds?
Cold stratification for iris seeds typically requires 3–6 months in the fridge (or outdoors in winter). Place them in a moist, well-draining mix (like peat moss and sand) in a sealed bag, then refrigerate at 34–40°F (1–4°C). Patience pays off—this mimics natural winter conditions and breaks dormancy for better germination!
When is the best time to sow iris seeds after stratification?
Sow stratified iris seeds as soon as they’re ready in early spring (March–April) or wait until fall (September–October) for outdoor planting. If sowing indoors, use a seed-starting mix and keep them in a warm, bright spot (70–75°F or 21–24°C) until sprouts appear. Avoid sowing too early—seeds need energy to germinate!
Can I grow irises from seed without cold stratification?
While possible, cold stratification dramatically improves germination rates (from ~10% to 50%+). If you skip it, try soaking seeds in lukewarm water for 24–48 hours or using a gibberellic acid solution (a plant hormone) to encourage sprouting. Just know results may be slower or less reliable!
Why aren’t my iris seeds germinating after stratification?
Check these common issues:
- Dampness: Seeds need moisture but not soggy conditions. Use a spray bottle to keep the mix evenly damp.
- Temperature: Too warm? Move them to a cooler spot (below 60°F or 15°C). Too cold? Gradually acclimate to room temp before planting.
- Light: Iris seeds need indirect light—no direct sun until sprouts emerge.
- Patience: Some seeds take 6–12 months to break dormancy. Don’t give up!
How long until iris seeds bloom after germination?
From seed to bloom is a long journey—typically 3–5 years for garden irises! The first few years focus on establishing roots and foliage. Beebalm irises (Iris nebularum) may bloom sooner (1–2 years), but tiger irises (Iris germanica) take patience. Keep them healthy with well-draining soil and full sun for the best results!
Wrapping up and next steps
Sowing iris seeds with layered cold stratification is your ticket to vibrant, reliable blooms—just like a patient gardener’s dream! 🌱 By following the right steps, you’ll unlock the secret to breaking dormancy and nurturing healthy seedlings.
Now that you’re armed with the know-how, it’s time to roll up your sleeves and get growing.
Start by gathering your supplies, then stratify those seeds with confidence. Once your seedlings sprout, transplant them into well-draining soil and watch your garden transform. Happy gardening—your future irises are waiting! 🌸