
Watering
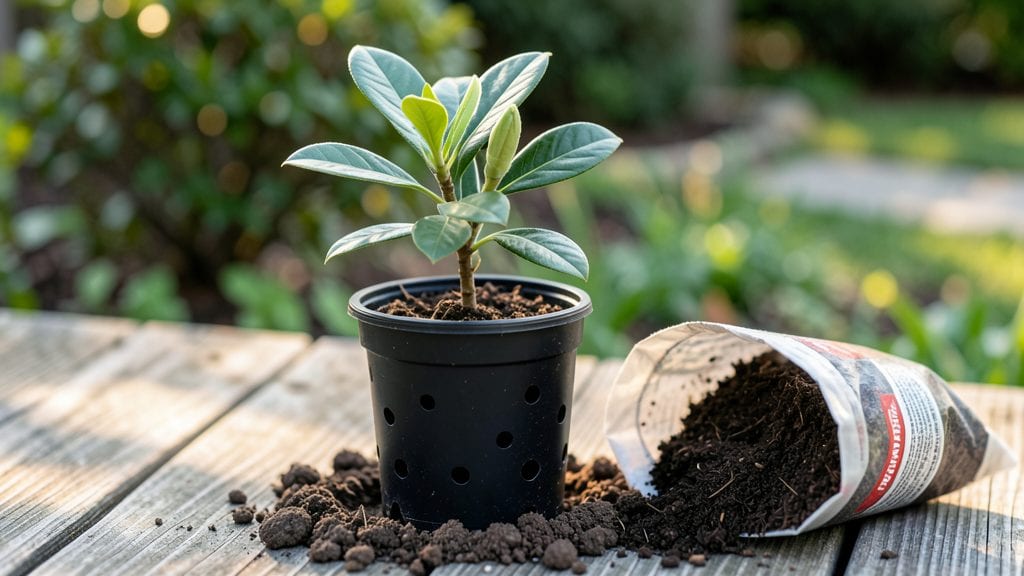
Growing a sweetbay magnolia seedling starts with keeping the soil consistently moist—this delicate balance is what separates thriving seedlings from those that wither before they even sprout. 🌱 I’ve nurtured dozens of these seedlings, and the layered moisture method has become my go-to technique for ensuring strong, healthy starts without the guesswork.
The secret lies in mimicking their natural forest-floor environment where moisture lingers just beneath the surface. You’ll need a well-draining mix of peat moss, perlite, and compost, layered carefully in your seedling tray. This setup maintains moisture while preventing root rot, which is the #1 killer of young magnolias.
The process is straightforward but requires patience—think of it as creating a mini ecosystem where your seedling can thrive from day one.
Within just a few weeks, you’ll see those first tender leaves unfurl, signaling that your moisture strategy is working. The seedlings develop a deep green hue and sturdy stems, ready to handle the next phase of growth.
This method works year-round, though spring and fall planting times yield the most reliable results in most climates.
Even experienced gardeners sometimes struggle with magnolia seedlings, but this approach eliminates the common pitfalls. Whether you’re dealing with dry spells or overwatering, the layered moisture technique gives you control. Once you’ve mastered it, you’ll wonder why you ever worried about these finicky seedlings in the first place.
📚 In This Guide
- What you need
- Instructions
- Tips and common mistakes
- Wrapping up and next steps
What you need
- ● Sweetbay magnolia seeds: 5–10 fresh, viable seeds (harvested from ripe, healthy fruit or purchased from a trusted supplier).
- ● Seed-starting mix: 1 part peat moss or coco coir + 1 part perlite or vermiculite (sterilized and well-draining). Mix in a 10-inch container.
- ● Clear plastic dome or plastic wrap: Large enough to cover your seed tray or container (to create humidity).
- ● Spray bottle (fine mist): 8–16 oz capacity for gentle hydration.
- ● Small seed tray or nursery pot: 6–8 inches wide with drainage holes (or a repurposed container like a takeout container with holes poked in the bottom).
- ● Drainage tray or saucer: To catch excess water and prevent root rot.
- ● Pencil or toothpick: For gently pressing seeds into the soil.
- ○ Heat mat (optional but recommended): 70–80°F range to encourage germination (especially in cooler climates).
- ● Grow lights or sunny windowsill: 6–8 hours of indirect light daily (sweetbay magnolias love brightness!).
- ● Humidity tray with pebbles: If your space isn’t naturally humid, place the tray on a bed of damp pebbles.
- ● Fungicide (organic, like neem oil or cinnamon): A light spray to prevent mold if humidity is high.
- ● Plant labels & marker: To track seed varieties and planting dates.
- ● Fine-mesh screen: For covering seeds if pests (like ants) are a concern.
How to germinate sweetbay magnolia seeds using the layered moisture method
This approach mimics the seed's natural forest floor environment—moist, shaded, and gradual—for reliable sprouts.
🌱 Step 1: Prepare Seeds for Stratification
Sweetbay magnolia seeds require cold stratification to break dormancy. Place the seeds in a ziplock bag with a damp paper towel—enough moisture to feel like a wrung-out sponge. Seal the bag and refrigerate for 90-120 days at 35-40°F. Check monthly to ensure the towel stays damp; if it dries, mist lightly.
Here's the thing—don't rush this step. Seeds need consistent cold to simulate winter conditions. After 120 days, transfer the bag to room temperature for 2-3 weeks to let them acclimate before planting. You'll see a slight softening of the seed coat when it's ready.
💧 Step 2: Layer Moisture in the Germination Tray
Fill a clear plastic container with 2 inches of moistened sphagnum moss—this holds water while allowing airflow. Gently press the stratified seeds ½ inch deep into the moss, spacing them 1 inch apart. Mist the moss until it feels like a damp sponge, but avoid puddles.
Cover the container with plastic wrap and poke a few small holes to prevent mold. Place it in indirect light—bright but not direct sun—to encourage slow, steady germination. The key is maintaining even moisture without waterlogging the seeds.
⏰ Step 3: Monitor for Sprouts and Adjust Conditions
Germination takes 4-8 weeks, but patience is critical. When tiny roots appear, uncover the container and move it to 60-65°F under grow lights for 12-14 hours daily. You'll see the first cotyledons (seed leaves) emerge within 2-3 weeks after roots appear.
If the moss dries out, mist it lightly—never soak. Overwatering at this stage causes rot. Once seedlings reach 2 inches tall, transplant them into 4-inch pots with well-draining potting mix. Real talk: The first true leaves signal it's time to harden off gradually before outdoor planting.
☀️ Step 4: Transition to Containers and Light
Use the 4-inch pots filled with sterile potting mix to give seedlings room to grow. Plant each seedling 1 inch deep, firming soil gently around the stem. Place pots under bright, indirect light for 2 weeks to prevent shock from transplanting.
After 2 weeks, introduce morning sun for 1-2 hours daily, increasing exposure over 10 days. You'll notice stronger stems and deeper green leaves as they adapt. Keep soil consistently moist—never soggy—by watering at the base when the top ½ inch feels dry.
Tips & tricks for perfect sweetbay magnolia seedling germination
These subtle adjustments make all the difference between struggling sprouts and thriving seedlings.
Stratification Temperature Precision: The 35-40°F range is non-negotiable for breaking dormancy. Use your fridge's crisper drawer if it's too warm—this maintains consistent cold without risking freezer burns. I've seen seeds fail when temperatures fluctuate above 45°F during stratification. For extra reliability, place a thermometer in the bag to monitor—anything above 42°F slows the process significantly.
Moss Moisture Technique: The secret to maintaining even moisture in Step 2 lies in the misting method. Use a spray bottle with fine mist setting and apply water to the container's sides rather than directly onto seeds. This prevents puddles while ensuring the 2-inch moss layer stays uniformly damp like a wrung-out sponge. I've found that checking moisture by lifting the container (it should feel about 10% heavier than dry) is more reliable than visual inspection.
Light Transition Strategy: When moving seedlings to grow lights in Step 3, position them 6-8 inches below the bulbs initially. Magnolia seedlings are sensitive to light intensity—too much too soon causes leaf scorch. Gradually increase light exposure over 5-7 days by lowering the height by 1 inch each day. This mimics natural forest understory conditions where light filters gradually through canopy layers.
Transplanting Timing: Wait until seedlings develop their first true leaves before transplanting to 4-inch pots in Step 4. The cotyledons (initial leaves) aren't strong enough to support new growth. I've learned this the hard way—transplanting too early leads to stunted growth as the seedlings expend energy recovering from shock rather than developing roots. Once you see the second set of leaves, you're ready for the next growth phase.
Pro Tips for Sweetbay Magnolia Seedling
- These subtle adjustments make all the difference between struggling sprouts and thriving seedlings.
- Stratification Temperature Precision: The 35-40°F range is non-negotiable for breaking dormancy.
- Moss Moisture Technique: The secret to maintaining even moisture in Step 2 lies in the misting method.
Frequently asked questions
Got questions about growing your sweetbay magnolia seedling? You’re not alone! Here are answers to the most common concerns to help you nurture your tree with confidence.
How long does it take for sweetbay magnolia seeds to germinate using the layered moisture method?
The layered moisture method can speed things up, but patience is key! Sweetbay magnolia seeds typically take 4–12 weeks to germinate. Keep the soil consistently moist (not soggy) and warm (around 70–80°F) to encourage sprouting. If no seedlings appear after 3 months, they may need a cold stratification period (mimicking winter) to break dormancy.
Do sweetbay magnolia seedlings need cold stratification before planting?
Yes! Cold stratification helps break seed dormancy. After scarifying your seeds (scratching the hard outer shell), store them in a damp paper towel or peat moss in the fridge for 60–90 days at 34–40°F. This mimics winter conditions and can dramatically improve germination rates. Skip this step, and you might be waiting much longer for sprouts!
What’s the best soil mix for sweetbay magnolia seedlings?
Sweetbay magnolias thrive in well-draining, acidic soil (pH 5.0–6.0). Mix equal parts peat moss, perlite, and pine bark fines for ideal aeration and moisture retention. Avoid heavy clay soils, which can suffocate roots. A 5–10% sand addition helps prevent compaction, especially in containers.
Why are my sweetbay magnolia seedlings turning yellow or wilting?
Yellowing leaves (chlorosis) or wilting often signal overwatering, underwatering, or poor drainage. Check the soil—it should feel like a damp sponge, not a swamp. If roots are mushy or the pot lacks drainage holes, repot immediately. Yellowing can also indicate nutrient deficiency; a balanced fertilizer (low in nitrogen) every 2–3 months helps.
Can I transplant a sweetbay magnolia seedling outdoors too soon?
Hold off until your seedling has 3–5 true leaves and sturdy roots (about 6–12 months old). Transplant in spring or early fall to avoid heat stress. Harden off seedlings gradually by exposing them to outdoor conditions for 1–2 hours daily over 1–2 weeks. Choose a sheltered, partially shaded spot for the first year to reduce transplant shock.
Wrapping up and next steps
Growing a sweetbay magnolia seedling using the layered moisture method is a rewarding way to nurture this fragrant beauty with minimal stress! 🌱 By keeping the soil consistently damp, protecting your seedling from extreme temperatures, and providing gentle care, you’ll give it the best start for thriving blooms.
Now that you’re equipped with the right techniques, it’s time to roll up your sleeves—your magnolia’s future fragrance-filled future begins with your first careful steps!
Next up: Once your seedling sprouts and grows a few inches, consider transplanting it into a larger pot or garden bed (with proper drainage!) to keep it happy and healthy. Happy gardening! 🌿