
Watering
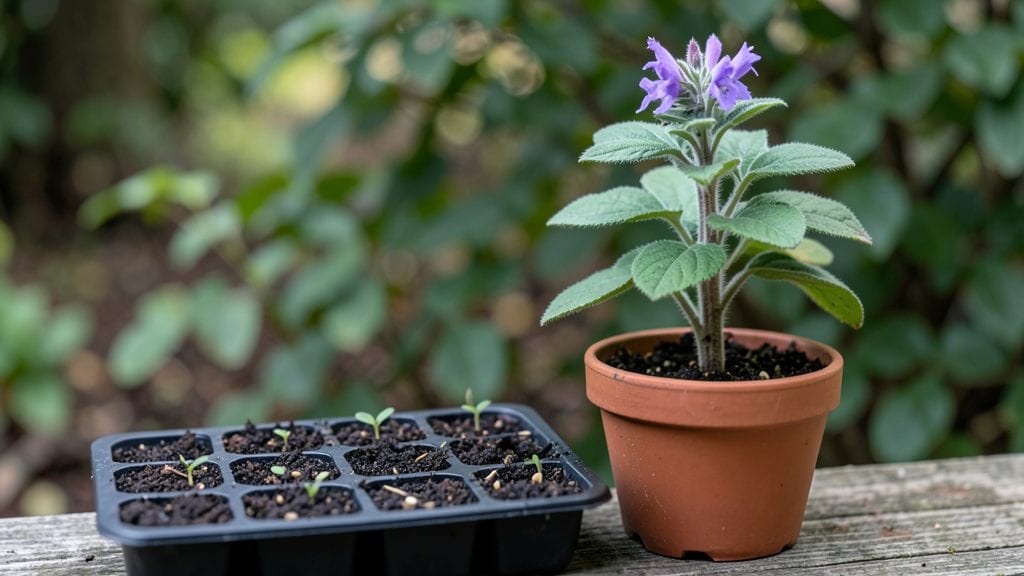
Cold-stratifying wood betony seedlings unlocks their full potential—those delicate stems and purple blooms won’t disappoint if you get this step right. 🌱 I’ve struggled with leggy, weak seedlings until I learned the secret: mimicking winter’s chill breaks their dormancy and builds sturdier roots before planting.
The process is simpler than it sounds, but timing matters—start now for spring blooms.
You’ll need just three things: a sealed plastic bag with a damp paper towel, a handful of moistened potting mix, and your seedlings themselves. Place them in the fridge for 4-6 weeks at 34–40°F, checking weekly to keep everything damp but not soggy.
Most beginners overlook the moisture balance—too dry and the seeds won’t germinate; too wet and they’ll rot. Think of it like giving them a gentle winter nap.
After stratification, you’ll transplant sturdy seedlings with deep green leaves that resist damping-off disease. Keep them in bright, indirect light for 2 weeks before moving to full sun, and water gently at the soil line to avoid disturbing those tender roots.
The first flush of blooms arrives 6-8 weeks after transplanting—earlier than most perennials—and they’ll reward you with months of cheerful purple spikes.
This method works for both indoor starts and direct-sown seeds, making it perfect for gardeners in zones 4-8. The key is patience—rushing the cold treatment or skipping it leads to weak plants that flop in summer heat.
Trust the process, and you’ll have a self-seeding woodland staple that thrives with almost no fuss.
📚 In This Guide
- What you need
- Instructions
- Tips and common mistakes
- Wrapping up and next steps
What you need
- ● Wood betony seeds: Fresh, high-quality seeds (aim for 10–20 seeds per batch).
- ● Cold stratification setup: A sealed plastic bag or container with a breathable lid (e.g., a Ziploc bag with small holes).
- ● Moistened peat moss or coconut coir: Enough to fully enclose seeds (about 2–3 cups).
- ○ Optional: A damp paper towel as an alternative medium.
- ● Growing containers: Small seedling trays or pots (3–4 inches deep) with drainage holes.
- ● Seed-starting mix: Lightweight, well-draining potting soil (avoid garden soil).
- ● Misting bottle or spray nozzle: For gentle hydration.
- ● Refrigerator or cold frame: A space to maintain 35–45°F (2–7°C) for stratification (typically 4–8 weeks).
- ● Grow lights or sunny windowsill: For post-stratification growth (12–16 hours of light daily).
- ● Humidity dome or clear plastic wrap to retain moisture during early growth.
- ● pH test kit (ideal soil pH: 6.0–7.0 for wood betony).
- ● Fertilizer (balanced 10-10-10 or organic compost) for transplanting.
- ● Heat mat (if starting seeds indoors in cooler climates).
How to cold-stratify wood betony seeds for strong seedlings
Cold stratification mimics nature’s winter cycle—this is how I ensure wood betony seeds break dormancy reliably.
🌱 Step 1: Prepare the Seeds for Stratification
Wood betony seeds have a hard outer coating that requires 6-8 weeks of cold, moist conditions to soften. Start by placing them in a paper towel or coffee filter and dampen it with room-temperature water until evenly moist but not dripping. Fold the towel to encase the seeds loosely—too tight and they’ll suffocate.
Place the folded towel in a resealable plastic bag and squeeze out excess air before sealing. Label the bag with the date and variety. This creates a controlled, humid microclimate that prevents drying while allowing oxygen exchange. I keep mine in a ziplock bag with a tiny hole poked in the corner—just enough to prevent mold but maintain moisture.
❄️ Step 2: Simulate Winter Conditions
Store the sealed bag in your refrigerator’s crisping drawer, where temperatures hover around 35-40°F. This mimics the natural cold period wood betony seeds experience in the wild. Check the seeds every 7-10 days—they should remain moist but not soggy. If the towel dries out, mist it lightly with water and reseal.
After 6-8 weeks, the seeds will look slightly swollen or cracked. This is your cue that stratification is working. Don’t rush—understratified seeds may sprout weakly or not at all. I’ve learned the hard way that patience here pays off in robust seedlings.
🌿 Step 3: Sow Stratified Seeds in Growing Medium
Fill a 4-inch seedling tray with a sterile, well-draining potting mix (I use a blend of peat moss and perlite for aeration). Press the mix down gently to remove air pockets but avoid compacting it. Wood betony seeds are tiny—scatter them ¼ inch deep across the surface, spacing them ½ inch apart.
Lightly cover the seeds with a fine layer of the same mix (no more than ⅛ inch thick). Mist the surface with water until the top layer is damp but not wet. Place the tray in a humidity dome or clear plastic bag to retain moisture. Keep it in a warm (65-70°F) location away from direct sunlight—seeds need warmth to germinate, not light.
☀️ Step 4: Provide Ideal Germination Conditions
Germination typically occurs in 14-28 days, though some seeds may take longer. Keep the humidity dome in place until 50% of seeds have sprouted, then remove it to prevent fungal issues. Once seedlings emerge, move the tray to a bright, indirect light source (a north-facing window or grow light on a 12-hour cycle).
Water from the bottom by placing the tray in ¼ inch of water for 10-15 minutes, then drain excess. This prevents disturbing delicate roots. You’ll know the seedlings are thriving when they develop first true leaves (the second set after the initial cotyledons). At this stage, they’re ready for gradual acclimation to outdoor conditions.
⏰ Step 5: Harden Off and Transplant
Begin hardening off seedlings 2-3 weeks before the last frost by placing them outside in a sheltered, shaded spot for 1 hour daily. Increase exposure by 1 hour each day until they can tolerate 6+ hours of sunlight. This toughens their cell walls and prepares them for transplanting.
Choose a partially shaded location with moist, well-draining soil for planting. Space seedlings 12-18 inches apart to allow for their bushy growth habit. Water deeply at the base after transplanting to encourage root establishment. Mulch with 1 inch of organic matter to retain moisture and suppress weeds.
Tips & tricks for perfect wood betony seedling stratification
These essential strategies will help you navigate the delicate balance of moisture, temperature, and timing to achieve the strongest possible wood betony seedlings.
Moisture Management: In Step 1, when dampening the paper towel, aim for a consistency where water gently beads up rather than pooling. Too much moisture creates anaerobic conditions that can lead to mold or rot, while too little prevents the seeds from softening properly. I've found that using a spray bottle for the initial misting gives me more control than soaking—just until the towel looks like a wrung-out sponge. After sealing in the bag, the tiny hole I poke in the corner is critical: it prevents pressure buildup while still maintaining humidity. This balance is what transforms that hard outer coating into something the seedling can break through.
Temperature Consistency: The 35-40°F range in Step 2 is non-negotiable for breaking dormancy, but refrigerator placement matters just as much. Avoid the main compartment where temperatures fluctuate more dramatically—opt for the crisping drawer where temps stay stable. If your refrigerator runs cooler, you might see slightly slower progress, but don't be tempted to move the seeds to a warmer spot. The cold period needs to be consistent; even slight warmth can trigger premature germination before the seeds are ready. I've had better success with seeds that show visible swelling after exactly 6 weeks rather than those that sprout earlier from inconsistent cold.
Visual Cues for Success: In Step 4, when checking for germination, look for tiny white tips emerging first—these are the radicles breaking through. The 14-28 day window is wide because seed viability varies, but you'll know you're on the right track when you see these initial signs within 3 weeks. Once you reach the 50% sprout mark, that's when you can confidently remove the humidity dome. I've learned to trust these visual cues over the clock—some batches germinate faster, others slower, but the swelling and cracking you see in Step 2 is your best indicator of whether the stratification worked.
Light Transition Strategy: The move from humidity dome to bright indirect light in Step 4 requires careful timing. When you first remove the dome, place the tray in dappled sunlight or under a sheer curtain for the first 24 hours. This gradual transition prevents shock to the delicate seedlings. I've seen seedlings that were too abruptly exposed to strong light develop leggy, weak stems trying to reach the light source. The 12-hour grow light cycle mentioned is perfect—just position it about 6 inches above the tray to mimic natural light intensity without overheating.
Pro Tips for Wood Betony Seedling
- These essential strategies will help you navigate the delicate balance of moisture, temperature, and timing to achieve the strongest possible wood betony seedlings.
- Moisture Management: In Step 1, when dampening the paper towel, aim for a consistency where water gently beads up rather than pooling.
- Temperature Consistency: The 35-40°F range in Step 2 is non-negotiable for breaking dormancy, but refrigerator placement matters just as much.
Frequently asked questions
Got questions about growing wood betony seedlings?
You’re not alone! Here are answers to the most common concerns—from timing to troubleshooting—to help your seedlings thrive after cold stratification.
How long should I cold-stratify wood betony seeds before planting?
Cold stratification for wood betony typically takes 4–8 weeks in a moist, refrigerated environment (34–40°F). For best results, start seeds in late fall or early winter, mimicking their natural dormancy cycle. Patience pays off—this step breaks seed dormancy and boosts germination rates!
Can I skip cold stratification and still grow wood betony seedlings?
While possible, skipping stratification reduces germination success dramatically. Seeds may take months (or never sprout) without this step. If you’re in a hurry, try soaking seeds in warm water for 24 hours before planting, but cold stratification remains the gold standard for reliable growth.
What’s the best soil mix for wood betony seedlings after stratification?
Use a well-draining, slightly acidic mix (pH 5.5–6.5) with equal parts peat moss, perlite, and compost. Wood betony dislikes soggy roots, so avoid heavy clay soils. A 50/50 blend of potting soil and sand works well for containers or garden beds.
My seedlings look leggy or weak after germination—what went wrong?
Leggy seedlings usually mean too little light or overcrowding. Move them to a bright, indirect spot (like a south-facing window) and thin seedlings to 2–3 inches apart. If they’re still weak, check for overwatering—let the top inch of soil dry between waterings.
When can I transplant wood betony seedlings outdoors?
Wait until all frost danger has passed and soil temps reach 55°F+ (usually late spring). Harden off seedlings by gradually exposing them to outdoor conditions for 1–2 weeks before transplanting. Choose a shady to partially sunny spot with moist, well-drained soil for best results.
Wrapping up and next steps
Growing wood betony seedlings from cold-stratified seeds is a rewarding journey that connects you to nature’s resilience.
With the right materials and patience, you’ll nurture hardy transplants ready to thrive in your garden. Now’s your chance— grab those damp paper towels, a fridge, and a sunny spot, and watch your little seedlings burst with life! 🌱
Ready to take the next step? Start small:
- Test a few seeds first to refine your method.
- Share your progress with fellow gardeners for tips and encouragement!