Watering
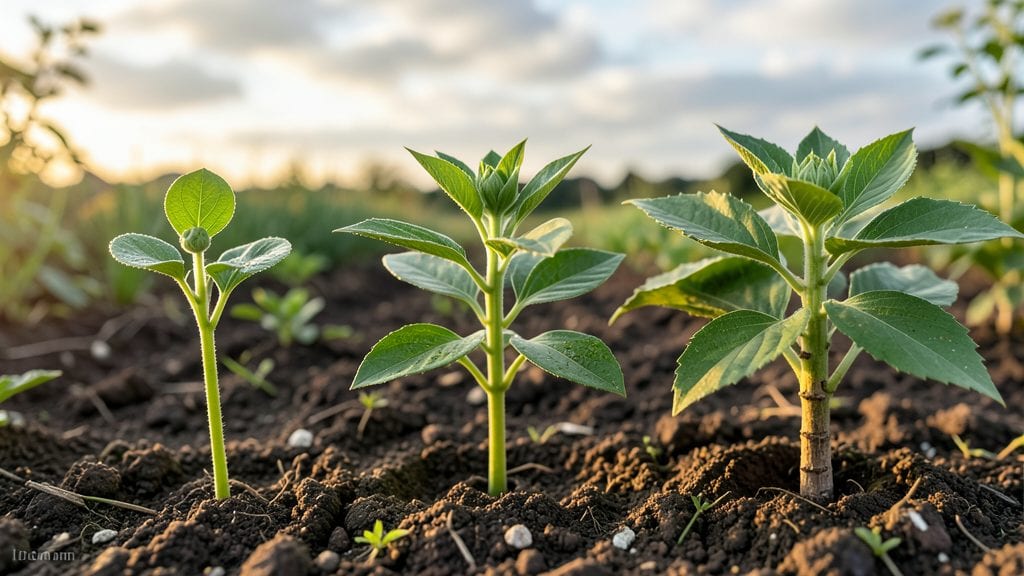
Knowing zinnia seedling stages lets you nurture plants that burst into bold color instead of flopping over by summer. 🌱 I’ve watched seedlings go from fragile sprouts to towering blooms, and the key is catching each stage’s needs—watering too much at the wrong time will drown them, while too little stunts their growth.
The first leaves appear within days, but it’s the second set that tells you if they’re strong enough for transplanting.
At the 2-4 week mark, seedlings should have two sets of true leaves and be about 2-3 inches tall. This is when they’re ready to move outdoors, but only after nighttime temps stay above 50°F.
Harden them off first by placing them in shade for a few hours daily, then gradually increase sun exposure. The soil should stay moist but not soggy—overwatering here causes damping-off, a fungal disease that kills seedlings overnight.
By month two, your zinnias will be 6-12 inches tall with bushy stems and tiny buds forming. This is where consistent watering at the base (not overhead) keeps stems sturdy.
Pinch back the tips of leggy seedlings to encourage bushier growth—this is the stage where they either thrive or get floppy if neglected. The payoff? By early summer, you’ll have 3-foot-tall plants covered in blooms that last until frost.
Pro tip: Mark your calendar for 6-8 weeks after sowing—that’s when most varieties start flowering. If you want nonstop blooms, deadhead spent flowers regularly. The stages might seem small at first, but each one builds to a garden full of vibrant color that neighbors will envy.
Ready to grow zinnias that stand tall all season?
📚 In This Guide
- What you need
- Instructions
- Tips and common mistakes
- Wrapping up and next steps
What you need
- ● Zinnia seeds: Choose heirloom or hybrid varieties (e.g., 'Benary’s Giant' or 'Profusion'). Buy 1–2 seed packets (50–100 seeds per packet).
- ● Seed-starting mix: 1–2 bags (1–2 cubic feet) of sterile, well-draining potting soil (avoid garden soil—it’s too dense!).
- ● Containers: Seed trays or cell packs: 1–2 trays (50+ cells) with drainage holes.
- ● OR Small pots (3–4 inches deep): 6–12 pots (1–2 seeds per pot).
- ● Watering can or spray bottle: 1 with a fine mist nozzle for gentle watering.
- ● Grow lights or sunny windowsill: 1–2 LED grow lights (12–16 hrs/day) OR a south-facing window (6+ hrs sunlight).
- ● Plant labels: 10–20 labels + fine-tip marker to track seedling stages.
- ● Humidity dome or plastic wrap: 1 to retain moisture (remove after germination!).
- ● Fertilizer: 1 bottle of balanced liquid fertilizer (e.g., 10-10-10) OR organic options like fish emulsion.
- ● Transplanting tools: Small trowel or spoon for careful seedling transfer.
- ● Garden twine (to mark rows if direct-sowing outdoors).
- ● Thermometer/hygrometer: 1 to monitor ideal temps (65–75°F for germination).
- ● Patience: Zinnia seedlings take 7–14 days to germinate—stay consistent!
- ● Space: Ensure 6+ inches of vertical space for grow lights or tall seedlings.
- ● Time: Dedicate 10–15 mins/day for watering, checking moisture, and light adjustments.
- ● Outdoor prep (if transplanting): Wait until nighttime temps stay above 50°F (usually 2–3 weeks after last frost).
Step-by-step guide to identifying zinnia seedling stages
Watch your zinnias transform from tiny sprouts to vibrant blooms—here’s how to track each growth phase with confidence.
🌱 Step 1: Germination (Days 5–14)
Your zinnias will first appear as delicate green shoots breaking through the soil surface. This happens 5–14 days after planting, depending on warmth—75–80°F speeds things up. Look for tiny, rounded leaves called cotyledons, which look like two plump, smooth petals. These aren’t true leaves but store energy for the seedling.
Keep the soil consistently moist but not soggy—water when the top inch feels dry. If you see fuzzy mold or blackened stems, you’ve overwatered. Remove any affected seedlings immediately to prevent spread. This is the most fragile stage, so avoid disturbing the soil around them.
🌿 Step 2: First True Leaves (Weeks 2–3)
Once the cotyledons unfurl, your seedlings will sprout their first true leaves—small, jagged, and serrated like tiny fern fronds. These mark the transition to real growth, and you’ll notice them 2–3 weeks after germination. At this point, seedlings should be 2–3 inches tall with sturdy stems.
Thin seedlings now if they’re crowded—leave the strongest one per pot, snipping weaker stems at soil level. Avoid pulling to prevent disturbing roots. If leaves look pale or stretched, your seedlings need more light—move them within 2–3 inches of a grow light or to a sunnier window.
☀️ Step 3: Vegetative Growth (Weeks 4–6)
By week 4, your zinnias will shoot up rapidly, developing 3–5 sets of true leaves and reaching 6–12 inches tall. This is their "juvenile" phase, where they focus on leaf and stem growth. You’ll see a bushier shape as side shoots form. Pinch back the top growth if stems exceed 8 inches—this encourages bushier plants with more blooms later.
Water at the base once a week (or when soil feels dry 1 inch down). Overhead watering can spread disease, so use a watering can with a narrow spout. If lower leaves yellow, it’s often overwatering or poor drainage—check your pots for drainage holes and adjust watering frequency.
🌸 Step 4: Bud Formation (Weeks 6–8)
Around week 6, you’ll spot tiny green buds forming at leaf junctions—this is the bloom stage! Buds start as tight, rounded nubs and gradually elongate into recognizable zinnia shapes. Your plants should now be 12–24 inches tall, with a sturdy, woody stem. If buds dry up before opening, underwatering or temperature swings (below 50°F) are likely culprits.
Reduce watering slightly to every 5–7 days—zinnias need less moisture as they mature. Deadhead spent blooms by snipping stems just above a set of leaves to encourage more flowers. If your plants lean toward light, rotate pots quarter-turn daily to keep them balanced.
✂️ Step 5: Full Bloom and Maintenance (Weeks 8–12+)
By week 8, your zinnias should burst into color—bright reds, pinks, oranges, or yellows—with blooms lasting 1–2 weeks per stem. Mature plants reach 18–36 inches tall, depending on variety. Keep deadheading to prolong flowering and prevent seed formation, which saps energy from new blooms.
Water deeply once a week, focusing on the base to avoid fungal issues. If your zinnias look leggy or sparse, they need more sunlight—6+ hours of direct sun is ideal. In hot climates, provide afternoon shade to prevent wilting. With proper care, your zinnias will keep blooming until first frost, rewarding your patience with nonstop color.
Tips & tricks for perfect zinnia seedling care
These practical insights will help you navigate each growth phase with confidence and avoid common pitfalls along the way.
Temperature Matters: During the critical 5–14 day germination phase, maintain consistent warmth between 75–80°F—this is when those first delicate shoots emerge. If your home runs cooler, consider using a seedling heat mat set to 75°F to speed up germination. I've seen germination times stretch to 21 days when temps dip below 65°F, so keep an eye on your thermostat!
Lighting Strategy: Once you reach the 2–3 week stage with true leaves, proper lighting becomes non-negotiable. If your seedlings look pale or stretched (a condition called "leggy"), they're begging for more light. Move them within 2–3 inches of a grow light or to the sunniest window. I keep mine under LED grow lights for 14–16 hours daily—this prevents the weak stems that collapse under their own weight.
Watering Wisdom: The 1-inch dry rule for checking soil moisture works, but timing matters too. Water in the morning so foliage has all day to dry—this prevents fungal issues. I've learned the hard way that overhead watering spreads disease, so always water at the base using a narrow-spout watering can. During the 4–6 week vegetative phase, you'll notice lower leaves yellowing if you're overwatering or if your pots lack drainage holes.
Pinching Technique: When your zinnias hit 8 inches tall during weeks 4–6, it's time to pinch back the top growth. Use your thumb and forefinger to gently remove the top set of leaves—this might sound harsh, but it triggers bushier growth with more blooms. I pinch about 1/3 of the top growth, and within weeks, you'll see side shoots forming that will become future flower stems.
Pro Tips for Zinnia Seedling Stages
- These practical insights will help you navigate each growth phase with confidence and avoid common pitfalls along the way.
- Temperature Matters: During the critical 5–14 day germination phase, maintain consistent warmth between 75–80°F—this is when those first delicate shoots emerge.
- Lighting Strategy: Once you reach the 2–3 week stage with true leaves, proper lighting becomes non-negotiable.
Frequently asked questions
Got questions about zinnia seedling stages?
You’re not alone! Here are answers to the most common concerns—from timing to troubleshooting—so you can nurture healthy, blooming zinnias with confidence.
How long does it take for zinnia seedlings to sprout?
Zinnia seeds typically sprout within 7 to 14 days after planting, depending on temperature and moisture. Keep soil consistently warm (around 70°F) and humid to speed up germination. If you don’t see sprouts in 2 weeks, gently check for seeds—some may need light to germinate!
What do healthy zinnia seedlings look like at each stage?
Here’s a quick visual guide:
- Stage 1 (Sprout): Tiny green leaves (cotyledons) appear first—think of them as baby zinnia “hands.”
- Stage 2 (True Leaves): After 2–3 weeks, serrated, lance-shaped leaves emerge. These are your zinnia’s “real” foliage.
- Stage 3 (Stem Thickening): Seedlings develop a sturdy stem and may start forming a rosette before flowering.
How often should I water zinnia seedlings?
Water seedlings lightly but daily to keep soil moist (not soggy). Once true leaves appear, reduce frequency to every 2–3 days, letting the top inch of soil dry out. Overwatering causes damping off (a fungal disease that collapses seedlings). Use a spray bottle for delicate sprouts!
Why are my zinnia seedlings dying or turning black?
Black or mushy stems = damping off, usually from overwatering or poor airflow. To fix it:
- Stop watering until soil dries slightly.
- Space seedlings 1–2 inches apart for better air circulation.
- Apply a fungicide spray (like copper-based) if needed.
Can I transplant zinnia seedlings too early?
Yes! Hardening off (acclimating seedlings to outdoor conditions) should start 7–10 days before transplanting. Gradually expose them to sunlight and wind for 1–2 hours daily. Transplant after the last frost when soil is at least 60°F—never move seedlings when they’re wilting or in extreme heat.
Wrapping up and next steps
Understanding the zinnia seedling stages makes growing these vibrant blooms a rewarding experience! From those tiny sprouts to full, colorful flowers, each phase offers a chance to nurture life and beauty. With the right care—consistent watering, proper sunlight, and a little patience—you’ll soon enjoy a garden bursting with cheerful zinnias.
Ready to dive in? Start with healthy seeds and follow the month-by-month guide to guide your seedlings to success. Happy gardening! 🌱✨