
Lawn
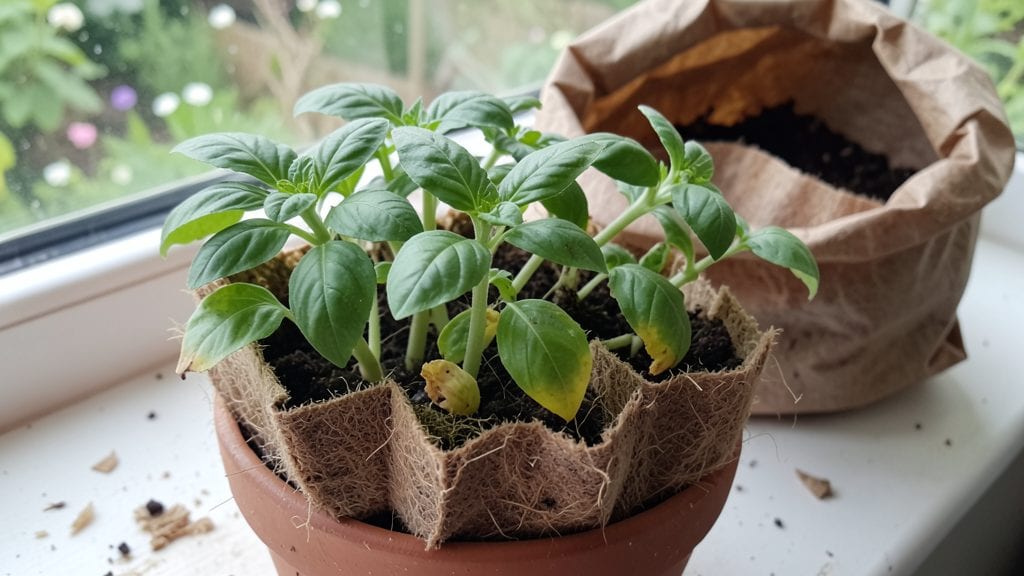
Making your own biodegradable seed starters cuts plastic waste while giving seedlings a perfect start. I switched to these after struggling with transplant shock in my raised beds—now my seedlings thrive from the moment they hit the soil.
The process uses materials you already have, and the results speak for themselves: stronger roots, less shock, and no cleanup after transplanting.
You’ll need just three simple supplies: newspaper, water, and a little patience. Roll the paper into pots, soak them lightly, and plant your seeds directly inside. The whole setup breaks down naturally when you plant, eliminating the need to disturb delicate roots.
This method works for tomatoes, peppers, herbs, and even delicate flowers like petunias.
By the time you’re ready to transplant, your seedlings will be stocky and ready for the garden. The biodegradable pots dissolve into the soil, feeding your plants with extra nutrients as they grow.
No more plastic waste, no more root damage—just healthy plants from start to finish. Let’s get those seeds sprouting the right way.
Perfect for organic gardeners, small-space growers, or anyone tired of plastic pots cluttering their garden. The technique scales from a few seedlings to a full garden bed, and the savings add up over multiple planting seasons. Here’s how to make it work for your garden.
📚 In This Guide
- What you need
- Instructions
- Tips and common mistakes
- Wrapping up and next steps
What you need
- ● 1 cup of biodegradable material (choose one): Newspaper strips (torn into 1-inch-wide pieces)
- ● Cardboard egg cartons (cut into squares)
- ● 10-15 coffee filters (undyed, unbleached)
- ● 1-2 toilet paper rolls (cut into 1-inch rings)
- ● 1 part peat moss or coconut coir (sterilized, 2 cups total)
- ● 1 part compost or worm castings (2 cups total)
- ● 1 part perlite or vermiculite (2 cups total, for drainage)
- ● Small handful of seeds (fast-growing varieties like radishes, lettuce, or basil)
- ● Water (room temperature, enough to moisten but not soak)
- ● A spray bottle (for gentle watering)
- ● A small bowl or container (for mixing soil)
- ● Scissors (to cut biodegradable materials)
- ○ Plastic wrap or a humidity dome (optional, to retain moisture)
- ○ Gloves (optional, for handling soil)
- ● Sunny windowsill or grow light (6+ hours of indirect light daily)
- ● 1 tsp mycorrhizal fungi (boosts root growth)
- ● 1 tbsp kelp meal or fish emulsion (for nutrient kick)
- ● Labeling tags (to track seed types)
- ● Seedling trays or small pots (for transplanting later)
Step-by-step instructions for making biodegradable seed starters
Here’s how to create your own eco-friendly seed starters using simple, sustainable materials.
Gather and Prepare Your Materials
Start with 4 sheets of newspaper—the kind without glossy coatings, as those can inhibit seedling growth. Cut each sheet into 4 equal strips, about 2 inches wide. This gives you 16 strips total, perfect for starting 4 different types of seeds. You’ll also need 1 gallon of water and a large mixing bowl. Soak the newspaper strips in the water for 10 minutes to soften them fully. Drain any excess water and wring them out gently—you want them damp, not dripping.
While the strips are soaking, gather 4 biodegradable mesh pots (or make your own from 4 small squares of biodegradable mesh). These will hold your seed starters together as they root. If you’re using store-bought mesh pots, ensure they’re 3 inches in diameter to give seedlings enough room to develop strong roots before transplanting.
Assemble the Seed Starters
Take one damp newspaper strip and fold it lengthwise into a 2-inch-wide tube. Overlap the edges by about ½ inch to secure it. Repeat this for all 16 strips, creating a total of 16 tubes. These tubes will form the core of your biodegradable seed starters. Place 4 tubes into each mesh pot, arranging them vertically so they stand upright. The mesh will hold them in place while allowing excess water to drain away.
Fill each mesh pot with the newspaper tubes until they reach 2 inches tall. Press them lightly to compact the material slightly, but don’t pack them down too tightly—you want the structure to remain airy for root growth. This assembly ensures your seedlings have a sturdy, biodegradable container that will break down seamlessly when transplanted into the garden.
Plant and Water the Seeds
Using your fingers, create a small ¼-inch-deep indentation in the top of each newspaper tube. Place 1-2 seeds into each indentation, depending on the seed size—smaller seeds like lettuce can share a tube, while larger seeds like beans should have their own. Cover the seeds lightly with a pinch of potting soil (not included in your materials, but essential for moisture retention). Press gently to ensure good seed-to-soil contact.
Water the assembled seed starters lightly using a spray bottle until the newspaper feels evenly moist but not soggy. Place the mesh pots in a seedling tray or shallow container to catch any excess water. Keep the tray in a warm, 65-75°F environment, such as a sunny windowsill or under a grow light. Check the moisture daily—you’ll know it’s time to water again when the top layer of newspaper feels dry to the touch.
Monitor and Transplant Seedlings
Once your seedlings develop their first true leaves (not the initial seed leaves), they’re ready for a bit more space. Gently unfold the mesh pot to expose the roots—you’ll see them growing into the newspaper tubes. This is the perfect time to transplant them into larger pots or directly into the garden. The newspaper will decompose naturally, providing nutrients to the soil as the roots expand.
When transplanting, place the entire mesh pot into the soil, ensuring the top of the newspaper tube sits ½ inch below the soil surface. Water thoroughly to help the newspaper break down and integrate with the surrounding soil. Over the next 3 months, your seedlings will grow into strong, healthy plants, and the biodegradable materials will have fully decomposed, leaving no waste behind.
Maintain and Extend the Process
To keep your biodegradable seed starters effective, reuse the mesh pots for future batches by cleaning them with soapy water and drying them completely. The newspaper can be composted after use, closing the loop on this sustainable growing method. For long-term success, store your mesh pots in a dry place until your next planting session. This approach not only reduces plastic waste but also creates a zero-effort transition for seedlings into their permanent home.
Real talk: If you notice seedlings struggling or wilting, it’s often a sign of overwatering. Let the newspaper dry slightly between waterings—it should feel damp but not wet. With this method, you’ll enjoy faster growth, healthier plants, and a guilt-free gardening experience.
Tips & tricks for perfect biodegradable seed starters
Here's what I've learned after perfecting this eco-friendly method—simple adjustments that make all the difference for strong, healthy seedlings.
Soaking Time is Critical: The 10-minute soak for your newspaper strips is non-negotiable. This ensures they soften enough to hold moisture but don't turn to mush. I've found that using lukewarm water (around 75°F) speeds up the process slightly while preventing the paper from becoming too limp. After soaking, give them a gentle squeeze—if water drips out, they're too wet and need more wringing. This step prevents soggy bottoms that can lead to rot.
Tube Assembly Technique: When creating your 2-inch-wide tubes in Step 2, the half-inch overlap is key. This creates a secure seal that won't unravel when wet. I like to make a slight crease along the fold line before overlapping to create a more defined edge. For extra stability, you can lightly secure the overlap with a tiny bit of water—just a drop or two—to help it hold shape during the planting process.
Seed Placement Matters: That quarter-inch indentation you make for seeds is perfect for most varieties, but for larger seeds like beans, you might want to make it slightly deeper—around a third of an inch. Press the seeds gently but firmly into the soil to ensure good contact. I've found that gently tapping the mesh pot after planting helps settle the soil around seeds, which improves germination rates significantly.
Environmental Consistency: Maintaining that 65-75°F range is crucial, but don't worry if your home fluctuates slightly. The key is consistency—avoid placing near drafty windows or heat sources. I've had great success using a simple seedling heat mat under the tray for just a few hours each day during cooler months. This small boost helps speed up germination without requiring constant attention.
Pro Tips for Biodegradable Seed Starters
- Here's what I've learned after perfecting this eco-friendly method—simple adjustments that make all the difference for strong, healthy seedlings.
- Soaking Time is Critical: The 10-minute soak for your newspaper strips is non-negotiable.
- Tube Assembly Technique: When creating your 2-inch-wide tubes in Step 2, the half-inch overlap is key.
Frequently asked questions
Got questions about biodegradable seed starters?
You’re not alone! Here are answers to the most common ones to help you grow with confidence—and ease.
What are biodegradable seed starters made of?
These eco-friendly starters are typically crafted from compostable materials like coconut coir, peat moss, or paper. Some recipes even use egg cartons, newspaper, or coffee grounds! The key is that they break down naturally in soil, eliminating waste and reducing plastic pollution. Always check labels for 100% plant-safe ingredients.
How long do biodegradable seed starters take to decompose?
Most biodegradable seed starters dissolve in 4–12 weeks, depending on soil moisture and temperature. Coir and peat-based options decompose faster (4–6 weeks), while paper or cardboard may take up to 3 months. Plant your seedlings before they fully break down to avoid root disturbance.
Can I reuse biodegradable seed starters?
No—they’re designed for single-use! Reusing them risks mold, bacterial growth, or uneven decomposition, which can harm seedlings. Instead, repurpose containers like yogurt cups or egg cartons for future starts. When you’re done, compost the biodegradable ones to close the sustainability loop!
What if my seed starters mold or smell bad?
Mold or odors usually mean excess moisture or poor airflow. To fix it:
- Increase ventilation: Poke holes in containers or move them to a brighter, drier spot.
- Adjust moisture: Water only when the top inch feels dry, and avoid soggy soil.
- Add perlite or sand: Mixing in 10–20% improves drainage.
Are biodegradable seed starters safe for all plants?
Yes! They’re universal for most vegetables, herbs, and flowers, including tomatoes, peppers, and basil. However, avoid using them for root crops (like carrots or radishes), as the decomposition process might interfere with root growth. For these, opt for soil blocks or peat pots instead.
Still curious? Drop your questions in the comments—we’re happy to help your green thumbs thrive!
Wrapping up and next steps
Biodegradable seed starters are a game-changer for eco-conscious gardeners—offering a sustainable, cost-effective way to nurture healthy plants while reducing waste. 🌱 Whether you’re a beginner or a green thumb, these simple, compostable starters make sprouting success easier than ever.
Now that you’re equipped with the how-to and answers to common questions, it’s time to roll up your sleeves and start your next gardening adventure!
Your next step? Grab your materials, pick your favorite seeds, and plant with confidence! Share your sprouting wins with the gardening community—happy growing awaits! 🌿