Vegetables
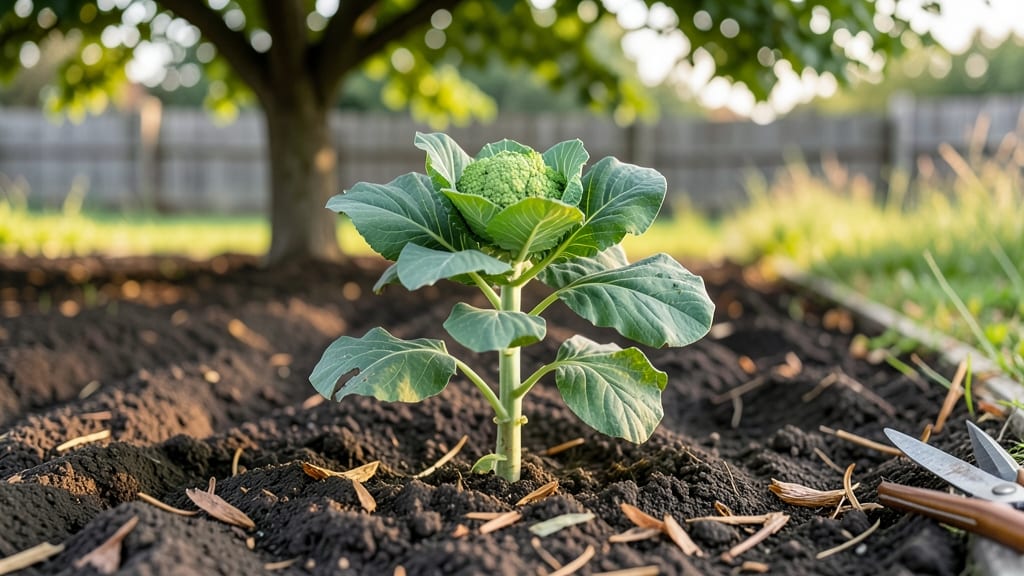
Those cauliflower seedling leaves you think are trash are actually the secret to early harvests and pest-resistant plants. ✨ I’ve learned to snip them for salads while the main head matures—turning potential waste into flavorful greens and healthier seedlings.
The first few leaves that sprout are tender, slightly bitter, and packed with nutrients. Harvesting them early prevents overcrowding, which weakens the main head and attracts pests. Just grab a pair of clean scissors and snip the outer leaves when they’re 4–6 inches long—leave the inner ones to keep growing.
📚 In This Guide
- What you need
- Instructions
- Tips and common mistakes
- Wrapping up and next steps
What you need
- ● Cauliflower seedlings: 5–10 healthy seedlings (ensure they’re at least 4–6 inches tall for harvestable leaves).
- ● Pruning shears or clean scissors: Sharp, sterilized tools to snip leaves without damaging the plant.
- ○ Organic compost or fertilizer (optional): A small bag of balanced 10-10-10 or compost tea to nourish seedlings post-harvest.
- ● Watering can or spray bottle: For gentle hydration after trimming.
- ● Large mixing bowl or colander: To rinse and store harvested leaves.
- ● Kitchen towel or paper towels: For patting leaves dry before cooking or storing.
- ● Food processor or blender: For making pesto, soups, or smoothies with the greens.
- ● Salad spinner: If you prefer extra-dry leaves for raw dishes.
- ● Herbs like basil or parsley: To pair with cauliflower leaves in recipes.
- ● Storage containers (glass or airtight): For freezing or refrigerating leftovers.
- ○ Gloves (optional): If you’re sensitive to plant sap or handling prickly stems.
Step-by-step instructions for harvesting cauliflower seedling leaves
Turn those early greens into tasty side dishes without sacrificing your future cauliflower crop.
🌱 Step 1: Identify and Select Healthy Seedling Leaves
Wait until your cauliflower seedlings have 4-6 true leaves—these are the larger, mature leaves that form after the initial baby leaves. I like to pick leaves that are at least 2-3 inches long and have a deep green color. Avoid yellowing or damaged leaves, as they won’t taste as good and might indicate stress.
Use clean, sharp scissors or your fingers to gently pinch the leaves at the base. Don’t pull too hard—just a clean snip or tug will do. This ensures the plant keeps growing without unnecessary damage. I usually harvest 2-3 leaves per seedling to keep the plant strong enough to produce a full head later.
💧 Step 2: Prepare Leaves for Cooking
Rinse the harvested leaves under cool water to remove any dirt or debris. Shake them gently to remove excess moisture, then pat dry with a clean towel or paper towels. You’ll want them dry enough to cook evenly but not so dry they wilt before you use them.
Trim off any thick stems or tough edges with a knife—these parts can be tough and less flavorful. I like to chop the leaves into ½-inch strips for quick cooking, but you can also leave them whole for a more delicate texture. Store them in a sealed container in the fridge for up to 3-4 days if you’re not using them right away.
☀️ Step 3: Cook the Leaves for Maximum Flavor
Heat a skillet over medium-high heat and add a little olive oil or butter. Once the oil is shimmering, add the leaves in a single layer—don’t overcrowd the pan, or they’ll steam instead of sauté. Cook for 2-3 minutes until they wilt slightly and turn vibrant green.
Season with a pinch of salt and a squeeze of lemon juice if you like. For extra flavor, add a minced garlic clove or a sprinkle of red pepper flakes. Serve immediately as a side dish or toss them into pasta, soups, or salads. The key is to cook them just until tender—overcooking turns them mushy and loses their fresh taste.
🌿 Step 4: Monitor Your Cauliflower Plants After Harvesting
After harvesting, keep an eye on your seedlings for any signs of stress. Water them lightly if the soil feels dry to the touch, but avoid overwatering—cauliflower plants are sensitive to too much moisture. Place them in a spot with 6-8 hours of sunlight daily to encourage strong growth.
In about 4-6 weeks, you’ll start to see the curd forming at the center of the plant. This is your reward for harvesting those early leaves! Just keep the soil consistently moist and fertilize lightly with a balanced plant food every 2-3 weeks to support the main head’s development.
Tips & tricks for perfect cauliflower seedling greens
Harvesting and cooking these delicate greens takes just a few smart moves to turn them into restaurant-worthy sides.
The Harvesting Secret: I learned this the hard way—always harvest leaves from the outer edges of the plant first. This prevents shocking the center where your future cauliflower head will form. The 2-3 leaves per seedling rule is non-negotiable if you want that main crop to grow properly. Trust me, your future cauliflower will thank you!
Cooking Time Matters: Those 2-3 minutes on medium-high heat are crucial. Any longer and you'll get mushy leaves instead of tender-crisp greens. I set a timer because it's easy to get distracted when those leaves start to wilt. The moment they turn vibrant green is your cue to remove them from the pan.
Storage Strategy: If you're not using your harvested leaves right away, store them in a sealed container with a paper towel to absorb excess moisture. This keeps them fresh for up to 3-4 days without wilting. I like to place them in the crisper drawer where it's coolest. For longer storage, you can even blanch and freeze them—just toss the blanched leaves into ice water, dry thoroughly, and store in freezer bags for up to 3 months.
Flavor Boosters: While the basic seasoning of salt and lemon is perfect, don't be afraid to get creative. A sprinkle of nutritional yeast adds a cheesy flavor, or try a pinch of smoked paprika for depth. For Asian-inspired dishes, a splash of soy sauce and sesame oil works beautifully. Just remember these are optional add-ins—your fresh cauliflower leaves will still shine on their own!
Pro Tips for Cauliflower Seedling Leaves
- Harvesting and cooking these delicate greens takes just a few smart moves to turn them into restaurant-worthy sides.
- The Harvesting Secret: I learned this the hard way—always harvest leaves from the outer edges of the plant first.
- Cooking Time Matters: Those 2-3 minutes on medium-high heat are crucial.
Frequently asked questions
Got questions about working with cauliflower seedling leaves? You’re not alone! Here are some of the most common queries—plus quick, practical answers to help you make the most of your harvest.
Can I eat cauliflower seedling leaves raw?
Yes! These tender greens are packed with flavor and nutrients, making them perfect for raw use. Try them in salads, wraps, or as a peppery garnish. For milder taste, lightly steam or sauté them—just 2–3 minutes is enough to soften the texture without losing nutrients.
How long do cauliflower seedling leaves take to grow?
Seedling leaves typically appear 3–7 days after planting, depending on temperature and light. If you’re harvesting leaves from mature plants, they’ll keep producing for 4–6 weeks before the main head forms. For continuous harvests, plant new seedlings every 2 weeks.
What can I substitute if I don’t have cauliflower leaves?
No worries! Swap them with kale, collard greens, or mustard greens for a similar peppery bite. Broccoli rabe or young turnip greens also work well in stir-fries or soups. Just adjust cooking time—seedling leaves are more delicate than mature greens.
Why are my cauliflower seedling leaves turning yellow?
Yellowing leaves usually signal overwatering, nutrient deficiency (like nitrogen), or pests. Check soil moisture—leaves should wilt slightly before watering again. Add compost or a balanced fertilizer, and inspect for aphids or cabbage worms. Prune affected leaves to redirect energy to healthy growth.
How should I store cauliflower seedling leaves?
Store them in a paper towel-lined container in the fridge for up to 5–7 days. For longer storage, blanch and freeze them in airtight bags. Avoid washing until ready to use—excess moisture speeds up spoilage. Pro tip: Don’t wash before storing!
Wrapping up and next steps
Growing your own cauliflower seedling leaves is a fantastic way to reduce food waste while adding a mild, nutritious green to your meals!
These tender leaves are packed with flavor and nutrients, making them a versatile addition to salads, stir-fries, or sautés. Whether you're a seasoned gardener or just starting out, this no-waste technique is simple and rewarding.
Ready to try it? Start small—plant a few cauliflower seedlings today and enjoy the harvest in just a few weeks! 🌱✨