
Lawn
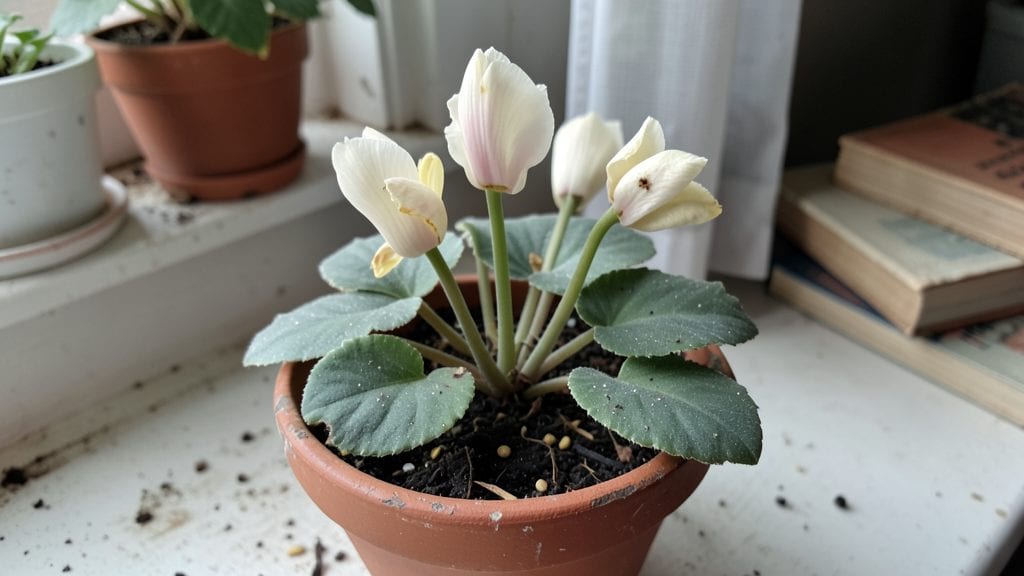
Those papery cyclamen seed pods hold the secret to growing your own blooms in just a few months—if you get the cold stratification right. 🌱 I’ve watched those delicate pink and white flowers fade only to discover the next generation waiting inside, ready to burst into life with the right timing and a little winter patience.
First, you’ll need to spot the mature pods—those dried, papery husks that split open when ripe. Collect them in late summer or early fall, then extract the tiny seeds inside.
The real magic happens next: a 4-6 week cold treatment in the fridge mimics winter, breaking dormancy so seeds germinate reliably when spring arrives.
With the right mix of moist, well-draining soil and a 60-65°F indoor spot, those seeds will sprout in 2-4 weeks. The seedlings are tiny but tough, and with proper light, they’ll grow into lush plants with fragrant blooms by next fall.
No more waiting for nursery plants—you’ll have cyclamen that’s exactly what you want.
Works for both indoor pots and outdoor borders, though indoor plants need extra care to survive winter. Here’s how to avoid the common pitfalls and get every seed to germinate—no guesswork, just reliable blooms.
📚 In This Guide
- What you need
- Instructions
- Tips and common mistakes
- Wrapping up and next steps
What you need
- ● Cyclamen seed pods: Fresh or dried, collected from mature plants (or purchased from a trusted supplier). Aim for at least 5-10 pods to increase germination success.
- ● Small pots or containers: 2-3 inch diameter pots with drainage holes (or a seed tray with individual cells). 4-6 pots are ideal for testing different stratification methods.
- ● High-quality seed starting mix: Lightweight, well-draining potting soil (avoid garden soil—it’s too dense!). Look for a mix labeled for seedlings or cyclamen.
- ● Plastic wrap or humidity dome: To retain moisture during germination (a clear plastic bag with holes or a store-bought propagator works great).
- ● Spray bottle: For gentle watering—no soaking! A 16 oz bottle with a fine mist nozzle is perfect.
- ● Refrigerator or cold frame: A standard home fridge (set to 35–40°F) or a shaded outdoor cold frame for stratification.
- ● Grow lights or sunny windowsill: A full-spectrum LED grow light (12-14 hours/day) or a south-facing window with indirect light for post-stratification growth.
- ● Labels and markers: To track seed pod sources, planting dates, and stratification progress (use waterproof labels for fridge storage!).
- ● Perlite or vermiculite: Mix 10-20% into your potting soil to improve aeration and drainage.
- ○ Fungicide (optional): A mild, organic fungicide like neem oil spray to prevent mold during stratification.
- ● Thermometer/hygrometer: To monitor fridge temps and humidity (aim for 35–45°F and 70–80% humidity).
- ● Heat mat (for post-stratification): A seedling heat mat (set to 65–70°F) to speed up germination once seeds are removed from cold.
- ● Journal or app: To log daily observations (e.g., “Pod #3 cracked on Day 21!”).
Step-by-step instructions for cold stratifying cyclamen seed pods
Here's the method I've used to coax stubborn cyclamen seeds into reliable blooms—no greenhouses required.
🌱 Step 1: Harvest and Prepare Mature Seed Pods
Collect fully brown, papery seed pods from your plants in late summer or early fall. The pods should feel dry and brittle when squeezed gently—this means they're ready. Open them carefully with your fingers or a small knife, avoiding the hard, woody stems. You'll find tiny, dark seeds inside, often mixed with fluffy fibers.
Spread the seeds on a clean paper towel to air-dry for 24 hours in a warm, dry spot. This prevents mold from forming during stratification. I like to place them on a mesh screen to ensure airflow all around. Once completely dry, store them in a labeled paper envelope until you're ready to stratify.
❄️ Step 2: Mix Stratification Medium
Combine equal parts moistened peat moss and perlite in a shallow container—think a wide, low dish rather than a deep pot. The mix should hold moisture without being soggy; squeeze a handful gently to check. If water drips out, add more perlite to improve drainage. Cyclamen seeds need this balance to avoid rotting during their cold treatment.
Spread the seeds evenly across the surface, spacing them ½ inch apart to prevent crowding. Cover the container loosely with plastic wrap, securing it with a rubber band to create a mini greenhouse effect. Place the container in a refrigerator set to 35-40°F—this mimics winter's natural cold period.
⏰ Step 3: Stratify for 6-8 Weeks
Check the seeds every 2 weeks to ensure the medium remains moist but not wet. If the surface feels dry, mist lightly with water and return to the fridge. You won't see germination yet—this stage is all about breaking dormancy. The cold period tricks the seeds into thinking winter has passed, signaling it's safe to grow.
After 6-8 weeks, remove the container from the fridge and place it in a bright, indirect light spot indoors. Keep the plastic wrap on for another 2 weeks to maintain humidity. This gradual transition prevents shock. Watch for tiny green sprouts emerging in 3-4 weeks—they'll look delicate but are tougher than they appear.
☀️ Step 4: Transition to Growing Conditions
Once sprouts appear, remove the plastic wrap completely and move the container to a spot with bright, indirect light—a north-facing window or under grow lights works best. Avoid direct sun, which can scorch the tender seedlings. Water gently from below by placing the container in a shallow tray of water for 10 minutes, then drain excess.
When seedlings develop their second set of true leaves (not the initial seed leaves), transplant them into 2-inch pots filled with a mix of peat moss and perlite. Handle the tiny plants carefully—they're fragile but resilient. Keep the soil lightly moist and maintain bright, indirect light for the first 6 weeks of growth.
Tips & tricks for perfect cyclamen seed stratification
Here's what I've learned to make cyclamen seed germination foolproof—these little tricks make all the difference between patience and frustration.
Harvesting Tip: When collecting seed pods, look for ones that feel completely dry and papery—if they still have any green or flexible parts, they're not ready. I've found that pods left on the plant too long can scatter seeds prematurely, so harvest them as soon as they turn uniformly brown. Once opened, remove any fluffy fibers from the seeds before drying, as these can harbor mold during the 24-hour drying process.
Medium Mixing Secret: The peat moss and perlite ratio is crucial—aim for that perfect "squeeze test" where just a drop or two of water escapes when you gently press the mix. Too much moisture causes rot, while too little prevents germination. I like to mix these in a shallow ceramic dish because it's easy to monitor moisture levels through the porous material.
Cold Treatment Insight: That 35-40°F refrigerator temperature might seem cold, but it's actually perfect for mimicking winter conditions. Most home fridges run around 38°F, which works just fine. The key is consistency—avoid opening the fridge door frequently to check on them, as temperature fluctuations can confuse the seeds about whether winter has truly passed.
Gradual Transition Strategy: The 2-week humidity period after removing seeds from cold is where most people rush things. I've seen seedlings shock and wilt when moved too quickly to dry conditions. Keep that plastic wrap on during the day but remove it for 10 minutes each evening to let fresh air circulate—this gradual acclimation gives them time to adjust without stress.
Pro Tips for Cyclamen Seed Pods
- Here's what I've learned to make cyclamen seed germination foolproof—these little tricks make all the difference between patience and frustration.
- Harvesting Tip: When collecting seed pods, look for ones that feel completely dry and papery—if they still have any green or flexible parts, they're not ready.
- Medium Mixing Secret: The peat moss and perlite ratio is crucial—aim for that perfect "squeeze test" where just a drop or two of water escapes when you gently press the mix.
Frequently asked questions
Got questions about growing cyclamen from seed pods?
Here are some of the most common ones—plus straightforward answers to help you avoid pitfalls and maximize success!
What does "cold stratification" mean for cyclamen seed pods?
Cold stratification mimics winter conditions to break seed dormancy. For cyclamen, this means chilling moistened seed pods in the fridge (or outdoors in a protected spot) for 8–12 weeks at 35–45°F (2–7°C). Without this step, seeds may sprout poorly or not at all!
How long do cyclamen seed pods take to germinate after stratification?
After cold treatment, germination usually starts in 4–12 weeks, depending on warmth and moisture. Keep soil consistently moist (not soggy) and maintain temps around 65–75°F (18–24°C). Patience is key—some seeds may take up to 3 months to sprout!
Can I skip cold stratification and still grow cyclamen from seed?
Technically yes, but success rates drop dramatically. Unstratified seeds may sprout sporadically or produce weak seedlings. If you’re impatient, try soaking pods in water for 24 hours first, but cold stratification remains the gold standard for reliable results.
Why aren’t my cyclamen seed pods opening or producing seeds?
Pods may stay closed if the plant lacks pollination (cyclamen need insects or hand-pollination with a brush). Overripe pods turn brown and papery—harvest them before they split open. If pods rot, check for fungus (reduce moisture) or pests (like slugs).
How should I store cyclamen seed pods before planting?
Keep pods in a paper bag with a damp paper towel in a sealed container (or fridge) until stratification. Avoid plastic—it traps too much moisture and risks mold. Label pods with the harvest date to track stratification progress!
Still stumped? Drop your question in the comments—we’re happy to help troubleshoot your cyclamen seed journey!
Wrapping up and next steps
Growing cyclamen from seed pods is a rewarding journey that unlocks vibrant blooms in just a few months—as long as you embrace the magic of cold stratification! 🌱❄️ By following the steps outlined here, you’ll transform tiny seeds into thriving plants with confidence. Ready to see your garden transform?
Your next step? Grab those seed pods, gather your supplies, and dive in! Start small—even a single pot can yield stunning results. Happy gardening, and may your cyclamen bloom beautifully! 🌸