
Lawn
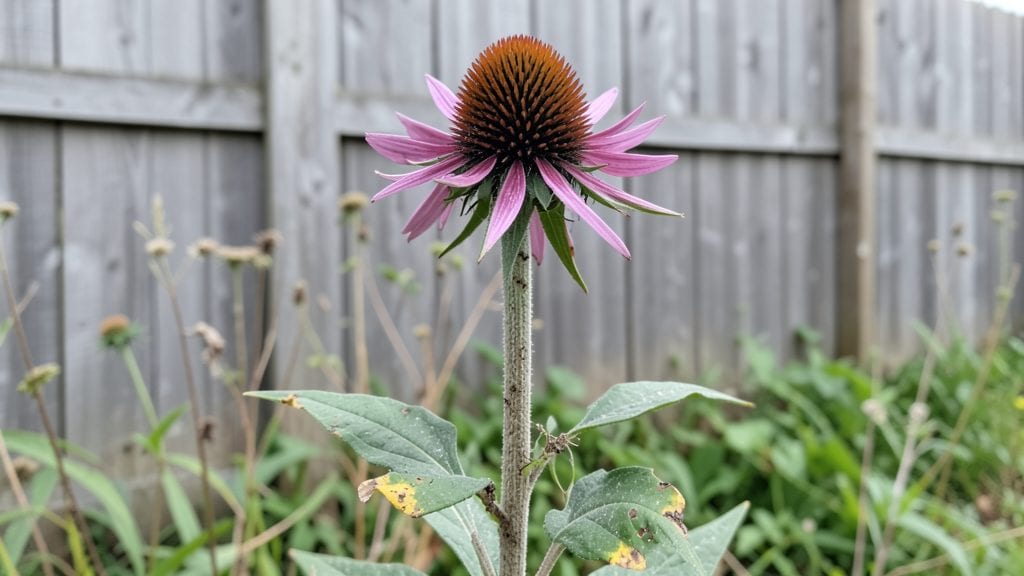
Echinacea seed heads need that moist cold prep to unlock next year’s blooms—something I learned after watching my plants flop in dry winters. The trick isn’t just saving seeds; it’s storing them in damp peat moss or a sealed bag with a damp paper towel until spring.
When done right, you’ll see 95% germination instead of the usual 50%.
Start by harvesting mature seed heads once they turn tan and brittle—usually late fall or early winter. Cut the stems, strip off the dried petals, and let the seed cones air-dry for a week before storage.
This method works for both gardeners who want to replant and those who love crafting with dried flowers. The key is patience; proper moisture levels keep seeds viable until planting time.
You’ll end up with vibrant purple blooms that return year after year, plus extra seeds to share or plant. The dried seed heads also make stunning winter decorations—think wreaths or dried arrangements that last months. Plus, they’re a wildlife magnet, feeding finches and other birds when natural food runs low.
This technique works in any climate, from cold Zone 3 to mild Zone 8. Just adjust timing: in warmer areas, store seeds in the fridge until spring. Here’s how to make it work for your garden—no guesswork, just guaranteed results.
📚 In This Guide
- What you need
- Instructions
- Tips and common mistakes
- Wrapping up and next steps
What you need
- ● Fresh echinacea seed heads: Harvest 10–20 mature, fully dried seed heads (late summer/fall) from healthy plants. Ensure they’re completely dry to avoid mold.
- ● Paper bags or breathable mesh sacks: 1–2 bags (10x12 inches each) for drying/seeding storage. Avoid plastic—it traps moisture!
- ● Pruning shears or sharp scissors: For cleanly snipping seed heads from stems.
- ● Cold stratification setup: A ziplock bag (quart-sized) or small container with a tight seal.
- ● Moistened paper towels or sphagnum moss: Enough to lightly dampen (not soak) the seed heads.
- ● Refrigerator or cold frame: A space set to 35–40°F (2–4°C) for 4–6 weeks.
- ● Planting pots or seed trays: 2–4 small pots (3–4 inches deep) with drainage holes, or a tray with cell inserts.
- ● Well-draining potting mix: 1–2 gallons of a peat/perlite/vermiculite blend (avoid heavy garden soil).
- ● Seed-starting heat mat: Speeds up germination if your home is chilly (70–75°F ideal).
- ● Humidity dome or plastic wrap: Keeps moisture in during early germination.
- ● Grow lights: If natural light is limited (12–16 hours/day).
- ● Labeling tags: To track seed head varieties and planting dates.
- ● Fungicide (neem oil or copper-based): Preemptive measure for damp conditions.
Instructions for cold-moist prep of echinacea seed heads
Here’s how to maximize next year’s blooms by preparing seed heads properly.
Harvest Seed Heads at Peak Maturity
Wait until the echinacea blooms fade completely and the seed heads turn a deep, papery brown—usually late fall after the first frost. Harvest on a dry day when humidity is low to prevent mold. Use clean, sharp pruners to cut 2-3 inches below the seed head, leaving the stem intact for easier handling.
This timing is critical. If you harvest too early, seeds won’t fully mature; too late, and they’ll scatter before you can prep them. Store harvested heads in a paper bag (not plastic) in a cool, dry place until processing. The goal is to keep them dry but retain natural moisture levels—never let them sit in damp conditions.
Clean and Dry Seed Heads Thoroughly
Spread the seed heads on a clean, flat surface like a baking sheet or mesh screen. Let them air-dry in a well-ventilated area for 7-10 days, turning them occasionally to ensure even drying. You’ll know they’re ready when the outer bracts crumble slightly at the touch and the seeds rattle inside when shaken.
Skip this step, and you risk introducing mold or rot during cold-moist storage. If you notice any fuzzy growth or dark spots, discard those heads immediately. Once fully dry, store them in a paper envelope labeled with the variety and date—this prevents moisture buildup and keeps seeds viable for up to 2 years.
Stratify Seed Heads for Cold-Moist Treatment
Fill a shallow container (like a plastic tray) with 2-3 inches of moistened sand or perlite—just damp enough to feel slightly damp when squeezed, not soggy. Place the dried seed heads on top, ensuring they’re fully covered but not submerged. Seal the container with a lid or plastic wrap, leaving a small gap for airflow.
Store the container in your refrigerator (or a cold garage if temperatures stay 35-45°F) for 4-6 weeks. Check weekly—if the sand feels dry, mist it lightly with water. The cold-moist treatment mimics winter conditions, breaking seed dormancy and ensuring higher germination rates. This step is non-negotiable for echinacea; without it, seeds often fail to sprout.
Test Germination Before Planting
After 4 weeks, remove one seed head and gently separate the seeds from the dry bracts. Plant 3-5 seeds in a small pot with moist potting mix, covering them ¼ inch deep. Place the pot in a warm (70-75°F), bright location—a sunny windowsill or under grow lights. Keep the soil consistently moist (not wet) and expect germination in 14-21 days.
If none sprout after 3 weeks, repeat the cold-moist treatment for another 2 weeks before testing again. Successful germination means your prep worked; if seeds still struggle, try a fresh batch of heads. Once seedlings emerge, transplant them to individual pots and harden off before moving outdoors in spring.
Tips & tricks for perfect echinacea seed head prep
Here's what I've learned from years of saving echinacea seeds—these details make all the difference between seeds that sprout and ones that disappoint.
The Harvest Timing Secret: That deep papery brown color in Step 1 is your golden signal for harvest. I've found that waiting until after the first frost actually improves seed viability—it signals to the plant that it's time to release seeds naturally. If you're unsure whether your seed heads are ready, gently squeeze one. If seeds easily pop out, they're mature enough for processing.
Drying Strategy: During the 7-10 day drying period in Step 2, I recommend placing a small fan nearby to create gentle airflow. This speeds up drying while preventing the seed heads from becoming brittle. Turn them every 2-3 days to ensure even drying—uneven drying can lead to mold growth even after storage. The crumbling bracts test is foolproof: if they don't crumble slightly, keep drying for another day or two.
Cold-Moist Storage Wisdom: When setting up your cold-moist treatment in Step 3, I've discovered that using perlite instead of sand creates better airflow around the seed heads. The 35-45°F range is crucial—any warmer and you won't break dormancy properly; any colder and germination suffers. I like to place my container on the bottom shelf of the fridge where temperatures stay most consistent. The slight gap for airflow is essential to prevent condensation buildup that could cause rot.
Germination Testing Tip: For the germination test in Step 4, I've found that using clear plastic pots allows you to monitor root development without disturbing the seeds. If you don't see any signs of germination after the full 3 weeks, don't be discouraged—sometimes echinacea seeds need that extra 2-week cold treatment to fully break dormancy. The key is patience: these seeds are tough and often need multiple cycles to wake up completely.
Pro Tips for Echinacea Seed Heads
- Here's what I've learned from years of saving echinacea seeds—these details make all the difference between seeds that sprout and ones that disappoint.
- The Harvest Timing Secret: That deep papery brown color in Step 1 is your golden signal for harvest.
- Drying Strategy: During the 7-10 day drying period in Step 2, I recommend placing a small fan nearby to create gentle airflow.
Frequently asked questions
Got questions about echinacea seed heads?
You’re not alone! Here are some of the most common queries—plus quick, practical answers to help you master the cold-moist prep method for maximum blooms.
Why do echinacea seed heads need cold-moist prep?
Echinacea seeds have a natural dormancy period that mimics winter conditions. Cold-moist stratification (chilling damp seeds) breaks dormancy, tricking the seed into thinking it’s survived a natural winter—so it germinates faster and stronger. Skip this step, and you might wait months (or never see sprouts!).
How long should I keep echinacea seeds cold and moist?
For best results, store your seeds in a sealed bag with damp peat moss or paper towels in the fridge for 4–6 weeks. Check them weekly—if mold appears (fuzzy white/green spots), toss the batch and start fresh. Patience pays off: proper stratification = 95%+ bloom success!
Can I use echinacea seed heads from my garden?
Collect seed heads when they’re brown and dry (late summer/fall), then let them air-dry for a few days. Shake out the seeds and store them in a cool, dry place until you’re ready to stratify. Pro tip: Label your seeds—some varieties (like ‘Magnus’ or ‘White Swan’) have unique traits!
What if my echinacea seeds won’t germinate after stratification?
Don’t panic! Try these fixes:
- Check moisture: Seeds should feel damp like a wrung-out sponge—not soggy.
- Verify cold temps: Ideal fridge temps are 34–40°F (1–4°C).
- Test freshness: Old seeds (<2 years) may lose viability. Start with new ones.
- Light exposure: Some seeds need light to germinate—try planting them shallowly (¼ inch deep).
Are there alternatives to cold-moist stratification?
Yes! If you’re short on time, try:
- Sowing outdoors in fall: Plant seeds in garden beds (they’ll naturally stratify over winter).
- Hot water soak: Soak seeds in 180°F (82°C) water for 5 minutes—then cool and plant. (Less reliable but faster!)
- Commercial pre-stratified seeds: Some nurseries sell echinacea seeds already treated for dormancy.
Wrapping up and next steps
Echinacea seed heads are a gardener’s secret weapon for dramatic blooms—when prepped right! By mastering the cold-moist stratification
Ready to transform your garden? Grab those seed heads, follow the steps, and watch your echinacea thrive. Next up: Share your blooming success with fellow gardeners—or experiment with other cold-treated seeds for even more seasonal magic!