Vegetables
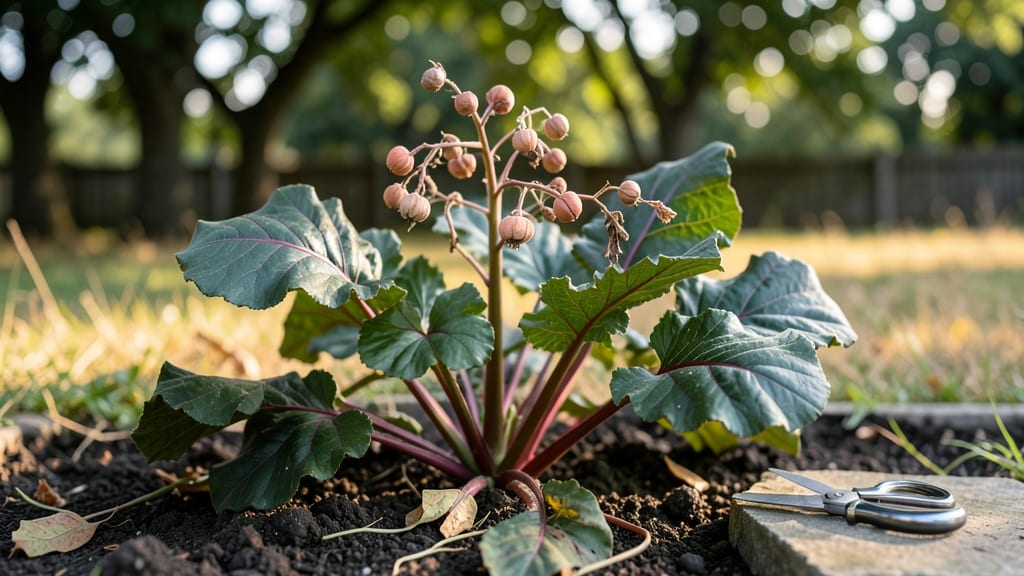
Harvesting beetroot seeds at the right time ensures strong germination and saves you money on heirloom varieties 🍠—but one wrong move can ruin your entire crop.
Picture this: you’ve nurtured your beetroot plants all season, only to realize too late that the seeds inside those dried pods won’t sprout next year. That’s why knowing the exact moment to harvest—when the stalks turn crispy brown and the seeds rattle inside—isn’t just helpful, it’s essential.
Get it wrong, and you’re back at the seed packet aisle.
Here’s the good news: with the right timing and a few simple steps, you can collect seeds that stay viable for years. I’ll walk you through how to spot the perfect moment, harvest without damaging the pods, and store them so they’re ready for next spring’s planting.
By the end, you’ll know exactly when to reach for those seed heads—and how to turn them into a low-cost, high-quality resource for your garden.
When to harvest beetroot seeds for best germination rates
Timing is everything when harvesting beetroot seeds. The critical window begins 60-90 days after planting, once plants bolt and flower. This is when your beetroot transforms from a leafy green into a seed-producing powerhouse.
Missing this window means lower germination rates, while waiting too long risks seed loss to pests or weather. For me, the ideal harvest time is when seed pods turn completely brown and crispy—usually 90-120 days after planting.
Climate plays a huge role in timing. In cooler regions like USDA Zone 4, you’ll need to start seeds earlier—sometimes as early as March—to ensure seeds mature before first frost. Meanwhile, in warmer climates like Zone 8, you can extend your harvest window into late fall.
The key is watching for bolting, the natural process where beetroot sends up flower stalks, signaling it’s ready for seed production.
Here’s the visual checklist I follow: green pods mean seeds aren’t ready; brown pods with crispy texture are perfect. If pods split open easily when dry, that’s your cue to harvest.
Ignore this, and you’ll risk losing seeds to birds or rain. Seed color also matters—dark brown seeds are more viable than pale or speckled ones, which often have lower germination rates.
🌱
In my experience, early morning harvests work best because pods are dry and less prone to mold. Cut the seed stalks at the base with clean pruning shears, leaving a few inches of stem attached. This prevents seeds from scattering and makes handling easier.
Once cut, I bundle the stalks together with a rubber band and hang them upside down in a well-ventilated area—like a garage or shed—to dry for 2-3 weeks.
Don’t overlook seed viability tests before storing. Place a few seeds in a glass of water—viable seeds sink, while empty or damaged ones float. This simple trick saves you from planting low-quality seeds later.
For best results, store dried seeds in a cool, dark place like a sealed jar in your fridge, where they’ll stay viable for 3-5 years.
One common mistake I’ve seen is harvesting seeds too early because the pods look brown. But if they’re still soft or green inside, the seeds won’t germinate. Always check for the rattle test: shake a pod—if it sounds hollow, it’s ready.
If not, wait another 7-10 days. Patience here ensures higher germination rates and healthier next-year plants.
For organic gardeners, saving beetroot seeds is a game-changer. It preserves heirloom varieties and cuts costs. Just remember: cross-pollination can happen, so if you’re growing multiple colors, isolate plants by at least 500 feet to maintain pure strains.
In my garden, I’ve kept Chioggia and Detroit Dark Red separate to avoid mixed seed colors.
🌿
If you’re in a short-growing-season area, consider starting seeds indoors 8-10 weeks before your last frost date. This gives you a head start on the 60-90 day window and maximizes your chances of successful seed harvest.
For example, in Zone 5, I start seeds in late February to ensure they’re ready by mid-July, just before the heat of summer slows growth.
Finally, keep an eye on pests like aphids and disease pressure during the seed maturation phase. These can reduce seed quality or even kill your plants before harvest. If you notice yellowing leaves
Step-by-step guide to collecting and drying beetroot seeds
Once you’ve identified your beetroot seed heads as fully mature, the next critical step is harvesting and drying them properly. Improper handling can lead to mold, low germination rates, or even complete seed loss.
I’ve learned through trial and error that patience and cleanliness are key—rushing the process often backfires. Let’s walk through each step to ensure you end up with viable seeds that last for years.
Your first priority is to harvest the seed heads at the right moment. If you wait too long, the pods may shatter and scatter seeds across your garden. On the other hand, harvesting too early means the seeds won’t be fully developed.
The ideal time is when the seed pods turn completely brown and begin to split open naturally. This usually happens 60-90 days after flowering, depending on your climate.
How to Harvest and Dry Beetroot Seeds
-
Step 1: Cut the Seed Heads
Use clean, sharp scissors or pruning shears to snip the entire seed stalk just above the foliage. Avoid tearing the stems, as this can damage the pods. Work on a dry, sunny day to minimize moisture exposure. -
Step 2: Remove Excess Foliage
Strip off any remaining yellowed leaves or stems, leaving only the seed clusters. This reduces the risk of mold growth during drying. Place the clusters in a well-ventilated area immediately. -
Step 3: Air Dry the Seed Heads
Hang the seed clusters upside down in a dry, shaded spot with good airflow. A mesh bag or paper bag works well to contain any loose seeds while allowing air circulation. Avoid direct sunlight, which can overheat and discolor the seeds. -
Step 4: Monitor for Dryness
Check the pods every 2-3 days. They’re ready when they’re completely dry and brittle, and the seeds rattle inside when shaken. If moisture remains, the seeds may mold or rot. This process typically takes 1-2 weeks, depending on humidity. -
Step 5: Extract the Seeds
Once fully dry, gently crush the pods with your fingers or a mortar and pestle to release the seeds. Avoid using machinery, as it can damage the seed coats. Sift the mixture through a fine mesh sieve to separate seeds from debris. -
Step 6: Store Properly
Place the cleaned seeds in a paper envelope or airtight container with a silica gel packet to absorb moisture. Label with the variety name and harvest date. Store in a cool, dark place (like a pantry) where temperatures stay below 70°F for optimal longevity.
One of the biggest mistakes I’ve seen gardeners make is skipping the drying step or rushing it to avoid pests. Moisture is the enemy of seed viability, so never store seeds until they’re bone-dry.
Even a slight dampness can trigger fungal growth within days. If you notice any white or green mold during drying, discard those seeds immediately and start fresh with a new batch.
Properly stored beetroot seeds can remain viable for 3-5 years, though germination rates drop slightly over time. To test viability, perform a simple float test: place seeds in water.
Viable seeds sink, while empty or damaged ones float. This quick check helps you determine which seeds to plant for the best results in your next garden season.
With these steps, you’ll not only save money on seed purchases but also preserve heirloom varieties that may disappear from commercial markets. Plus, there’s nothing quite like the satisfaction of growing a plant from seeds you harvested and saved yourself—it’s a full-circle moment in gardening.