
Size
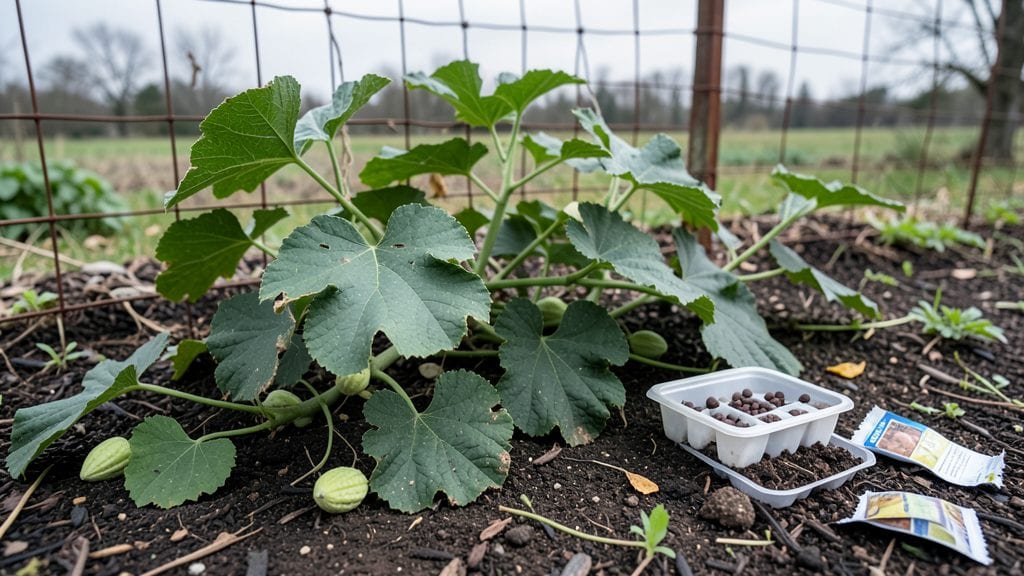
Growing ampalaya from seed means harvesting your own tropical bitter melon with that signature sharp bite—if you’re willing to wait for the vines to mature. 🌱 I’ve learned the hard way that these seeds need warmth and patience, but the payoff is worth it when you’re snipping fresh leaves for stir-fries or harvesting the fruit for soups.
The first secret is heat: ampalaya seeds won’t germinate below 75°F, so start them indoors under grow lights or in a sunny window. Use a well-draining potting mix and keep the soil consistently moist but never soggy—these tropical plants hate wet feet.
Once seedlings sprout, transplant them outdoors only after the last frost, giving them a long growing season to climb and produce.
By summer’s end, you’ll see those distinctive ridged fruits forming, though they take 6-8 months to mature. The vines grow aggressively, so provide a trellis or strong support—they’ll reward you with a harvest that tastes nothing like store-bought.
Just watch for powdery mildew in humid climates and keep those leaves dry.
Perfect for warm climates like Florida, Texas, or California, but even northern growers can try this in containers moved indoors for winter. The key is consistency: warmth, water, and a little elbow grease. Ready to grow your own bitter melon?”
📚 In This Guide
- What you need
- Instructions
- Tips and common mistakes
- Wrapping up and next steps
What you need
- ● Ampalaya seeds – 5–10 seeds (fresh or dried, but avoid seeds older than 1 year for best germination).
- ● Seed-starting trays or small pots – 2–3 inch (5–7.5 cm) diameter, with drainage holes.
- ● Seed-starting mix – Lightweight, well-draining mix (e.g., coco coir + perlite or a commercial seedling mix). Quantity: Enough to fill your trays/pots (about 1–2 cups per pot).
- ● Plastic wrap or humidity dome – To retain moisture while seeds germinate.
- ● Spray bottle – For gentle watering (avoid over-saturating seeds).
- ● Grow lights or sunny windowsill – Ampalaya needs 6–8 hours of warm light daily (a south-facing window or LED grow lights work).
- ○ Fertilizer (balanced, water-soluble) – 10-10-10 or 5-5-5 NPK ratio. Optional: Start with half-strength once seedlings sprout.
- ● Transplanting pots or garden bed – For containers: 5–7 gallon (19–26 L) pots with drainage.
- ● For garden: Well-draining soil, full sun (6+ hours/day), and space (plants spread 3–5 ft/0.9–1.5 m).
- ● Trellis or stakes – Ampalaya vines grow 10–20 ft (3–6 m)! Use bamboo stakes or a sturdy trellis.
- ● Pruning shears – For trimming vines and shaping plants.
- ● Soil moisture meter – Ampalaya prefers consistently moist (not soggy) soil.
- ● Organic mulch – Straw or shredded leaves to retain moisture and suppress weeds.
- ● Compost or worm castings – Boosts soil fertility for faster growth.
- ● Pest control (neem oil or insecticidal soap) – Preemptive measure against aphids or whiteflies.
- ● Garden journal – Track planting dates, watering, and growth milestones!
Step-by-step instructions for growing ampalaya from seed
Here's how to turn those small, hard seeds into thriving tropical vines ready for harvest.
🌱 Step 1: Soak and Prepare the Seeds
Ampalaya seeds have tough outer shells that need softening before they'll sprout. Place the seeds in a small bowl and cover them with warm water (about 80°F) for 24 hours. This breaks down the seed coat and speeds up germination. I like to use a mesh bag or cheesecloth to keep them contained while soaking.
After soaking, drain the water and let the seeds sit in a warm, humid spot for another 12 hours. You'll notice the outer shells soften slightly—this is your signal they're ready to plant. If they still feel hard, soak them another 4-6 hours. Never skip this step; dry seeds can take weeks to germinate, if at all.
🪴 Step 2: Plant in Warm, Well-Draining Soil
Fill a small seedling tray or individual pots with a mix of 50% peat moss and 50% perlite—this ensures excellent drainage, which ampalaya roots need to avoid rot. The soil should be warm, ideally between 75-85°F, to encourage quick germination. You can place the tray on a seedling heat mat if your home runs cooler.
Plant the soaked seeds about ½ inch deep, spacing them 2 inches apart in the tray. Gently press the soil around them to secure them in place. Ampalaya seeds are tiny, so I use a toothpick to handle them carefully. Water lightly with a spray bottle until the soil feels evenly moist but not soggy.
☀️ Step 3: Provide Humidity and Warmth for Germination
Cover the tray with clear plastic wrap or a humidity dome to trap warmth and moisture. Ampalaya seeds thrive in these conditions and typically germinate within 7-14 days. Place the tray in a warm spot, like on top of a refrigerator or near a sunny window. You'll see tiny sprouts push through the soil once they're ready.
Check the soil daily and mist with water if it feels dry to the touch. Avoid overwatering—soggy soil can cause the seeds to rot before they sprout. Once the seedlings emerge, remove the plastic wrap immediately to prevent fungal growth. Keep the soil consistently moist but never waterlogged.
🌿 Step 4: Transplant Seedlings to Larger Pots
When the seedlings reach about 3-4 inches tall and develop their first true leaves, it's time to transplant them into individual 5-inch pots. Fill the pots with a mix of potting soil and compost to provide nutrients for their rapid growth. Handle the seedlings gently by their leaves, not the stems, to avoid damaging the roots.
Plant each seedling about 1 inch deep in the new pot and firm the soil around the base. Water thoroughly after transplanting to help the roots settle. Place the pots in a location with bright, indirect light for the first week to help them adjust. Gradually introduce them to full sun over the next few days.
✂️ Step 5: Support and Train the Vines
Ampalaya grows as a vigorous vine, so you'll need to provide support early on. Install a small trellis or bamboo stakes in each pot as soon as the vines start climbing. Gently guide the main stem along the support, tying it loosely with soft twine if needed. This encourages upward growth and keeps the plant from sprawling.
Fertilize the plants every 2 weeks with a balanced liquid fertilizer diluted to half strength. Ampalaya is a heavy feeder and will reward you with faster growth and more abundant fruit. Watch for signs of nutrient deficiency, like yellowing leaves, which means it's time to fertilize again. Prune any leggy or overcrowded growth to keep the plant focused on producing fruit.
Tips & tricks for growing ampalaya from seed
Mastering ampalaya seed germination takes patience, but these key steps will help you avoid common pitfalls and get those seeds sprouting like a pro.
Soaking Secret: The 24-hour soak in 80°F warm water is non-negotiable—this breaks down the tough seed coat that would otherwise keep your ampalaya dormant for weeks. I've learned the hard way that skipping this step means waiting months for germination. After soaking, place the seeds in a warm, humid spot for that extra 12 hours—this mimics tropical conditions and gives you the best chance at quick sprouting.
Soil Temperature Matters: Those 75-85°F soil temps in Step 2 aren't just suggestions—they're crucial for germination. If your home runs cooler, invest in a seedling heat mat ($15 at garden centers) to maintain that warmth. I've seen seeds fail to sprout when planted in soil that was only 68°F, despite following all other steps perfectly. Pro tip: Check soil temp with a small thermometer before planting.
Germination Timeline: The 7-14 day germination window can feel like an eternity, but consistency is key. Keep that humidity dome in place and maintain even moisture—don't let the soil dry out completely between waterings. I've had seeds sprout in 5 days when conditions were perfect, and others take 2 weeks. The key is patience and maintaining those warm, humid conditions without overwatering.
Transplanting Technique: When moving seedlings to 5-inch pots in Step 4, handle them by the leaves, not the stems—this prevents root damage. I use a small spoon to gently lift each seedling with its soil intact, then place it in the new pot. Water thoroughly after transplanting to help the roots establish quickly. This is where many beginners lose their seedlings—gentle handling makes all the difference.
Pro Tips for Grow Ampalaya Seeds
- Mastering ampalaya seed germination takes patience, but these key steps will help you avoid common pitfalls and get those seeds sprouting like a pro.
- Soaking Secret: The 24-hour soak in 80°F warm water is non-negotiable—this breaks down the tough seed coat that would otherwise keep your ampalaya dormant for weeks.
- Soil Temperature Matters: Those 75-85°F soil temps in Step 2 aren't just suggestions—they're crucial for germination.
Frequently asked questions
Got questions about growing ampalaya from seeds?
You’re not alone! Here are some of the most common concerns—and their easy answers—to help you grow bitter melon like a pro.
How long does it take for ampalaya seeds to germinate?
Ampalaya seeds typically sprout within 10 to 21 days if kept in warm (70–85°F), moist conditions. For faster germination, soak seeds in warm water for 24 hours before planting. Patience is key—some seeds may take longer, especially in cooler climates.
When is the best time to plant ampalaya seeds?
Plant ampalaya seeds after the last frost when soil temperatures reach at least 70°F (21°C). In tropical climates, you can grow year-round, but cooler months slow growth. Start indoors 2–3 weeks before the last frost for a head start.
Can I grow ampalaya in pots or containers?
Yes! Ampalaya thrives in containers as long as they’re at least 12–18 inches deep with drainage holes. Use well-draining soil and fertilize regularly. Just ensure the pot gets 6+ hours of sunlight daily. Dwarf varieties like ‘Mini Melon’ are ideal for small spaces.
Why are my ampalaya leaves turning yellow or wilting?
Yellow leaves often signal overwatering, nutrient deficiency, or pests. Check soil moisture—ampalaya prefers it slightly dry between waterings. Yellowing edges? It might be magnesium deficiency (try Epsom salt). Wilting could mean aphids or whiteflies—spray with neem oil or insecticidal soap.
How do I know when ampalaya is ready to harvest?
Harvest when fruits are 3–6 inches long and still firm but slightly tender. Younger melons are milder and sweeter. Use pruning shears to avoid damaging the vine. For bitter melon stir-fries, pick when green; for pickling, wait until slightly yellow.
Wrapping up and next steps
Growing ampalaya from seed is a rewarding journey that brings fresh, nutritious produce right to your doorstep! 🌱 With the right soil, sunlight, and care, you’ll soon enjoy homegrown bitter melon packed with vitamins and flavor.
Whether you’re a beginner or seasoned gardener, every step—from planting to harvesting—is manageable with patience and passion.
Now that you’re armed with knowledge, why not start your own ampalaya garden today? Grab those seeds, prep your space, and watch your tropical green grow. Happy gardening! 🌿