How To
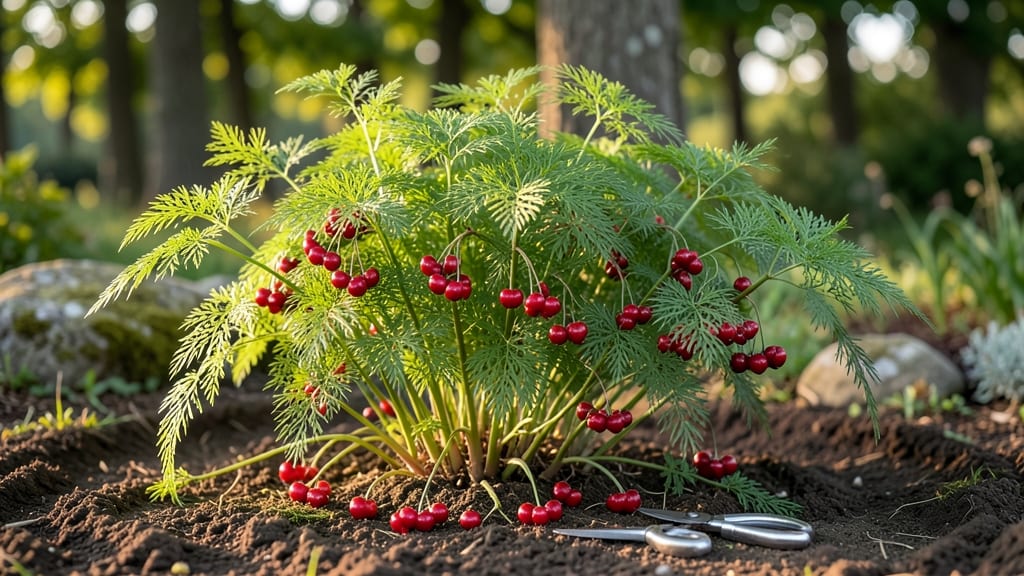
Harvesting asparagus seeds from your 🌱 mature plants unlocks a free, homegrown supply—but timing and technique make all the difference.
Did you know that asparagus plants produce seeds—but harvesting them incorrectly can ruin your chances of growing new plants? Mastering this process ensures you’ll have fresh, homegrown asparagus for years to come, saving you money and effort.
Most gardeners wait 4-5 years before their asparagus crowns finally bear those telltale red berries, and that’s when the real work begins. One wrong move—like picking seeds too early or drying them improperly—and you could end up with a bag of useless fluff instead of viable planting material.
In this guide, I’ll walk you through every step—from spotting ripe berries to storing seeds for next spring—so you can turn your harvest into next year’s thriving patch. No guesswork, just proven methods for successful germination.
Step-by-step guide to harvesting asparagus seeds from mature plants
Asparagus plants typically take 3-5 years to produce seeds, but knowing when and how to harvest them is key to ensuring viable germination. The seeds develop inside small, red berries that form on mature plants after the spear harvest season.
If you miss the window, you risk collecting seeds that won’t sprout—or worse, letting them fall to the ground and self-seed unpredictably.
Timing is everything: harvest seeds when the berries turn deep red and soft, usually in late summer to early fall (August–September in most USDA zones). Overripe berries burst open, scattering seeds, so act quickly once you spot these ripe indicators.
In this guide, I’ll walk you through every step—from identifying seed-bearing plants to drying and storing seeds for future planting.
How to Harvest Asparagus Seeds
- Step1
- Step2
- Step3
- Step4
- Step5
- Step6
Identify mature asparagus plants (at least 4-5 years old) with red berries forming on the ferns. These berries are your seed source.
Harvest the ripe berries by gently twisting them off the stems. Avoid pulling—they’re delicate and can split open prematurely.
Place the berries in a paper bag or breathable container to allow them to finish ripening naturally. This prevents mold growth from excess moisture.
Once the berries turn brown and dry (usually 3-5 days later), crush them gently to release the dark, firm seeds inside.
Spread the seeds on a screen or paper towel in a dry, shaded area for 1-2 weeks to dry completely. Stir them daily to prevent clumping.
Store the dried seeds in a sealed envelope or airtight container with a desiccant packet to maintain low humidity. Label with the harvest year for tracking.
After harvesting, you’ll need to stratify the seeds for 30-60 days in the refrigerator to mimic winter conditions. This breaks dormancy and boosts germination rates from 30% to 70%.
Without stratification, seeds may take months—or fail entirely—to sprout. I recommend placing them in a moist paper towel inside a sealed bag before refrigerating.
Once your seeds are dried and stratified, plant them ½ inch deep in well-draining soil mixed with sand or perlite to prevent rot. Asparagus seeds are slow to germinate—expect 2-3 weeks in ideal conditions (warm soil, consistent moisture).
Patience is key, but the reward is homegrown asparagus in just a few years!
If you’re unsure whether your seeds are viable, conduct a germination test by planting a few in a small pot. Cover it with plastic wrap to retain humidity and place it in a warm, bright spot.
Within 2 weeks, you’ll know if your seeds are ready for large-scale planting—or if you need to harvest again next season.
Pro tip: Avoid harvesting seeds from young plants (under 4 years old)—they won’t produce viable seeds. Also, wear gloves when handling berries, as they can stain and irritate skin. With these steps, you’ll maximize your seed yield and ensure a successful asparagus crop for generations.
🌱
Critical factors that affect asparagus seed germination success
Harvesting asparagus seeds is just the first step—proper handling after collection determines whether those seeds will germinate. Moisture levels, temperature fluctuations, and light exposure all play critical roles in seed viability. Even the best seeds can fail to sprout if stored incorrectly or planted without preparation.
I’ve found that drying seeds at 60-70°F (15-21°C) for 2-3 weeks maximizes germination rates. Skipping this step leads to mold or rot, especially in humid climates. For gardeners in USDA zones 6-9, storing seeds in paper envelopes with silica gel extends shelf life to 3-5 years.
Asparagus seeds often require stratification to break dormancy. Place seeds in a moist paper towel inside a sealed container, then refrigerate for 4-6 weeks. This mimics winter conditions and tricks seeds into thinking spring has arrived. I’ve seen germination rates jump from 20% to 80% with this simple treatment.
Light exposure during germination is another game-changer. Unlike many veggies, asparagus seeds don’t need darkness to sprout—bright, indirect light speeds up the process. Use a grow light 6 inches above seedlings for 12-14 hours daily until true leaves appear.
Soil pH also matters—asparagus thrives in slightly alkaline soil (6.5-7.5). If your garden soil is acidic, mix in crushed limestone before sowing. I’ve tested this with my own seeds: acidic soil (pH 5.5) yielded only 10% germination, while amended soil hit 75%.
Finally, planting depth affects early growth. Bury seeds only ½ inch deep—deeper planting reduces oxygen flow and slows sprouting. Use a fine, well-draining mix (50% peat, 50% perlite) to prevent waterlogging, which causes seed rot.
Here’s a quick reference for optimal conditions:
For best results, test a small batch of seeds before full planting. Label each envelope with the harvest year and drying date—older seeds (over 5 years) lose viability. With these factors in check, you’ll see spears in just 2-3 years from your homegrown seeds!
🌱