Picking
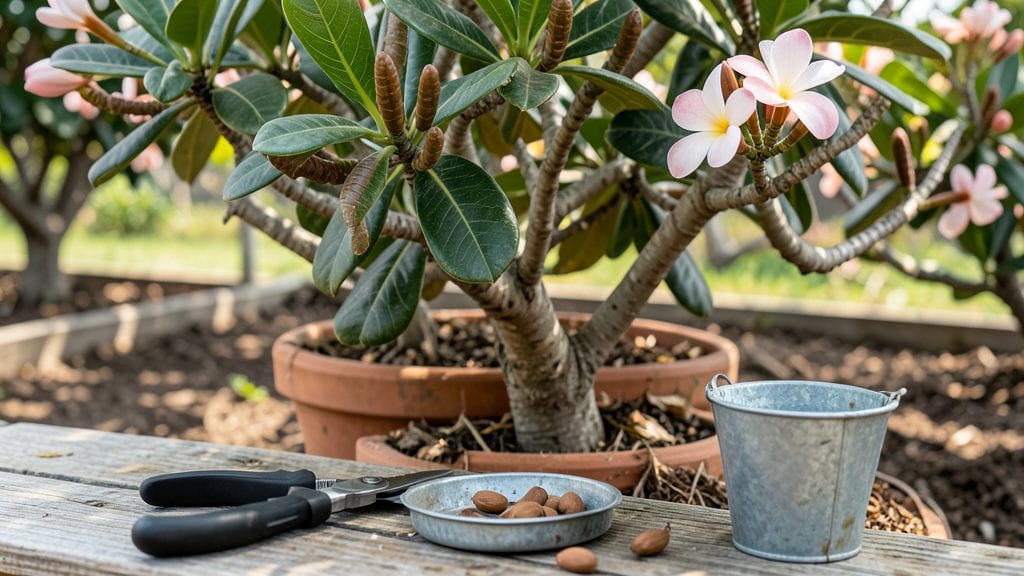
Harvesting plumeria seed pods at the perfect moment means the difference between thriving seedlings and wasted effort. 🌿 I’ve learned that timing—when those pods turn from green to brown—is everything, and a single day too early or late can ruin your germination chances.
The key is catching them just as they’re softening but before they split open on their own, because once those seeds hit the ground, they won’t wait for you.
You’ll need just a few simple tools: sharp pruning shears, a small bucket or paper bag for collection, and a marker to label pods by harvest date. I always work on a dry morning after the dew has evaporated—wet pods stick to everything and can mold if you’re not careful.
The moment you spot a pod that’s turned a dull brown and feels slightly papery under gentle pressure, that’s your cue to act.
Once harvested, store the pods in a cool, dry place for up to a week before cracking them open—this mimics the natural drying process and prevents premature sprouting. The seeds inside should be plump and firm; any shriveled or hollow ones won’t germinate.
When you’re ready to plant, soak them for 24 hours to soften the tough outer shell, and you’ll see those first green shoots emerge within weeks.
This method works for both tropical and subtropical climates, though timing shifts slightly depending on your last frost date. The real magic happens when you watch those first leaves unfurl—proof that your patience paid off. Ready to turn those pods into a jungle of new plumeria trees?
📚 In This Guide
- What you need
- Instructions
- Tips and common mistakes
- Wrapping up and next steps
What you need
- ● Ripe plumeria seed pods – Wait until they turn brown and dry (usually late summer to early fall).
- ● Sharp pruning shears or scissors – A clean, sterilized pair (7–10 inch blades) to avoid damaging the plant.
- ○ Gloves (optional but recommended) – Protect your hands from sap and potential irritation.
- ● Paper towels or newspaper – For drying and cleaning seed pods.
- ● Small bowl or container – To collect seeds as you harvest.
- ● Permanent marker & labels – To mark seed pods by variety (if applicable).
- ● Plastic bag or airtight container – For storing seeds until germination.
- ● Disinfectant (rubbing alcohol or bleach solution) – To sterilize tools between cuts.
- ● Magnifying glass – For inspecting seeds for pests or damage.
- ● Seed-starting mix or coconut coir – If you plan to sow seeds immediately.
- ● Spray bottle with water – To lightly mist seeds if drying them indoors.
Step-by-Step instructions for harvesting plumeria seed pods
Here's how to identify and collect seed pods at peak ripeness for the best germination results.
🌿 Step 1: Identify Ripe Seed Pods on the Plant
Look for seed pods that have turned from green to a pale tan or light brown color—this is your signal they're ready. The pods should feel slightly leathery but still intact, not dry and brittle. I tap them gently with my fingernail; ripe pods make a hollow sound when tapped, while unripe ones sound firm.
Plumeria pods typically ripen in clusters, so check the plant every 3-4 days during the late summer to early fall season. Avoid harvesting pods that have already split open or are falling off the plant—they've missed their prime window for germination success.
✂️ Step 2: Harvest the Pods at the Right Time
Use clean, sharp pruning shears to snip the pods directly from the stem, leaving about ½ inch of stem attached. This prevents damage to the plant and helps preserve the seed viability. I always sterilize my shears with rubbing alcohol between cuts to prevent any potential disease transfer.
Harvest on a dry, sunny morning when the pods are fully dry. This timing ensures the seeds inside are at their most stable state. Collect 4-6 pods per plant if you're aiming for a small collection—each pod contains dozens of seeds, so you won't need many for successful germination.
🪴 Step 3: Prepare the Harvested Pods for Storage
Once harvested, place the pods in a well-ventilated area to dry completely for 2-3 days. Spread them out on a paper towel or mesh screen in a dry, shaded spot. The pods are ready when they're completely dry and make a crisp sound when tapped together.
Store the dried pods in a paper bag or breathable fabric sack in a cool, dry place. Avoid plastic containers—they trap moisture and can cause mold. Label the bag with the harvest date, as seeds lose viability over time, especially in humid climates.
💧 Step 4: Extract Seeds and Prepare for Germination
When you're ready to plant, gently crush the dried pods between your hands or with a small hammer to release the seeds. Plumeria seeds are flat and papery, about the size of a small fingernail. I sift them through a fine mesh screen to separate the seeds from the pod debris.
Soak the seeds in lukewarm water for 24 hours before planting to soften the seed coat and encourage faster germination. This step is crucial—dry seeds can take weeks to sprout, while soaked seeds often germinate within 7-14 days. Drain and plant immediately after soaking.
⏰ Step 5: Plant Seeds for Optimal Germination
Fill small pots with a well-draining mix of 50% potting soil and 50% perlite, then plant the soaked seeds ¼ inch deep. Space them 1 inch apart in the pot to allow room for growth. Keep the soil consistently moist but never soggy—plumeria seeds rot quickly if overwatered.
Place the pots in a warm, bright location with indirect light. A seedling heat mat set to 75-80°F speeds up germination. Cover the pots with plastic wrap to retain humidity, but remove it daily for 10 minutes to prevent mold. You'll see tiny green sprouts push through the soil within 2 weeks if conditions are right.
Tips & tricks for harvesting plumeria seed pods
Mastering the timing and technique for harvesting plumeria seed pods makes all the difference in germination success.
The Ripeness Test: In Step 1, when you're checking for that pale tan color, also look for pods that have slightly separated from the stem at the base. This natural separation is a strong indicator of ripeness. I've learned the hard way that pods still firmly attached might need another 3-4 days to reach peak germination potential.
Harvesting Strategy: During Step 2, I recommend collecting pods from multiple branches to ensure genetic diversity in your seedlings. If you're working with a single plant, gather pods from both sun-exposed and shaded areas—they often ripen at slightly different times. Just remember to keep those 4-6 pods per plant to avoid overharvesting.
Drying Wisdom: For Step 3, the 2-3 day drying period is crucial, but don't rush it! I've seen pods that dried too quickly develop mold during storage. Place them in a spot with good airflow but protect them from direct sunlight, which can cause them to over-dry and become brittle. A mesh screen works perfectly for this.
Seed Extraction: When crushing pods in Step 4, I find using a small hammer on a hard surface works better than hands alone. This gives you better control and prevents accidentally damaging the delicate seeds. After extraction, I always do a quick float test—place the seeds in water for a few seconds. Good seeds will sink, while empty or damaged ones will float away.
Pro Tips for Harvest Plumeria Seed Pods
- Mastering the timing and technique for harvesting plumeria seed pods makes all the difference in germination success.
- The Ripeness Test: In Step 1, when you're checking for that pale tan color, also look for pods that have slightly separated from the stem at the base.
- Harvesting Strategy: During Step 2, I recommend collecting pods from multiple branches to ensure genetic diversity in your seedlings.
Frequently asked questions
Got questions about harvesting and handling plumeria seed pods? Here are some of the most common ones—and their answers!
When are plumeria seed pods truly ready for harvest?
Plumeria seed pods are ready when they turn light brown or tan and feel slightly papery to the touch. If they’re still green or firm, they need more time—typically 3–6 months after flowering. Avoid harvesting if pods are still closed or leathery, as the seeds won’t be viable.
How long does it take for plumeria seeds to germinate after harvest?
Germination can take anywhere from 2–6 weeks, depending on temperature and moisture. Keep seeds in a warm, humid environment (around 75–85°F) and maintain consistent moisture. Patience is key—some seeds may take longer, especially if stored improperly before planting.
Can I harvest plumeria seeds from store-bought flowers?
Unfortunately, no. Most commercially sold plumeria flowers are sterile (they don’t produce seeds) because they’re bred for beauty, not reproduction. For seeds, you’ll need to harvest from a mature, flowering plumeria tree in your garden or a trusted seed source.
What should I do if my seed pods split open before I can harvest them?
Don’t worry! If pods split naturally, scoop out the seeds and plant them immediately. The pods release seeds when fully ripe, so they’re still viable. Just avoid letting them dry out or scatter—harvest the seeds and store them in a paper bag (not plastic) in a cool, dry place until you’re ready to plant.
How do I know if my harvested plumeria seeds are still good?
Fresh plumeria seeds should be plump, firm, and dark brown. If they’re shriveled, moldy, or discolored, they’ve likely lost viability. Test a few by soaking them in water—if they sink, they’re still good! Store seeds in a paper envelope in the fridge for up to 6 months for best results.
Wrapping up and next steps
Harvesting plumeria seed pods is a rewarding way to grow these fragrant beauties from scratch! 🌱 With the right timing—waiting for pods to turn brown and split naturally—and a few simple tools, you’ve got everything you need to kickstart your germination journey. Don’t let hesitation hold you back—now’s the perfect time to gather those seeds and nurture your future plumeria trees!
Ready to take the next step? Once you’ve collected your seeds, research germination methods (like soaking or planting directly) to give your new plants the best start. Happy growing—your garden (and nose!) will thank you. 🌸