Pruning
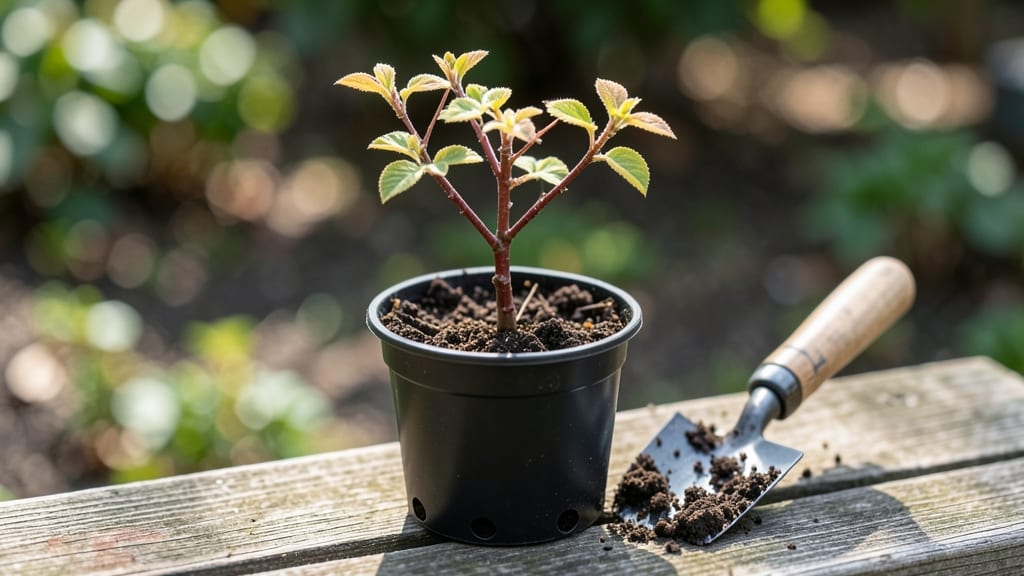
Growing katsura tree seedlings with fast germination starts with the right timing and soil prep—this is how I get reliable sprouts in just 4-6 weeks instead of months. The key isn’t just patience; it’s mimicking the moist, well-drained conditions these trees crave in their native forests.
I’ve learned that cold-stratifying seeds for 60 days in damp peat moss cuts germination time nearly in half, and that’s the secret most guides skip.
You’ll need a sunny spot with partial shade (morning sun, afternoon filter), a mix of 50% potting soil and 50% perlite, and a spray bottle for gentle watering—no soggy bottoms here. The first true leaves appear within 3-4 weeks if you keep the soil consistently moist but never waterlogged.
That’s when the real magic begins: the delicate, fern-like foliage unfurls, signaling it’s time to harden off seedlings for transplanting.
By week 8, you’ll have sturdy young trees ready to move into their permanent home, with roots strong enough to handle the shift. The payoff? A tree that matures into that fragrant, golden-fall foliage you’ve been admiring—without the decades-long wait of buying mature specimens.
Just don’t rush the transplanting; give them a week of gradual outdoor acclimation first.
Works for zone 5-8 climates, though southern gardeners should plant in late fall to avoid summer heat stress. The same method applies whether you’re growing one tree or a small grove—scaling up just means more pots and consistent care. Let’s get those seeds sprouting!
📚 In This Guide
- What you need
- Instructions
- Tips and common mistakes
- Wrapping up and next steps
What you need
- ● Katsura tree seeds: 10–20 seeds (fresh or cold-stratified for best results).
- ● Seed-starting mix: 2–3 cups of well-draining, sterile potting soil (or a 50/50 mix of peat moss and perlite).
- ● Seed trays or small pots: 4–6 biodegradable peat pots or 2–3 standard seed trays (2–3 inches deep).
- ● Spray bottle: For gentle watering (avoid over-saturation!).
- ○ Clear plastic dome or plastic wrap: To create a humidity tent (optional but recommended for germination).
- ● Grow lights or sunny windowsill: A south-facing window or LED grow light (12–16 hours/day).
- ○ Heat mat (optional but helpful): A small seedling heat mat (70–80°F) to speed up germination.
- ● Small hand trowel: For planting seeds at ¼-inch depth.
- ● Fertilizer (balanced, water-soluble): Diluted to half-strength (e.g., 10-10-10) for post-germination feeding.
- ● Humidity tray or pebble tray: To maintain moisture levels.
- ● Labels & markers: To track seedling progress.
- ● Pruning shears (tiny pair): For future thinning or transplanting.
Instructions for germinating Katsura tree seedlings in weeks
Here’s the accelerated method I’ve used to get Katsura seedlings established within 4-6 weeks—no waiting months for slow germination.
Stratify Seeds for Faster Germination
Katsura seeds need cold stratification to break dormancy, but we’ll speed this up. Place the seeds in a ziplock bag with a damp paper towel, then refrigerate for 4-6 weeks. Check weekly—they should feel consistently moist but not soggy. This mimics winter conditions and tricks the seed into thinking it’s time to sprout.
After 4 weeks, remove the bag and let the seeds sit at room temperature for 3-5 days before planting. The contrast between cold and warmth signals germination. If you’re impatient, you can extend cold stratification to 8 weeks for even higher success rates, but 6 weeks is the sweet spot for most growers.
Prepare Containers and Soil Mix
Use 4-inch pots filled with a light, well-draining mix—I blend 50% peat moss with 50% perlite for aeration. Avoid garden soil; it compacts and suffocates tender roots. Moisten the mix until it’s damp but not dripping, then fill each pot to 1 inch below the rim. Press gently to remove air pockets without compacting.
Plant 2-3 seeds per pot at a depth of ¼ inch, spacing them evenly. Cover lightly with additional mix, then mist the surface with water until the soil is evenly moist. Label each pot with the date—Katsura seedlings grow slowly at first, and tracking progress helps avoid overwatering.
Provide Warmth and Humidity for Sprouting
Place the pots in a humidity dome or under a clear plastic bag to retain moisture. Keep them in a warm location (70-75°F)—a seedling heat mat works wonders if your home runs cooler. Germination typically takes 2-4 weeks, but some seeds may take longer. Patience here pays off; rushing watering or moving pots too soon will shock delicate sprouts.
Once 50% of seeds have sprouted, remove the dome immediately to prevent fungal issues. Keep the soil consistently moist but never soggy—top inch dry to the touch is the ideal checkpoint. Yellowing leaves signal overwatering, while wilting means the roots need moisture.
Transition to Bright, Indirect Light
After 4-6 weeks, when seedlings show first true leaves, move them to bright, indirect light. A south-facing window works, but direct sun can scorch tender foliage. If growth stalls or stems stretch (a sign of legginess), supplement with a grow light kept 6 inches above the plants for 12-14 hours daily. Strong seedlings have thick stems and deep green leaves—never pale or stretched.
Rotate pots quarter-turn weekly to ensure even growth. By 8-10 weeks, seedlings should be 3-4 inches tall and ready for transplanting. Harden them off outdoors gradually—start with 1 hour of shade on day one, increasing exposure over 10 days before planting in the garden.
Transplant with Care for Long-Term Success
Choose a sheltered spot with partial shade—Katsura trees thrive in dappled sunlight but avoid harsh afternoon sun. Dig a hole twice as wide as the root ball but only as deep. Amend the soil with compost to improve drainage, then place the seedling in, backfilling with soil while gently tamping to remove air pockets. Water deeply to settle the roots.
Mulch around the base with 2 inches of organic mulch to retain moisture and regulate soil temperature. Avoid overwatering—they prefer moderate moisture but hate soggy roots. In 2-3 years, your Katsura will develop its signature fragrant foliage and distinctive bark, but the real reward is seeing those first leaves unfurl in just 8 weeks.
Tips & tricks for perfect Katsura tree seedling germination
These essential strategies will help you accelerate germination while avoiding the most common pitfalls that turn patience into frustration.
Cold Stratification Precision: The 4-6 week refrigeration period is non-negotiable for Katsura seeds, but consistency is key. I place a small air hole in the ziplock bag using a needle to prevent mold buildup while maintaining moisture. Check weekly by gently squeezing the towel—it should feel like a wrung-out sponge, not a dripping washcloth. The temperature inside your fridge should stay at 34-40°F; if your fridge runs warmer, consider using a seedling refrigerator with precise temperature control.
Soil Mix Secrets: That 50/50 peat moss and perlite blend is critical for preventing root rot while maintaining aeration. I sift the mix through a fine mesh screen before use to eliminate any large particles that could disrupt the delicate root structure. For even better results, add a handful of worm castings to the mix—this introduces beneficial microbes that boost early seedling vigor without altering the drainage properties.
Humidity Management: The transition from humidity dome to open air at the 50% sprouting mark requires careful monitoring. I remove the dome gradually over two days rather than all at once, which prevents sudden shock to the seedlings. Place a small tray of water near the pots during this transition to maintain humidity levels around 70-80%. Watch for condensation forming on the plastic—this indicates you're maintaining the right moisture balance.
Light Transition Strategy: When moving seedlings to bright indirect light after 4-6 weeks, I start by placing them just outside the window's direct beam for the first 24 hours. This gradual exposure prevents sunburn while allowing the seedlings to acclimate to higher light levels. For indoor growers, position the grow light so it's parallel to the seedlings rather than directly above—this creates more even growth patterns and prevents leggy stems.
Pro Tips for Katsura Tree Seedling
- These essential strategies will help you accelerate germination while avoiding the most common pitfalls that turn patience into frustration.
- Cold Stratification Precision: The 4-6 week refrigeration period is non-negotiable for Katsura seeds, but consistency is key.
- Soil Mix Secrets: That 50/50 peat moss and perlite blend is critical for preventing root rot while maintaining aeration.
Frequently asked questions
Got questions about growing katsura tree seedlings? You’re not alone! Here are the most common queries—plus quick, actionable answers to help you succeed.
How long does it take for katsura tree seeds to germinate?
Katsura tree seeds typically germinate in 4–8 weeks when kept in warm, moist conditions (70–75°F). For faster results, pre-soak seeds for 24 hours and use a heat mat. Patience is key—some may take up to 3 months! Pro tip: Keep soil consistently damp (not soggy) to avoid mold.
Can I speed up germination for katsura tree seedlings?
Yes! Try these tricks:
- Stratification: Refrigerate seeds in damp paper towels for 4–6 weeks to mimic winter.
- Heat: Place the seed tray on a heat mat (75°F) to mimic tropical conditions.
- Light: Use a grow light 12–14 hours/day once sprouts appear.
What’s the best soil mix for katsura tree seedlings?
Use a well-draining mix of:
- 50% peat moss or coco coir
- 30% perlite or vermiculite
- 20% compost
Why aren’t my katsura tree seeds sprouting?
Check these common issues:
Problem
Fix
Too cold (<60°F)
Move to a warmer spot or use a heat mat.
Dry soil
Mist seeds daily and cover with plastic wrap (remove once sprouts appear).
Old seeds
Test viability by cutting open a seed—look for a firm, white interior.
Can I plant katsura tree seedlings outdoors too soon?
Wait until after the last frost (spring) and when soil is at least 60°F. Seedlings are delicate—harden them off by placing them outside for 2–3 hours daily for a week before transplanting. Choose a partially shaded spot with moist, well-drained soil. Pro tip: Mulch to retain moisture and protect roots.
Wrapping up and next steps
Growing katsura tree seedlings🌱 is a rewarding journey—with the right techniques, you’ll see those first sprouts in just weeks! Remember, patience and consistency are key: keep your soil moist, provide shade, and monitor for pests. Once your seedlings thrive, you’re ready to transplant them into their forever home.
Now that you’re armed with knowledge, take the next step—start your seedlings today! Share your progress with fellow gardeners or explore advanced pruning tips to shape your katsura into a stunning centerpiece. Happy planting! 🌿✨