
Lawn
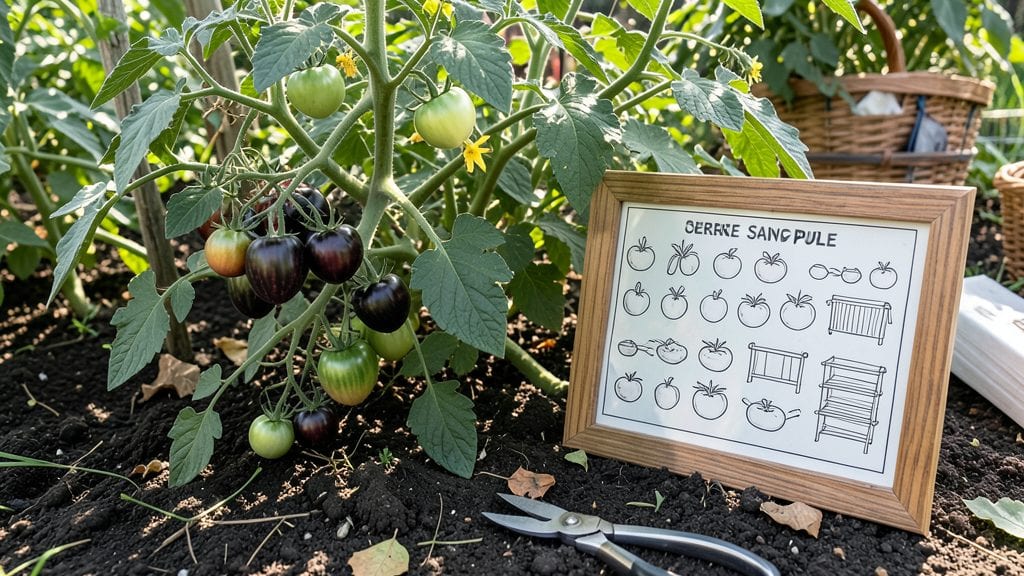
My seed saving chart became the game-changer for turning last year’s garden scraps into this year’s thriving plants. 🌱 The key is knowing exactly when to harvest, how long to dry seeds, and where to store them—details that make the difference between viable seeds and dust.
I designed this chart after struggling with inconsistent germination rates, and now I’ve got a foolproof system for tomatoes, beans, lettuce, and more.
The chart breaks down each plant’s life cycle stages with clear icons showing seed maturity—think plump pods for beans or fully ripened tomatoes that don’t give under gentle squeeze. Drying times vary wildly: some seeds need just a week in a cool, dark spot, while others require months.
I’ve included pro tips like isolating cucumbers to prevent cross-pollination messes and testing seed viability with a simple water float test.
By following this chart, you’ll end up with seeds that sprout reliably, year after year, cutting costs and keeping rare varieties alive. The satisfaction of watching a seed you saved grow into a full plant?
Unmatched. Plus, you’ll have a customizable tracker to log your progress season by season—because every gardener’s conditions are slightly different.
Perfect for beginners tired of buying new seeds every year or experienced gardeners looking to refine their process. The downloadable version lets you print and check off stages as you go, making seed saving as simple as it is rewarding. Let’s turn your garden into a seed bank!
📚 In This Guide
- What you need
- Instructions
- Tips and common mistakes
- Wrapping up and next steps
What you need
- ● Seed Saving Chart (Printed or Digital): A clear, labeled chart mapping out plant life stages (e.g., germination, flowering, seed maturation). Tip: Use a waterproof version if saving outdoors!
- ● Permanent Markers or Labels: For marking plant varieties, dates, and stages (e.g., Sharpie or alcohol-based markers for durability).
- ● Notebook or Journal: To log observations (e.g., weather, pests, or unusual growth patterns). A ruled 8.5x11-inch notebook works well.
- ● Garden Twine or Tags: For labeling plants directly in the garden (e.g., 10–15 feet of twine or 100+ plant tags).
- ● Pruning Shears or Scissors: Sharp, clean tools for harvesting seeds (e.g., bypass pruners or small garden scissors).
- ● Paper Bags or Envelopes: For drying and storing seeds (e.g., 100–200 kraft paper envelopes or brown lunch bags).
- ○ Digital Scale (Optional but Helpful): To measure seed weight for long-term storage tracking (e.g., 0.01g precision).
- ● Seed Viability Test Kit: To check seed freshness before storage (e.g., paper towel germination test supplies).
- ● Humidity Pack or Silica Gel: For preserving seeds in dry conditions (e.g., 50g silica gel packets).
- ● Camera or Smartphone: To document each stage of plant development (e.g., 12MP+ camera for clarity).
- ● Seed Catalog or Database: For cross-referencing plant traits (e.g., digital apps like Seed Savers Exchange).
- ● Gloves: To protect hands from prickly or sticky seeds (e.g., nitrile or cotton gloves).
How to use a seed saving chart for successful plant life cycles
This chart simplifies tracking when to save seeds—no guesswork, just clear stages.
🌱 Step 1: Identify Your Plant’s Life Cycle Type
Most plants fall into one of three categories: annuals, biennials, or perennials. Annuals complete their life cycle in one growing season, biennials take two, and perennials return yearly. Check your seed saving chart for the plant you’re working with—it’ll mark key stages like flowering, seed development, and maturity.
For example, tomatoes (annuals) show readiness when their fruit turns fully ripe and begins to soften. Biennials like carrots need you to let them bolt in their second year before saving seeds. Perennials like lavender produce seeds after flowering, but you’ll need to watch for seed heads to fully mature.
⏰ Step 2: Track Key Developmental Stages
Use the chart to pinpoint when your plant enters its reproductive phase. For annuals, this is usually when 50% of flowers have opened—that’s your cue to start monitoring seed pods. Biennials require you to let them flower in their first year but save seeds only after they’ve gone dormant and regrown in the second.
Watch for visual cues like color changes in seed pods or the drying of leaves. For instance, basil seeds form in small clusters that turn from green to brown. Once 70-80% of pods are dry and crisp, it’s time to harvest. The chart will show you exactly what to look for at each stage.
🌿 Step 3: Harvest Seeds at Peak Maturity
Timing is everything—harvest too early, and seeds won’t be viable; too late, and they’ll scatter or spoil. The chart lists the ideal maturity window for each plant, often tied to seed pod color or texture. For example, peas turn brown and papery when ready, while tomatoes should be fully ripe before seeds are extracted.
Gently collect seeds when pods are fully dry but before they split open. Store them in a cool, dry place for 2-4 weeks to complete drying. Label each batch with the plant name and harvest date—this keeps your seed collection organized and traceable.
🪴 Step 4: Store Seeds Properly for Long-Term Viability
The chart includes storage guidelines, like keeping seeds in airtight containers at 35-40°F for maximum longevity. Most seeds stay viable for 1-5 years, depending on the species. For example, lettuce seeds last about 1 year, while beans can last 3-5 years if stored correctly.
Check your chart for specific recommendations—some plants, like onions, benefit from a fermentation step before drying to improve germination. Avoid moisture and light, as these accelerate seed spoilage. A simple paper envelope in the fridge works for short-term storage.
✂️ Step 5: Review and Adjust for Next Season
After your first harvest, compare your results to the chart. Did seeds germinate well? Were there any issues like mold or poor viability? Use this feedback to refine your approach. For instance, if seeds didn’t dry properly, adjust your drying time or storage conditions next year.
Update your chart with notes on what worked and what didn’t. Over time, you’ll develop a personalized system tailored to your climate and growing conditions. This ensures your seed-saving efforts become more efficient—and successful—each season.
Tips & tricks for mastering your seed saving chart
Working with a seed saving chart can transform your gardening game—here's how to get the most out of it without the guesswork.
Visual Cues Matter: In Step 2, when the chart mentions watching for 70-80% of pods turning dry and crisp, I recommend using a small magnifying glass for tricky seeds like basil. The color shift from green to brown is subtle, and close inspection prevents premature harvesting. For plants like tomatoes, look for that slight softening of the fruit—it's your signal that seeds are ready.
Climate Adjustments: The chart's 35-40°F storage recommendation works for most seeds, but if you live in a humid climate, consider adding silica gel packets to your airtight containers. Humidity can reduce seed viability faster than you'd expect, especially for tropical plants not native to your area. For extra protection, store seeds in the crisper drawer of your fridge where temperatures stay consistently cool.
Drying Strategy: The 2-4 week drying period in Step 3 can be tricky with moisture-heavy seeds like peas. I found that spreading them on a wire rack over a fan for 4-6 hours daily speeds up drying without risking heat damage. Just avoid direct sunlight—it can degrade seed quality faster than you'd notice. For seeds that scatter easily (like dill), harvest when pods are just starting to open rather than waiting for full dryness.
Labeling System: Don't just write the plant name on your seed packets—include the harvest year and any notes about germination success. I use a simple code: "Tomato 2024 - 90% germ" tells me exactly what I need to know when reviewing my chart in Step 5. This prevents confusion between similar plants and helps track which varieties perform best in your specific growing conditions.
Pro Tips for Seed Saving Chart
- Working with a seed saving chart can transform your gardening game—here's how to get the most out of it without the guesswork.
- Visual Cues Matter: In Step 2, when the chart mentions watching for 70-80% of pods turning dry and crisp, I recommend using a small magnifying glass for tricky seeds like basil.
- Climate Adjustments: The chart's 35-40°F storage recommendation works for most seeds, but if you live in a humid climate, consider adding silica gel packets to your airtight containers.
Frequently asked questions
Got questions about seed saving? You’re not alone—this process can feel tricky at first! Below, we’ve rounded up the most common queries to help you navigate seed saving like a pro.
What’s the best time to harvest seeds for saving?
The ideal time depends on the plant, but most seeds are ready when the pod, fruit, or flower head fully matures and turns dry or brown. For example, tomatoes are best when the fruit is overripe and squishy, while lettuce seeds mature when the leaves bolt and turn brown. Always check your seed saving chart for plant-specific cues!
How long can I store saved seeds before they lose viability?
Seed longevity varies by type, but most last 1–5 years if stored properly (cool, dry, and dark). For short-term storage (up to a year), a sealed paper envelope or glass jar works. For longer-term, use mylar bags with oxygen absorbers and refrigerate. Check your seed chart for species-specific estimates!
Can I save seeds from hybrid plants, or will they grow true to type?
Hybrid seeds (marked with an “F1”) often won’t produce plants identical to the parent. For reliable results, stick to heirloom or open-pollinated varieties—these are bred to reproduce true from seed. Always verify labels or consult your seed saving chart before saving!
How do I prevent cross-pollination when saving seeds?
Cross-pollination can mix traits, but you can minimize it by:
- Isolating plants (e.g., grow tomatoes 50+ feet from other varieties).
- Hand-pollinating with a paintbrush if needed.
- Saving seeds from open-pollinated or self-pollinating plants (like peas or beans).
What do I do if my saved seeds don’t germinate?
Low germination could mean old seeds, improper storage, or dormancy. Try these fixes:
- Test viability by soaking a few seeds in water—floaters are likely dead.
- Use stratification (cold treatment) for seeds like tomatoes or peppers.
- Check moisture—some seeds need scarification (lightly sanding the shell).
Wrapping up and next steps
Mastering seed saving is like unlocking a sustainable superpower—one that connects you directly to nature’s cycle! 🌱 With your seed saving chart as your guide, you now have a clear roadmap to preserve heirloom varieties, reduce waste, and nurture biodiversity.
Whether you’re a backyard gardener or an eco-conscious enthusiast, every saved seed is a step toward a greener future.
Ready to dive deeper? Start by testing a few seeds this season—pick one easy crop (like tomatoes or beans) and track its progress using your chart. Before you know it, you’ll be sharing your newfound skills—and seeds—with fellow gardeners! 🌟