Pruning
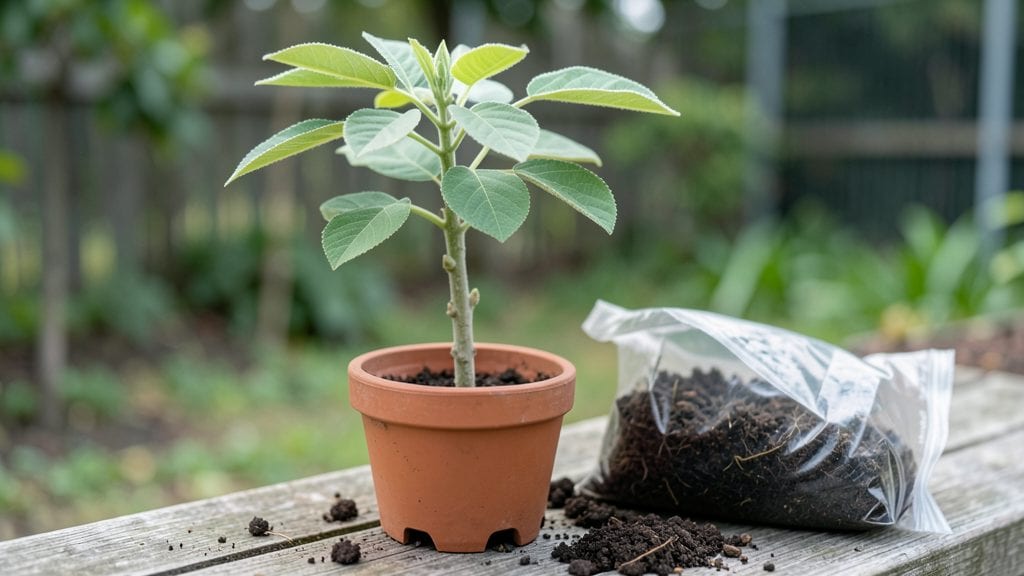
Cold-stratifying your silk tree seedling is the secret to breaking dormancy and guaranteeing those iconic fuzzy pink blooms. 🌱 I’ve struggled with floppy, underperforming silk trees until I learned this trick—now my seedlings grow sturdy, fast, and ready to burst into color by summer.
The process mimics winter’s natural chill period, tricking the seed into thinking it’s time to wake up and grow.
You’ll need just three things: a plastic bag, a damp paper towel, and your patience. Place the seeds between the towel, seal them in the bag, and refrigerate for 3-4 weeks. No fancy equipment—just your fridge and a little time.
Silk trees thrive in full sun and well-draining soil, but seedlings are fussier about moisture. Overwatering is the #1 killer, so let the top inch dry between drinks.
Once stratified, plant your seedling in a 5-gallon container or directly in the ground after the last frost. Prune leggy growth early to encourage bushiness, and watch for those first powder-puff blooms by mid-summer. The payoff? A tree that’s drought-tolerant, pest-resistant, and covered in blooms from June to September.
Works for both containers and landscapes—just give it room to spread. Here’s how to avoid the pitfalls and get results that’ll make your neighbors ask, “What’s that tree?”
📚 In This Guide
- What you need
- Instructions
- Tips and common mistakes
- Wrapping up and next steps
What you need
- ● Silk tree seeds – 10–20 fresh, viable seeds (harvested in fall or purchased from a reputable supplier).
- ● Cold stratification setup: 1–2 paper towels or coir mats (moistened, not soaking wet).
- ● 1 resealable plastic bag (quart-sized or larger).
- ● 1 small container (e.g., plastic cup, Tupperware, or seed tray with drainage).
- ● Growing medium – 1–2 gallons of well-draining potting mix (50% peat moss or coco coir + 50% perlite or sand).
- ● Watering can or spray bottle (with a fine mist setting).
- ○ Plant labels (optional but helpful for tracking stratification dates).
- ● Thermometer (to monitor fridge temps: 34–41°F (1–5°C)).
- ● Fine-mesh screen or breathable cloth (to cover seeds if using an open container).
- ● Humidity dome (for post-stratification germination).
- ● Grow lights or sunny windowsill (for seedlings after sprouting).
- ● Fertilizer (balanced 10-10-10 or slow-release granules for transplanting).
Step-by-Step instructions for cold stratifying silk tree seedlings
Cold stratification breaks dormancy—here’s how to ensure your silk tree seeds germinate reliably.
🌱 Step 1: Collect and Prepare the Seeds
Harvest silk tree seeds (also called mimosa pods) when they’re fully brown and dry but still intact. I like to collect them in late fall after the first frost—this mimics their natural dormancy period. Remove seeds from the pods by gently crushing them with your fingers or rolling them over a clean surface. Discard any shriveled or damaged seeds—they won’t germinate.
Soak the viable seeds in lukewarm water for 24 hours to soften the tough outer coating. This step is critical because silk tree seeds have a hard seed coat that blocks moisture. After soaking, drain them well and let them air-dry on a paper towel for 12 hours—this prevents mold during stratification.
💧 Step 2: Moisten and Layer the Seeds
Fill a quart-sized zip-top bag with a mix of equal parts peat moss and perlite (about 1 cup total). This blend drains well while retaining enough moisture for stratification. Spritz the mix lightly with water until it’s damp but not soggy—think of a wrung-out sponge. The goal is to keep the seeds moist without drowning them.
Place 4 seeds (your servings) in a single layer at the bottom of the bag. Then, add another ½ inch layer of the moist mix, followed by another layer of seeds. Repeat until all seeds are layered, finishing with a ½ inch top layer of mix. Seal the bag loosely—leave a small gap for airflow or poke a few tiny holes with a pin.
⏰ Step 3: Stratify in the Refrigerator
Store the sealed bag in your refrigerator’s crisper drawer, where temperatures hover around 35-40°F. Silk tree seeds need 6-8 weeks of cold stratification to break dormancy. Check the bag weekly—if the mix feels dry, spritz it lightly with water to maintain moisture. Condensation inside the bag is normal, but if you see mold, open it for 24 hours to air out.
This is the moment that matters: after 6 weeks, transfer the bag to a warm, dark place (like a pantry) for another 2 weeks. The temperature shift signals the seeds to germinate. You’ll notice tiny roots emerging within 10-14 days—this is your cue to prepare for planting.
☀️ Step 4: Plant Stratified Seeds
Once roots appear, fill 4-inch pots with well-draining potting mix (avoid garden soil—it’s too dense). Plant each seed ½ inch deep, spacing them 1 inch apart in the pot. Gently firm the soil around the seeds to eliminate air pockets. Water lightly to settle the soil without disturbing the seeds.
Place the pots in a bright, indirect light spot—direct sun will dry out the soil too quickly. Keep the soil consistently moist (not soggy) until germination, which typically occurs in 2-3 weeks. You’ll see the first true leaves emerge as small, fern-like structures—this confirms successful stratification.
🌿 Step 5: Transition to Outdoor Conditions
After the last frost date, harden off seedlings by placing them outside in a shaded, sheltered spot for 2-3 hours daily. Gradually increase their time outdoors over 10-14 days, eventually moving them to full sun. Silk trees thrive in full sun to partial shade and tolerate a range of soil types, but they despise waterlogged roots—ensure pots have drainage holes.
Real talk: silk trees grow fast, so don’t wait too long to transplant. Once seedlings reach 6 inches tall with 4-5 leaves, move them to their final location. Mulch around the base with 1 inch of organic mulch to retain moisture and suppress weeds. With patience, you’ll see those signature pink blooms in 2-3 years.
Tips & tricks for perfect silk tree seedling stratification
Here's what I learned after years of trial and error with silk tree seeds—these tricks make all the difference between reliable germination and wasted effort.
Timing is Everything: The 24-hour soak in Step 1 is non-negotiable for silk tree seeds. Their tough outer coating blocks moisture, and this extended soak softens it enough for water to penetrate. I've tried shorter soaks, and germination rates plummet dramatically. After soaking, the 12-hour drying period is equally critical—it prevents mold during the cold stratification phase by reducing excess moisture in the seed coat. Think of it as prepping the seeds for their winter nap.
Layering Technique: When creating your seed layers in Step 2, aim for a uniform ½-inch separation between each layer of seeds and mix. This spacing ensures even moisture distribution and prevents mold from spreading between seeds. I've found that using a quart-sized bag gives just enough room for 4 seeds while maintaining proper airflow. If you're working with more seeds, use a larger bag proportionally—just keep that ½-inch layering consistent.
Temperature Consistency: The refrigerator's crisp drawer maintains that critical 35-40°F range for cold stratification. If your fridge runs hotter, consider using a second refrigerator or placing the bag on the bottom shelf. During the 6-8 week stratification period, consistency is key—fluctuations can confuse the seeds and delay germination. After the 6-week mark, the sudden shift to warm conditions (around 70°F) triggers germination, so don't rush this transition.
Visual Germination Cues: In Step 4, watch for those tiny white roots emerging from the seeds—this is your first sign of success. Once roots appear, you'll typically see the first true leaves in 2-3 weeks, which look like delicate fern fronds. These leaves confirm successful stratification. If you're not seeing roots after 14 days of warm stratification, gently check one seed to see if it's still viable—sometimes seeds need that extra nudge.
Pro Tips for Silk Tree Seedling
- Here's what I learned after years of trial and error with silk tree seeds—these tricks make all the difference between reliable germination and wasted effort.
- Timing is Everything: The 24-hour soak in Step 1 is non-negotiable for silk tree seeds.
- Layering Technique: When creating your seed layers in Step 2, aim for a uniform ½-inch separation between each layer of seeds and mix.
Frequently asked questions
Got questions about growing silk tree seedlings with cold stratification?
You’re not alone! Here are some of the most common queries—and their straightforward answers—to help you succeed.
What is cold stratification, and why do silk tree seedlings need it?
Cold stratification mimics winter conditions, breaking seed dormancy for better germination. Silk tree (Albizia julibrissin) seeds often require this step to sprout reliably. Without it, seeds may stay dormant or grow slowly. Think of it as a "wake-up call" for your seedlings!
How long should I cold-stratify silk tree seeds?
For best results, stratify silk tree seeds for 6–8 weeks in a moist, refrigerated environment (35–40°F). Place them in a sealed container with damp peat moss or paper towels, then check periodically for mold. Patience pays off—this step ensures stronger, healthier seedlings when spring arrives.
Can I skip cold stratification and still grow silk tree seedlings?
You can, but germination rates will likely drop, and seedlings may be weaker. If you’re in a warm climate, try soaking seeds in warm water for 24 hours first. However, cold stratification remains the gold standard for reliable blooms. For best results, follow the process—your future tree will thank you!
What if my silk tree seedlings rot during stratification?
Rotting usually means excess moisture or poor airflow. To fix it:
- Use sterilized peat moss or vermiculite.
- Wrap seeds in a breathable cloth (like cheesecloth) before refrigerating.
- Check weekly for mold—discard any mushy seeds.
Do I need a fridge for cold stratification, or can I use other methods?
A standard fridge works perfectly, but outdoor methods (like burying seeds in a cold, moist garden bed) can also work in mild climates. Just ensure temps stay consistent and cool (avoid freezing!). For urban gardeners, a DIY setup with a cooler and ice packs is another budget-friendly option.
Wrapping up and next steps
Growing a silk tree seedling with reliable blooms is all about patience and the right techniques—like cold stratification! By following these steps, you’ll set your seedling up for vibrant growth and stunning flowers.
Remember, consistency is key, whether it’s monitoring moisture, tracking temperature shifts, or gently handling your seedling during the process.
Now that you’re armed with the know-how, it’s time to take action! Grab your supplies, roll up your sleeves, and give your silk tree seedling the care it deserves. Watch it thrive—and soon, you’ll be rewarded with breathtaking blooms! 🌸✨