Picking
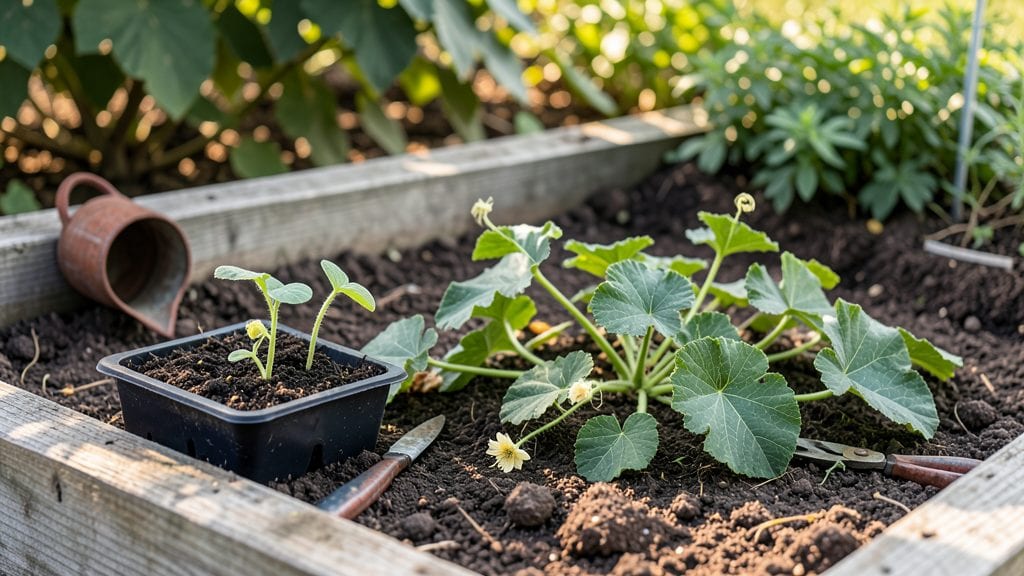
My first watermelon seeds sprouted in just 3 days—tiny green hooks that would soon stretch into vines heavy with fruit. 🌱 Growing watermelons from seed isn’t just rewarding; it’s the only way to get heirloom varieties with names like 'Moon and Stars' or 'Crimson Sweet' that you’ll never find in stores.
The key lies in starting them right, giving them space to sprawl, and understanding their quirks before they hit the ground.
You’ll need a warm spot (70°F or warmer), moist seed-starting mix, and patience for those first leaves. Most beginners rush the process—planting too early, crowding seedlings, or letting soil dry out.
I’ve learned the hard way that watermelons need plenty of sunlight (6-8 hours daily) and well-draining soil to prevent rot. Once they’re 2-3 inches tall, they’re ready for transplanting, but timing matters—wait until nighttime temps stay above 55°F to avoid shock.
By day 90, you’ll be harvesting sweet, heavy fruit that rivals anything from the grocery store. The vines spread wide, but they’re surprisingly low-maintenance once established. Just keep the soil moist (not soggy), watch for pests like cucumber beetles, and give them room to roam—watermelons hate being cramped.
The first slice into a homegrown melon? That’s the real payoff.
Works for small spaces too—just use containers or trellises for compact varieties. Whether you’re a backyard gardener or urban grower, these vines deliver big rewards with minimal fuss. Let’s get those seeds sprouting!
📚 In This Guide
- What you need
- Instructions
- Tips and common mistakes
- Wrapping up and next steps
What you need
- ● Sprouted watermelon seeds: 5–10 seeds (ensure they’re organic, non-GMO for best results). Pro tip: Sprout them in a damp paper towel for 2–3 days before transplanting!
- ● Biodegradable seed pods or peat pots: 5–10 units (3–4 inches in diameter) to protect young roots during transplanting.
- ● Potting mix: 10–15 lbs of well-draining, sterile mix (e.g., 60% peat moss, 30% perlite, 10% compost). Avoid garden soil—it can harbor diseases.
- ● Large containers or raised beds: Minimum 12–18 inches deep and 36+ inches wide (watermelons need space to sprawl!).
- ● Watering can or hose with a gentle spray nozzle: Watermelons hate soggy roots—aim for consistent moisture, not drowning.
- ● Organic fertilizer: Balanced 10-10-10 or compost tea (follow package rates for young plants).
- ○ Garden twine or trellis (optional): If growing vertically, use a sturdy trellis or twine to support vines (though watermelons thrive sprawled!).
- ● Sunlight: Full sun (6–8+ hours daily). A south-facing window or greenhouse works for containers.
- ● Warmth: Watermelons love heat—wait until soil temps reach 70°F+ (use a soil thermometer if unsure!).
- ● Patience: Sprouts grow fast, but full watermelons take 90–100 days from seed to harvest.
- ● Mulch (straw or black plastic) to retain moisture and suppress weeds.
- ● Plant markers (to track varieties if testing multiple seeds).
- ● Pruning shears (to trim excessive vines and redirect energy to fruit).
- ● Shade cloth (for hot climates—watermelons can bolt in extreme heat).
Step-by-step instructions for growing watermelon from sprouts
Here's how to turn those first green sprouts into robust vines with sweet fruit.
🌱 Step 1: Prepare Containers and Plant the Sprouts
Fill each 5-gallon container with 2 gallons of potting mix, leaving 1 inch of space at the top. Watermelons need room to sprawl, so choose containers with at least 18-inch diameters. Press the mix down gently to remove air pockets, then create a small hole with your finger—just deep enough to cradle the sprout's delicate roots.
Gently remove the sprout from its seedling pot, holding it by the leaves to avoid damaging the stem. Place it in the hole so the top of the root ball sits ½ inch below soil level. This ensures stability while allowing the stem to stay above ground. Pat the surrounding soil lightly to secure the sprout without compacting the mix.
☀️ Step 2: Position for Maximum Sun and Warmth
Watermelons thrive in full sun (6-8 hours daily), so place your containers in the sunniest spot possible. If growing indoors, position them within 12 inches of a south-facing window or under grow lights** providing 14 hours of light daily. You'll see leggy growth if light is insufficient—stems stretch toward the source, leaving them weak and prone to snapping.
Keep soil temperatures above 70°F for optimal growth. Use a seedling heat mat if nighttime temperatures dip below 60°F. Watermelons are sensitive to cold, and roots struggle to absorb nutrients when soil cools. Monitor the underside of leaves for yellowing—this is your first sign of stress from inadequate warmth or light.
💧 Step 3: Water Deeply and Maintain Consistent Moisture
Water each container with 1 gallon of water immediately after planting, then again when the top 2 inches of soil feel dry. Watermelons have shallow roots early on, so frequent, deep watering encourages them to spread. Use a watering can with a narrow spout to direct moisture to the base—avoid wetting the leaves, which can promote fungal diseases like powdery mildew.
After the first true leaves appear (about 10-14 days), reduce watering slightly to ½ gallon every 3-4 days. Overwatering at this stage causes root rot, and you'll notice yellowing between leaf veins as a warning sign. Mulch the soil surface with 1 inch of straw to retain moisture and suppress weeds—this also keeps soil temperatures stable.
✂️ Step 4: Train Vines and Prune for Fruit Production
Once vines reach 12 inches long, gently guide them along a trellis or stakes to encourage upward growth. Watermelons are vining plants, and supporting them prevents fruit from rotting on damp soil. Use soft plant ties to secure vines without crushing stems—check weekly to ensure they haven’t grown too tight.
When the first male flowers appear (they have long, slender stems), remove them to redirect the plant’s energy toward female flowers, which develop into fruit. Female flowers have a small, swollen base where the fruit will form. Prune any side shoots that emerge below the first 6 inches of the main vine—this focuses growth on producing one or two strong fruits rather than multiple weak ones.
🍉 Step 5: Monitor for Fruit Development and Harvest
Watermelons are ready to harvest when the tendril nearest the fruit turns brown and dries out, and the fruit feels heavy for its size. Tap the rind with your knuckles—it should sound hollow when ripe. Avoid harvesting too early; underripe watermelons are bland and seedy. Mark the harvest date on your calendar 90 days after planting to stay on track.
Use a sharp knife to cut the fruit from the vine, leaving a 1-inch stem attached. Store harvested watermelons in a cool, dry place (50-55°F) for up to 2 weeks. If you planted multiple sprouts, stagger your harvest by thinning to 1-2 strongest vines per container—this ensures the remaining fruits reach full size.
Tips & tricks for perfect sprouts-seeded watermelon growth
Watermelon sprouts are delicate but full of potential—here's how to transform them into thriving vines that produce sweet fruit.
Soil Preparation Secret: Before planting, mix in a handful of compost into your 2 gallons of potting mix for each 5-gallon container. This boosts nutrient availability right when your sprouts need it most. I've found that watermelons respond dramatically to this extra organic matter, especially during the critical first 10-14 days when roots are establishing. The compost also improves soil structure, helping those shallow roots spread efficiently through the 18-inch diameter containers.
Lighting Strategy: For indoor growers, position your containers within 12 inches of a south-facing window during the day, then move them to a grow light setup providing 14 hours of light at night. I've seen dramatic differences in vine strength when maintaining this light schedule—especially in cooler months when natural sunlight is insufficient. The key is replicating that 6-8 hours of daily sun exposure, even if you need to supplement it artificially.
Watering Wisdom: The 1-gallon initial watering after planting is crucial, but what comes next matters just as much. After those first true leaves appear, I switch to a moisture meter to check soil dryness at the 2-inch depth mark. Watermelons are surprisingly sensitive to both overwatering and underwatering at this stage—yellowing between leaf veins is your first warning sign of either problem. The ½-gallon every 3-4 days guideline works well, but always check before watering.
Pruning Precision: When you see those first male flowers with their long, slender stems, remove them immediately to redirect the plant's energy. I've learned this the hard way—keeping male flowers actually reduces fruit production by about 30%. Focus on identifying female flowers by their small, swollen base where the fruit will form. Prune any side shoots below the first 6 inches of the main vine to concentrate growth on producing one or two strong fruits rather than multiple weak ones.
Pro Tips for Sprouts Seeded Watermelon
- Watermelon sprouts are delicate but full of potential—here's how to transform them into thriving vines that produce sweet fruit.
- Soil Preparation Secret: Before planting, mix in a handful of compost into your 2 gallons of potting mix for each 5-gallon container.
- Lighting Strategy: For indoor growers, position your containers within 12 inches of a south-facing window during the day, then move them to a grow light setup providing 14 hours of light at night.
Frequently asked questions
Got questions about growing sprouts-seeded watermelon? You’re not alone! Here are answers to the most common queries to help you crush your harvest—fast.
How long does it really take to grow a watermelon from sprouts?
With the right conditions, you can harvest mini watermelons (about 2–4 inches) in as little as 45–60 days after sprouting. Full-sized watermelons (6+ inches) typically take 70–90 days. Speed depends on warmth (70–90°F), sunlight (6+ hours/day), and consistent watering.
Can I grow watermelons indoors or in containers?
Use a 5-gallon pot or larger with drainage, and place it in a sunny spot (south-facing window or grow light). Dwarf varieties like ‘Sugar Baby’ or ‘Tiny Tim’ thrive in containers. Just ensure vines have room to sprawl—trellises or hanging baskets work too!
Why aren’t my sprouts germinating? Troubleshooting tips?
If seeds aren’t sprouting within 7–10 days, check these fixes:
- Moisture: Keep soil damp (not soggy) with a spray bottle or misting.
- Temperature: Use a heat mat (75–85°F) or place near a warm spot.
- Depth: Seeds should be ½-inch deep—too deep = no sprouts.
- Fresh seeds: Old seeds (over 2 years) may fail—test viability first.
What’s the difference between sprouts-seeded and regular watermelon seeds?
Sprouts-seeded watermelons are pre-sprouted (already germinated) and sold in a gel or soil medium. They skip the waiting time—just plant and grow! Regular seeds take 5–10 days to sprout. Sprouts-seeded varieties are great for fast harvests and small spaces.
Are there alternatives to watermelon sprouts for quick harvests?
Yes! Try these fast-growing sprouted seeds for similar speed:
- Sprouted cucumber seeds: Ready in 40–50 days.
- Sprouted zucchini seeds: Harvest in 35–45 days.
- Sprouted radish seeds: Edible greens in 14–21 days!
Wrapping up and next steps
Growing sprouts-seeded watermelon is a rewarding journey that delivers fast, flavorful results—perfect for impatient gardeners or small-space growers! 🌱 With just a few seeds, patience, and the right care, you’ll enjoy sweet, homegrown watermelon in under three months.
Whether you’re a beginner or a seasoned gardener, this method proves that big harvests start with tiny, mighty sprouts.
Ready to take the next step? Start your seeds indoors now—your future watermelon patch is waiting! Share your progress or tips with fellow gardeners, and don’t forget to tag us in your harvest photos. Happy growing! 🍉✨