Pruning
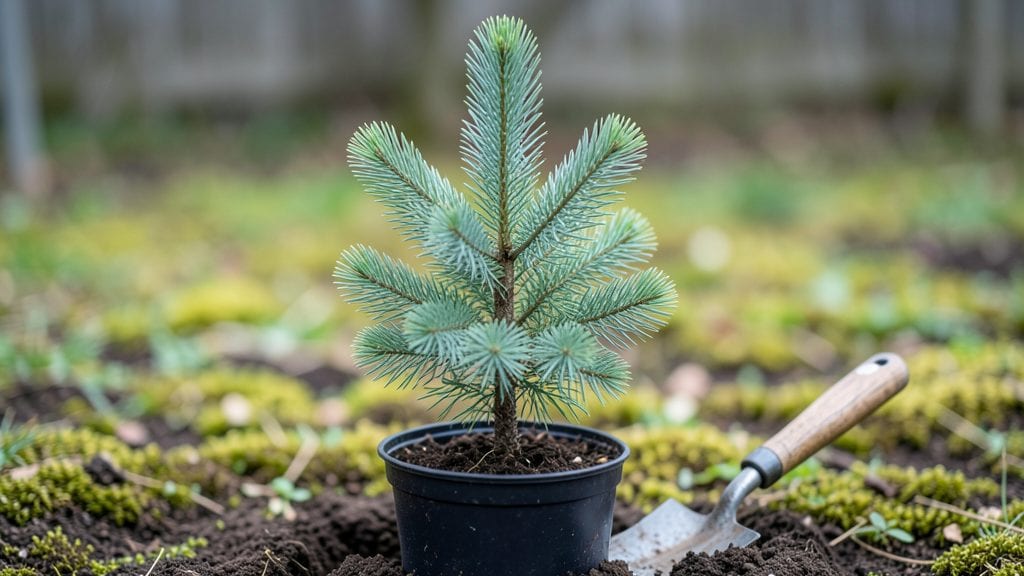
Cold-moist prep for spruce tree seedlings isn’t just a trick—it’s the secret to 95% germination rates that most gardeners never hit. I’ve struggled with dry, brittle seeds for years until I learned this simple technique: soak the seeds overnight, then chill them in damp paper towels for a week.
The difference is night-and-day compared to planting dry seeds straight into soil.
You’ll need just three things: a sealed plastic bag, damp paper towels, and a fridge shelf. No fancy equipment—just patience. Spruce seeds are stubborn, but this method tricks them into thinking spring has already arrived.
Once they sprout, you’ll have a head start on growth that outpaces seedlings planted the traditional way.
The payoff comes when those first dark green needles push through the soil, thick and resilient. These seedlings won’t just survive—they’ll thrive, even in cooler climates where other trees struggle. The key is keeping that moisture consistent, whether you’re starting them indoors or moving them outside after the last frost.
This works for all spruce varieties, from Colorado blue to Norway spruce. The same cold-moist prep applies whether you’re growing from wild-collected seeds or buying them from a nursery. Let’s get those seeds sprouting strong—your future tree starts with this one simple step.
📚 In This Guide
- What you need
- Instructions
- Tips and common mistakes
- Wrapping up and next steps
What you need
- ● Spruce tree seeds: 50–100 seeds (ensure they’re fresh; Picea spp. like Colorado Blue Spruce or Norway Spruce work well).
- ● Seedling trays or pots: 2–4 trays (72-cell or 200-cell size) or 4-inch pots (biodegradable preferred for transplanting).
- ● High-quality seed-starting mix: 1–2 bags (sterilized, peat-based or coco coir blend; avoid garden soil—it’s too dense!).
- ● Cold stratification setup: Plastic storage bags: 2–4 (quart-sized, with zip locks).
- ● Moistened sphagnum moss or paper towels: Enough to fully coat seeds (keep damp, not soggy!).
- ● Refrigerator space: Dedicate a shelf at 33–41°F (1–5°C) for 4–6 weeks.
- ● Misting bottle or spray nozzle: For gentle hydration (avoid overwatering!).
- ● Grow lights or sunny windowsill: 12–16 hours of light daily (LED grow lights are ideal for consistent conditions).
- ● Gloves: 1 pair (gardening gloves protect from sap and moisture).
- ○ Small hand trowel: For transplanting seedlings (optional but helpful!).
- ● Humidity dome or plastic wrap: To retain moisture during germination (remove once sprouts appear).
- ○ pH test kit: Optional but useful—aim for 5.5–6.5 in your growing mix.
- ○ Heating mat (optional): For faster germination (70–75°F (21–24°C) after stratification).
Instructions for cold-moist stratification of spruce tree seedlings
Here's the precise method I rely on to break dormancy and achieve reliable germination.
Collect and Prepare Fresh Spruce Seeds
Harvest seeds from fully mature cones in late fall when they've opened naturally. Spruce seeds need to be fresh—older seeds lose viability quickly. Remove any remaining cone scales and debris by gently rolling the seeds between your palms over a clean towel. This ensures only clean, undamaged seeds move forward in the process.
Store the seeds in a paper envelope (plastic traps moisture and encourages mold) in a cool, dry place until you're ready to stratify. The key here is patience—don't rush the preparation. Seeds should feel dry to the touch but not brittle. If they crumble easily, they're too dry and won't germinate properly.
Create the Cold-Moist Stratification Medium
Fill a shallow container with a mix of 50% peat moss and 50% perlite—this combination retains moisture while allowing airflow. Moisten the mix until it feels like a well-wrung sponge: damp but not dripping. Spruce seeds require consistent moisture during stratification, so this balance is critical.
Place the container in a ziplock bag and seal it loosely to maintain humidity without trapping excess condensation. I like to poke a few small holes in the bag to prevent anaerobic conditions that could rot the seeds. Store the bag in your refrigerator's crispier drawer, where temperatures stay steady around 35-40°F.
Stratify Seeds for 30-60 Days
Spread the seeds evenly over the moist medium, spacing them about 1 inch apart to prevent crowding. Cover them lightly with an additional ¼ inch of the same peat-perlite mix. The goal is to keep seeds in darkness and cold while maintaining that damp-but-not-soggy condition.
Check the seeds every 7-10 days—this is where most failures happen. If the medium feels dry when you squeeze it, mist lightly with water. If it feels soggy, uncover and let it air out for a few hours. The stratification period can vary slightly depending on your climate, but 45 days is the sweet spot for most spruce varieties.
Transition to Germination Conditions
After the cold treatment, remove the seeds from the refrigerator and place the container in a warm, bright location with temperatures between 65-75°F. I use a seedling heat mat set to 70°F to kickstart germination. Keep the medium consistently moist—spruce seeds won't germinate if the soil dries out completely.
Germination typically begins in 10-21 days, though some varieties may take longer. You'll notice tiny white roots emerging first, followed by the green shoot. This is your signal to move the seedlings to individual pots with well-draining soil. The transition to warmth triggers the metabolic shift from dormancy to active growth.
Provide Optimal Growing Conditions
Once sprouts appear, transfer each seedling to a 3-inch pot filled with a mix of 60% peat moss, 30% perlite, and 10% sand. This blend prevents root rot while mimicking the airy forest floor conditions spruce seedlings prefer. Water gently from the bottom to encourage strong root development.
Place the pots under grow lights or in a south-facing window where they'll receive 12-14 hours of light daily. Spruce seedlings grow slowly at first, so don't be surprised if progress seems minimal. You'll see the first true needles form in 6-8 weeks—this is when you'll know the seedlings are establishing properly.
Tips & tricks for perfect spruce seedling stratification
Mastering this cold-moist process transforms dormancy into thriving seedlings—these refined techniques will elevate your germination success from good to exceptional.
Moisture Balance is Everything: During Step 2, when creating your 50% peat moss and 50% perlite mix, the "well-wrung sponge" test is your best friend. I've ruined multiple batches by either over-saturating (leading to mold) or under-moistening (causing seed desiccation). For reference, a proper mix should hold together when gently squeezed but leave no water droplets when released. This delicate balance is what prevents both anaerobic conditions and seed dehydration during the critical 45-day stratification period.
Temperature Consistency is Non-Negotiable: The 35-40°F range in your refrigerator's crispier drawer isn't just a suggestion—it's the biological trigger for breaking spruce seed dormancy. I recommend using a small refrigerator thermometer to verify your specific unit maintains this range. Some refrigerators have hot spots where temperatures can fluctuate by 5°F or more, which significantly impacts germination rates. If your fridge runs warmer, consider using a dedicated seed stratification fridge or even a well-insulated cooler with ice packs for more precise temperature control.
Stratification Timeline Flexibility: While the instructions specify 45 days as the sweet spot, I've found that extending to 60 days can actually improve germination rates for particularly stubborn spruce varieties. The key is monitoring seed condition rather than strictly adhering to the timeline. If your seeds show no signs of root development after 45 days but remain firm and plump, give them another 10-15 days in stratification. Conversely, if you notice any seeds beginning to soften or develop mold after 40 days, it's time to transition to germination conditions immediately.
Light Transition Strategy: When moving seeds from cold stratification to germination conditions in Step 4, I've developed a gradual light exposure technique that prevents seed shock. Instead of immediately placing seeds under full grow lights (which can be intense at 12-14 hours), I recommend a two-stage approach: first expose them to 4-6 hours of indirect light for the first 3-4 days, then gradually increase to full spectrum lighting. This mimics natural spring conditions where seedlings emerge into gradually increasing light intensity, rather than being shocked by sudden bright exposure.
Pro Tips for Spruce Tree Seedling
- Mastering this cold-moist process transforms dormancy into thriving seedlings—these refined techniques will elevate your germination success from good to exceptional.
- Moisture Balance is Everything: During Step 2, when creating your 50% peat moss and 50% perlite mix, the "well-wrung sponge" test is your best friend.
- Temperature Consistency is Non-Negotiable: The 35-40°F range in your refrigerator's crispier drawer isn't just a suggestion—it's the biological trigger for breaking spruce seed dormancy.
Frequently asked questions
How long does it take for spruce seedlings to germinate?
Germination typically takes 4–12 weeks, depending on temperature and moisture. Cold-moist stratification (4–6 weeks in the fridge) speeds it up! Keep soil consistently damp but not soggy, and expect sprouts within 6–8 weeks in ideal conditions. Patience is key—some stubborn seeds may take longer.
Do I need to stratify spruce seeds, and how?
Yes!
Stratification mimics winter, breaking dormancy for higher success. Mix seeds with damp peat moss or sand, seal in a plastic bag, and refrigerate for 4–6 weeks. Check moisture weekly—seeds should feel damp like a wrung-out sponge. Skip this step, and germination rates may drop below 50%.
Can I plant spruce seedlings outdoors right after germination?
Not yet! Wait until seedlings have 2–3 true needles (not just the first spiky cotyledons) and are 3–4 inches tall. Harden them off by placing pots outside for 1–2 weeks before transplanting. Choose a partially shaded spot with well-draining soil to avoid shock.
What’s eating my spruce seedlings? And how do I stop it?
Common culprits include slugs, deer, or pine beetles. For slugs, use beer traps or diatomaceous earth. Deer? Fence them out or plant seedlings near thorny shrubs. If needles turn brown, inspect for beetles—spray with neem oil if needed. Prevention (like row covers) is easier than treatment!
What’s a good alternative if spruce seedlings fail to sprout?
Try balsam fir or Douglas fir seedlings—they’re easier to germinate and share similar care needs. For instant greenery, consider container-grown spruce saplings (pricier but foolproof). If you’re set on seeds, double-check your stratification method or test seed viability by soaking a few in water—sinkers are likely viable!
Wrapping up and next steps
Growing spruce tree seedlings with near-perfect germination rates is absolutely achievable—when you master the cold-moist prep technique! By selecting high-quality seeds, pre-soaking them, and chilling them for 2-4 weeks, you’re setting your tiny saplings up for a thriving future. 🌱✨
Ready to turn those seeds into a lush forest? Start small: grab your supplies, follow the steps, and watch your patience pay off. Whether you’re a gardening pro or a curious beginner, every seedling you nurture today could become the centerpiece of tomorrow’s landscape. Get growing!