
Container Gardens
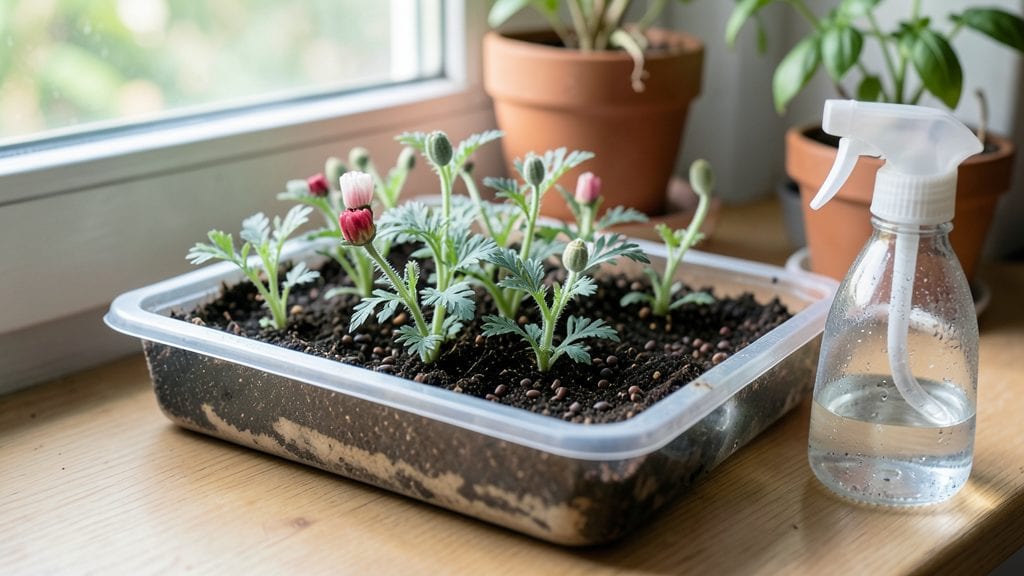
Starting poppy seeds indoors cuts weeks off the growing season—no cold stratification needed. 🌱 I’ve grown poppies from seed for years, and the secret to fast germination lies in warm soil, bright light, and patience.
Most people assume poppies are tricky, but with the right setup, they sprout reliably in just 7–14 days.
The key is keeping things simple: a shallow tray, well-draining soil, and a sunny windowsill or grow light. Poppy seeds are tiny, so don’t bury them—just press them into the top layer of soil.
Overwatering is the biggest mistake, so let the surface dry slightly between waterings. Within two weeks, you’ll see those delicate first leaves pushing through.
By the time you transplant, your seedlings will be sturdy enough to handle outdoor conditions. The payoff? Bright, velvety blooms that outshine anything from a nursery. Even in small spaces, poppies thrive in containers—just give them room to grow and avoid overcrowding.
Ready to skip the cold treatment and get these seeds sprouting fast?
This method works for oriental poppies, California poppies, and even Iceland poppies—just adjust your timing based on your last frost date. No fancy equipment needed, just a little attention to detail. Let’s get those seeds going!
📚 In This Guide
- What you need
- Instructions
- Tips and common mistakes
- Wrapping up and next steps
What you need
- ● Poppy seeds: Choose Papaver somniferum (opium poppy) or ornamental varieties like Papaver rhoeas (corn poppy). Buy fresh seeds (preferably from a reputable seed supplier) for best germination—aim for 10–20 seeds per container.
- ● Seed-starting trays or small pots: Use 2–4 inch pots or cell trays (72-cell or larger). Poppies hate transplanting, so 1 seed per pot is ideal!
- ● Seed-starting mix: A lightweight, sterile mix (e.g., 50% peat/50% perlite or coco coir) works best. Avoid garden soil—it’s too dense!
- ● Grow lights or sunny windowsill: Poppies need 12–16 hours of light daily. A full-spectrum LED grow light (12–18 inches above seedlings) is perfect if natural light is limited.
- ● Misting bottle or spray nozzle: Keep the soil moist but not soggy—poppy seeds need consistent humidity to germinate.
- ● Plastic wrap or humidity dome: Creates a mini greenhouse to retain moisture until germination (usually 7–14 days).
- ○ Thermometer (optional but helpful): Ideal germination temp: 65–75°F (18–24°C). A seedling heat mat (70–80°F range) can speed things up!
- ● Small hand trowel or spoon: For gently pressing seeds into soil (no deep planting—just ¼ inch deep).
- ● Fine-mist spray bottle: For post-germination hydration (avoid overhead watering—poppy seedlings are fragile!).
- ● Labeling tags & marker: Poppy seedlings look similar—label varieties to avoid mix-ups!
- ● Fertilizer (balanced, water-soluble): Once true leaves appear, use a diluted 5-5-5 or 10-10-10 mix (half-strength) every 2–3 weeks.
- ● Pruning shears (for later): Poppies get tall and leggy—pinch back tips to encourage bushiness if desired.
Step-by-Step instructions for starting poppy seeds indoors
Here's how to get poppy seeds sprouting in just days without the usual cold treatment.
🌱 Step 1: Prepare Containers and Soil Mix
Poppy seeds need fast-draining soil to prevent rot, so mix the 2 gallons of potting mix with 1 cup perlite in a clean container. This keeps moisture balanced while allowing roots to breathe. Fill your 4 small pots (about 3 inches deep) with this mix, leaving ½ inch of space at the top for watering.
Tap each pot gently on the table to settle the soil without compacting it. The surface should feel firm but still crumbly. Poppies hate soggy conditions, so drainage is more important than depth—these shallow pots work perfectly. Label each pot with the date to track germination progress.
💧 Step 2: Sow Seeds and Moisten Gently
Scatter 10-15 poppy seeds per pot across the soil surface—don't bury them. Poppy seeds need light to germinate, so only press them lightly into the top layer. Use a spray bottle to mist until the soil feels damp ½ inch down, but not wet. Overwatering now will drown the tiny seeds before they sprout.
Cover the pots with a clear plastic dome or wrap them in plastic wrap to create a mini greenhouse. This traps warmth and humidity, which speeds up germination. Place them in a warm spot (70-75°F)—a sunny windowsill or under a grow light. You'll see sprouts in 3-5 days, sometimes even overnight.
☀️ Step 3: Provide Light and Prevent Legginess
Once sprouts appear, remove the plastic immediately to prevent fungal growth. Poppies need 12-14 hours of bright light daily—a south-facing window works, but supplement with a grow light if natural light is weak. Keep the light 2-3 inches above the seedlings to avoid burning tender leaves.
Watch for leggy growth (long, thin stems reaching for light). If you notice this, move the light closer or rotate the pots daily so they grow straight. Strong poppy seedlings have bold green leaves and thick stems—don't let them stretch too tall before transplanting.
⏰ Step 4: Thin and Harden Off for Outdoor Success
When seedlings have 2-3 true leaves (about 3-4 weeks), thin to the strongest plant per pot. Snip the weaker ones at the base with clean scissors—don't pull, or you'll disturb the roots of the remaining seedling. This ensures your poppies have room to grow without competition.
Start hardening off 1 week before transplanting. Move pots outside for 1-2 hours daily, gradually increasing time over 5-7 days. Poppies are tough once established, but sudden temperature shifts can stress them. Transplant after the last frost when soil is at least 55°F—they'll bloom faster with consistent warmth.
Tips & tricks for perfect poppy seed germination
Here's what I learned to make sure your poppy seeds sprout quickly and strong—no cold treatment required!
Soil Mix Secret: The 1:16 ratio of perlite to potting mix (1 cup perlite to 2 gallons potting mix) is key for fast drainage. I've found that adding a handful of coarse sand to this mix helps prevent compaction over time. After filling your 3-inch pots, give the soil a final tap to settle it—this ensures even moisture distribution without packing it down too tightly.
Lighting Strategy: Those critical 12-14 hours of light in Step 3 are non-negotiable for preventing leggy seedlings. I use a simple LED grow light on a timer to automate this—set it for 14 hours on, 10 hours off. Position it just 2-3 inches above the seedlings, and adjust as they grow. If you notice leaves stretching toward the light, move it closer immediately.
Germination Speed Hack: The 3-5 day window for sprouts is achievable, but here's how to hit the faster end: After sowing your 10-15 seeds per pot, place the covered pots in a warm spot (70-75°F) and check daily. I've seen sprouts appear within 48 hours when conditions are perfect. The key is maintaining that consistent warmth—avoid drafty areas or sudden temperature drops.
Thinning Technique: When you reach the 3-4 week mark for thinning, I recommend using a pair of small, clean scissors rather than your fingers. Snip at the base while holding the pot steady—this prevents disturbing the roots of your remaining seedling. I also find it helpful to thin in the morning so any disturbed seedlings have time to recover before evening.
Pro Tips for Starting Poppy Seeds Indoors
- Here's what I learned to make sure your poppy seeds sprout quickly and strong—no cold treatment required!
- Soil Mix Secret: The 1:16 ratio of perlite to potting mix (1 cup perlite to 2 gallons potting mix) is key for fast drainage.
- Lighting Strategy: Those critical 12-14 hours of light in Step 3 are non-negotiable for preventing leggy seedlings.
Frequently asked questions
Got questions about germinating poppy seeds indoors? You're not alone! Here are answers to the most common concerns—so you can skip the guesswork and get those delicate blooms thriving.
When is the best time to start poppy seeds indoors?
For most poppy varieties (like California poppies or opium poppies), start seeds 8–10 weeks before your last frost date. This gives seedlings enough time to grow sturdy before transplanting. If you’re in a warm climate, you can even direct-sow in early spring—just be ready to protect them from late frosts.
Why won’t my poppy seeds germinate? Troubleshooting tips!
Poppy seeds need light to germinate—don’t bury them! Scatter them on soil (just press lightly) and keep them warm (70–75°F) and moist. If they’re slow to sprout, check for:
- Old seeds (viability drops after 1–2 years)
- Cold soil (use a heat mat if needed)
- Overwatering (dampness causes rot)
Can I use regular potting mix, or do poppy seeds need something special?
Poppy seeds thrive in well-draining, sterile mix—avoid garden soil or heavy blends. A 50/50 mix of cactus/succulent mix + perlite works wonders. For extra insurance, add a fungicide to prevent damping-off. Pro tip: Skip fertilizers until seedlings have 2–3 true leaves—poppies hate “baby food” overload!
How do I harden off poppy seedlings before transplanting?
Start 1–2 weeks before moving them outdoors. Gradually expose seedlings to outdoor conditions:
- Day 1–3: 1–2 hours in shade
- Day 4–6: 3–4 hours, partial sun
- Final 2 days: Full sun + wind (if possible)
Are there any alternatives to starting poppy seeds indoors?
Yes! If you’re short on space or time, try:
- Direct sowing: Scatter seeds in well-prepared soil after the last frost (they hate transplant shock).
- Peat pots: Start seeds in biodegradable pots to skip transplanting entirely.
- Greenhouse trays: Mimics indoor conditions with natural warmth and humidity.
Wrapping up and next steps
Starting poppy seeds indoors is a rewarding way to jumpstart your garden—no cold stratification needed! 🌱 With the right setup, you’ll enjoy fast germination and vibrant blooms in no time. Whether you’re a seasoned gardener or just beginning, these steps make it simple and stress-free.
Now that you’re ready to grow, take the next step by monitoring your seedlings closely and preparing for transplanting once they’ve sprouted. Happy gardening—your poppies are about to shine! 🌸