Picking
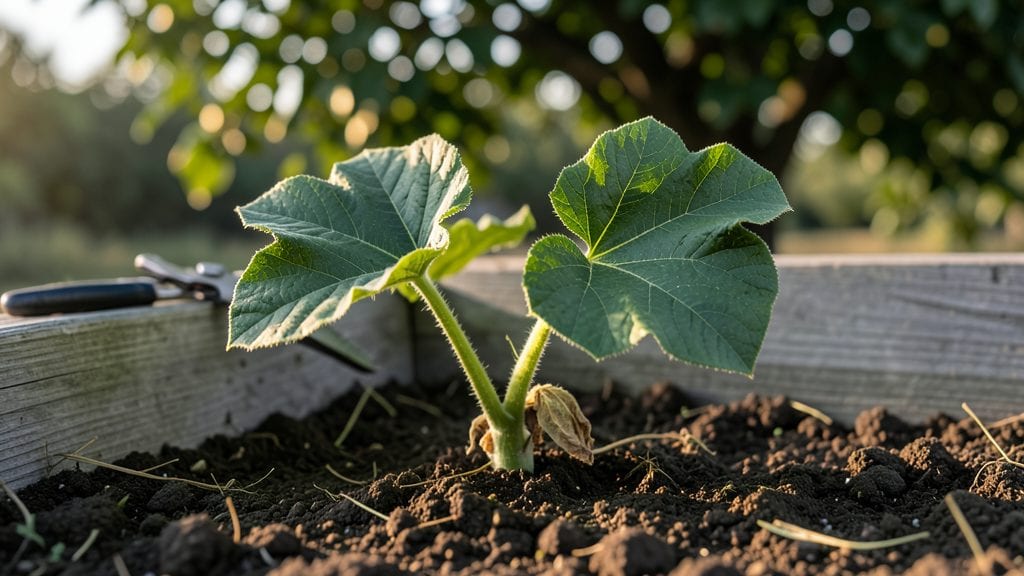
Fast summer squash seedlings mean zucchini on the vine by July. 🌱 I’ve grown hundreds of squash plants, and the ones started indoors in early spring always outpace the store-bought ones—sometimes by weeks. The secret isn’t fancy equipment but timing, soil warmth, and a little patience.
You’ll need a seed-starting tray, lightweight potting mix, and a heat mat or sunny windowsill. Plant seeds just 1 inch deep, keep the soil warm (70-80°F), and expect sprouts in 5-10 days. Most beginners overwater, which causes damping-off, but a spray bottle and shallow tray solve that instantly.
By the time you transplant, your seedlings will be stocky and ready for the garden. They’ll handle heat better than store-bought plants, and you’ll harvest your first squash in as little as 45 days. The key is consistent moisture and full sun—no excuses for weak growth here.
Works for yellow crookneck, zucchini, or pattypan varieties. Pair with radishes or nasturtiums to deter pests, and space plants 2-3 feet apart. Here’s how to get them growing fast and strong.
📚 In This Guide
- What you need
- Instructions
- Tips and common mistakes
- Wrapping up and next steps
What you need
- ● Summer squash seeds: 3–5 seeds (choose heirloom or hybrid varieties like Zucchini, Yellow Crookneck, or Straightneck).
- ● Seed-starting mix: 1–2 gallons of sterile, well-draining potting soil (avoid garden soil—it’s too dense!).
- ● Seedling trays or small pots: 2–4 biodegradable or plastic pots (3–4 inches deep) or a seed-starting tray with individual cells.
- ● Grow lights or sunny windowsill: A full-spectrum LED grow light (12–16 hours/day) or a south-facing window with 6+ hours of direct sunlight.
- ● Watering can or spray bottle: With a fine mist nozzle (to avoid disturbing seeds).
- ○ Plastic wrap or humidity dome: (Optional but helpful for retaining moisture during germination).
- ● Trowel or small spoon: For gently pressing seeds into soil.
- ● Plant labels: To track varieties (use toothpicks + masking tape if needed!).
- ● Fertilizer: A balanced, water-soluble fertilizer (5-5-5 or 10-10-10) for transplanting (dilute to half-strength).
- ○ Heat mat (optional): For faster germination (70–90°F is ideal).
- ● Transplanting tools: Small hand trowel or butter knife for moving seedlings outdoors.
How to grow summer squash seedlings for a quick harvest
Here’s the fast, foolproof way to get summer squash seedlings off to a strong start—no waiting weeks for germination.
🌱 Step 1: Prep Containers and Soil for Fast Germination
Use the 4 biodegradable seedling pots (2.5 inches deep) filled with 2 gallons of seed-starting mix. Press the mix down gently to remove air pockets, but don’t compact it—summer squash roots need loose soil to spread quickly. Moisten the mix until it feels like a damp sponge, not soggy. I like to tap the pots lightly on the table to settle the soil evenly.
Squash seeds germinate fastest in warm soil—80-85°F is ideal. If your space runs cooler, place the pots on a seedling heat mat (set to 70°F) for 24 hours before planting. This jumpstarts germination and gets you sprouts in just 3-5 days instead of a week.
🌱 Step 2: Plant Seeds at the Right Depth
Drop 1 seed per pot (you’ll thin later) about 1 inch deep—too shallow and they’ll dry out before sprouting. Use your finger to make a small hole, place the seed inside, then cover it with soil. Press lightly to ensure good soil contact. I’ve found that squash seeds need firm soil to break through quickly, so don’t be shy with a gentle pat.
Water immediately with a spray bottle (not a heavy stream) to avoid displacing the seed. The soil should be moist but not dripping. Place the pots in a humidity dome or cover loosely with plastic wrap to trap warmth. Check daily—condensation inside the dome means you’ve got the moisture right.
☀️ Step 3: Provide Warmth and Light for Rapid Growth
Keep the pots in a warm spot (70-75°F) until sprouts appear—under a grow light if natural light is weak. Squash seedlings need 12-14 hours of light daily to avoid leggy growth. If using a grow light, position it 2-3 inches above the pots and raise it as they grow. You’ll know light is sufficient when leaves stay dark green and compact.
Once sprouts emerge (usually 3-5 days), remove the humidity dome immediately to prevent fungal issues. Water only when the top inch of soil feels dry—overwatering at this stage slows growth. Watch for the first true leaves (not the initial seed leaves)—that’s your cue to start fertilizing lightly with ½ teaspoon of diluted fish emulsion per pot.
🌿 Step 4: Thin and Harden Off for Transplant Success
When seedlings have 2-3 true leaves, thin to the strongest one per pot by snipping the others at the base with scissors. This reduces competition and gives your winner room to grow. After thinning, let the soil dry slightly between waterings—summer squash hates soggy roots but needs consistent moisture.
Start hardening off 10 days before transplanting by moving pots outside for 1-2 hours daily, gradually increasing time. By day 5, they should handle a full day outdoors. Transplant into the garden when soil is at least 60°F and nighttime temps stay above 55°F. Bury the stem slightly deeper than in the pot—this encourages stronger root growth.
Tips & tricks for perfect summer squash seedlings
Fast germination is all about creating the right conditions—and avoiding common pitfalls that slow things down. Here’s what I’ve learned after growing dozens of batches.
Soil Temperature Matters: That 24-hour heat mat prep at 70°F is non-negotiable if your space runs cool. I’ve seen germination times double when soil stays below 65°F. For extra speed, place your pots on a heating pad set to 75°F for the first 24 hours—you’ll get sprouts in just 3 days instead of 5. The key is maintaining that 80-85°F range once seeds are planted.
Planting Depth Secret: That 1-inch depth recommendation isn’t arbitrary—it’s the sweet spot for summer squash. Plant too shallow (less than ½ inch) and seeds dry out before sprouting; too deep (over 1.5 inches) and they struggle to break through. I make a small hole with my finger, place the seed, then cover with soil and press lightly—just enough to make contact without compacting.
Light Position Strategy: When using grow lights for those crucial 12-14 hours, position them 2-3 inches above the pots at first. As seedlings grow, raise the light to maintain this distance—it prevents leggy growth while ensuring strong, compact plants. I use a simple clip-on light with a timer to automate this, which saves me from remembering to adjust it daily.
Harden Off Gradually: The 10-day hardening off period is your insurance against transplant shock. Start with just 1-2 hours on day 1, then increase by 1 hour each day. By day 5, they should handle full sun. I’ve seen seedlings wilt dramatically when moved too quickly—take it slow, and your plants will thank you with vigorous growth after transplanting.
Pro Tips for Summer Squash Seedling
- Fast germination is all about creating the right conditions—and avoiding common pitfalls that slow things down.
- Soil Temperature Matters: That 24-hour heat mat prep at 70°F is non-negotiable if your space runs cool.
- Planting Depth Secret: That 1-inch depth recommendation isn’t arbitrary—it’s the sweet spot for summer squash.
Frequently asked questions
Got questions about growing summer squash seedlings? You’re not alone! Here are answers to the most common queries to help you nurture thriving plants from start to harvest.
How long does it take for summer squash seedlings to germinate?
Summer squash seeds typically sprout in 3–10 days when planted in warm soil (70–90°F). For faster germination, soak seeds overnight or use a heat mat. If moisture and warmth are ideal, expect tiny sprouts peeking through the soil within a week!
When is the best time to transplant summer squash seedlings outdoors?
Wait until nighttime temperatures stay above 50°F and all frost risk has passed. Seedlings need warmth to thrive, so transplant after last frost (usually late spring/early summer). Harden off seedlings for 7–10 days first by gradually exposing them to outdoor conditions.
What if my summer squash seedlings look leggy or weak?
Leggy seedlings often mean they’re stretched for light. Move them to a sunnier spot (6+ hours of sunlight daily) or use grow lights. Overcrowding can also weaken seedlings—thin them so each has 12–24 inches of space. If soil is too cold, germination slows, so keep it warm with black plastic mulch.
Can I grow summer squash from store-bought squash seeds?
Yes! Save seeds from organic, heirloom summer squash (like zucchini or yellow squash) by scooping out seeds, rinsing, and drying them. Store in a cool, dark place for up to 5 years. Avoid hybrid seeds—they may not produce true-to-type squash.
How do I protect summer squash seedlings from pests?
Common pests like squash bugs and cucumber beetles can damage seedlings. Use row covers early on, handpick pests, or spray with neem oil. Keep garden beds weed-free (weeds attract pests) and rotate crops yearly to break pest cycles. Healthy seedlings are your best defense!
Wrapping up and next steps
Growing summer squash seedlings is a rewarding journey that leads to a bountiful harvest—whether you're a seasoned gardener or a beginner! With the right soil, warmth, and care, you’ll soon be enjoying fresh, homegrown zucchini, yellow squash, or pattypan in no time. 🌱
Ready to take the next step? Plant those seedlings outdoors once the soil is warm (around 60°F or higher) and the last frost has passed. Keep an eye on their progress, and soon, you’ll be feasting on your own homegrown goodness! Happy gardening! 🌞