Container Gardens
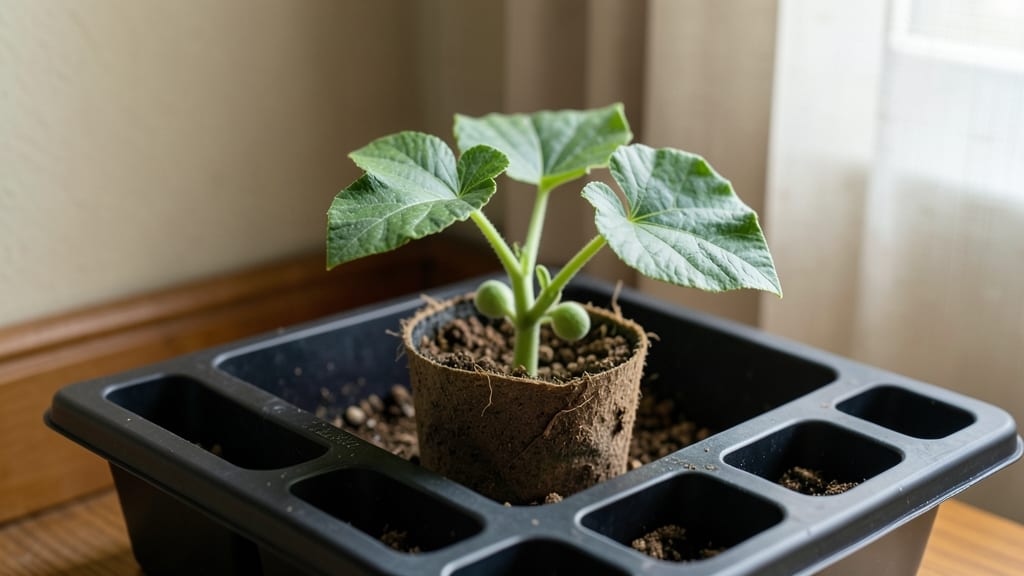
Starting winter squash seeds indoors 8 weeks before your last frost 🎃 gives them the head start they need to outpace cool spring soil.
Winter squash thrives when given a head start, but timing your indoor seed start can mean the difference between a bountiful harvest and wasted effort—especially in cooler climates where frost lingers late.
If you live in USDA Zone 6a (like me), that means setting up your seed trays by early March to transplant hardened-off seedlings by mid-May, just as the soil warms to 60°F.
Below, I’ll walk you through how to calculate your exact window, avoid common mistakes, and keep your seedlings strong until they’re ready for the garden.
Optimal indoor starting dates for winter squash by US hardiness zones
Getting your winter squash seeds indoors at the right time ensures healthy seedlings ready for transplant when soil warms. Since winter squash varieties like butternut and acorn need 80-120 days to mature, timing is everything.
I’ll break down the zone-specific windows based on last frost dates and ideal transplant temperatures of 50-60°F—plus how to adjust for non-standard climates.
Most gardeners start winter squash indoors 4-6 weeks before their average last frost date. This gives seedlings enough time to develop 2-3 true leaves before moving outdoors.
However, cooler zones (like Zone 3) may need an earlier start, while warmer zones (like Zone 10) can delay until late winter. Let’s dive into the details by zone.
| USDA Zone | Avg. Last Frost | Indoor Start Window | Transplant Ready | Notes |
|---|---|---|---|---|
| Zone 3 (-40°F to -30°F) | Mid-May | Early March | Late April | Use grow lights; soil warms slowly. |
| Zone 4 (-30°F to -20°F) | Late April | Late February | Early May | Start early; frost risk lingers. |
| Zone 5 (-20°F to -10°F) | Early May | Early March | Late April | Ideal for butternut squash. |
| Zone 6 (-10°F to 0°F) | Mid-April | Late February | Early May | Best for acorn and delicata. |
| Zone 7 (0°F to 10°F) | Late March | Early February | Late April | Soil warms faster; start slightly later. |
| Zone 8 (10°F to 20°F) | Early March | Late January | Early April | Can direct-sow in Zone 8b. |
| Zone 9 (20°F to 30°F) | Mid-February | Early January | Late March | Extend season with row covers. |
| Zone 10 (30°F to 40°F) | None (year-round) | Late December | Early March | Sow directly outdoors in warm zones. |
If you’re in a microclimate (like a urban heat island or high-altitude garden), adjust your timeline by 1-2 weeks. For example, if your area has a later-than-average frost date, push your indoor start back by 7-10 days.
Conversely, if your soil warms earlier than expected, you can start seeds 2 weeks later.
For non-standard climates, use this simple formula: subtract your last frost date from your target transplant date (usually 8 weeks before harvest). Then, subtract the 5-10 days it takes for seeds to germinate. This gives you your indoor start window.
For instance, if your last frost is May 1 and you want to harvest by October 15, aim to transplant by July 15. Count back 8 weeks to May 15 for transplant readiness, then 4-6 weeks earlier for indoor starts.
Pro tip: Use a seedling heat mat to maintain 75-85°F soil temps during germination. This speeds up sprouting and ensures uniform growth. Once seedlings have 2-3 true leaves, harden them off by placing them outdoors for 2-3 hours daily in protected shade before transplanting.
Remember, overcrowding seedlings is a common mistake. Thin to 1-2 inches apart in containers or 3-4 inches apart in trays. This prevents weak stems and ensures stronger transplants. Once hardened off, transplant on a cloudy day
How to determine your exact seed starting window for maximum yield
Getting your winter squash seeds indoors at the right time isn't just about guessing—it's about math. Your local frost dates, seed germination time, and seedling growth stages all factor in. Start too early, and your seedlings will be leggy and weak by transplant time.
Start too late, and your harvest window shrinks. Let's break it down step by step so you can nail your timing every year.
First, find your average last frost date for your area. This is your anchor point. Then, work backward from there, accounting for the 8-week growth period winter squash seedlings need before they're ready to transplant.
But here's the catch: seed germination (5-10 days) and local microclimates (like urban heat islands) can shift your window by weeks. Adjust for these variables to avoid common pitfalls.
-
1.
Step 1: Find Your Last Frost Date
Check your USDA hardiness zone and local weather records. For example, Zone 5 typically has a last frost around May 10, while Zone 8 might see frost as late as March 15. Use resources like the Old Farmer’s Almanac or your local Cooperative Extension for precise data.
-
2.
Step 2: Subtract 8 Weeks for Seedling Growth
Winter squash seedlings need 56-63 days (8 weeks) to mature enough for transplanting. If your last frost is May 10, count back 8 weeks to arrive at your indoor start date: March 1. This ensures seedlings are robust and ready to go outside by early May.
-
3.
Step 3: Adjust for Germination Time (5-10 Days)
Most winter squash seeds germinate in 5-10 days. To account for slower starts, begin seeds 1-2 weeks earlier than your calculated date. For example, if March 1 is your target, start seeds on February 15 to ensure germination aligns with your growth timeline.
-
4.
Step 4: Factor in Microclimates
Urban areas can be 5-10°F warmer than rural zones, delaying frost. If you’re in a heat island, push your start date 1-2 weeks later. Conversely, high-altitude gardens may need an earlier start. Observe your garden’s behavior for 3 years to refine your timeline.
-
5.
Step 5: Verify Soil Temperature
Winter squash thrives when soil is 50-60°F at transplant. Use a soil thermometer to confirm. If your soil warms slower (common in Zone 3-4), start seeds 2 weeks earlier to extend your growth window.
Once you’ve calculated your personalized start date, mark it on your calendar and set reminders. Pro tip: Use grow lights if your seedlings stretch toward weak winter sunlight.
Aim for 12-14 hours of light daily to keep them stocky and strong. Overcrowding is another common mistake—give each seedling 2-3 inches of space in trays to prevent competition.
Don’t forget to harden off your seedlings before transplanting. Start this process 7-10 days before your target date by gradually exposing them to outdoor conditions. Begin with 1-2 hours of shade and increase exposure daily. This toughens their skin and reduces transplant shock, ensuring they thrive in your garden.
By following these steps, you’ll transform guesswork into a predictable, high-yield system. Your winter squash will mature earlier, produce larger fruits, and resist pests better than ever. Happy growing—your future harvest is waiting! 🎃