
Lawn
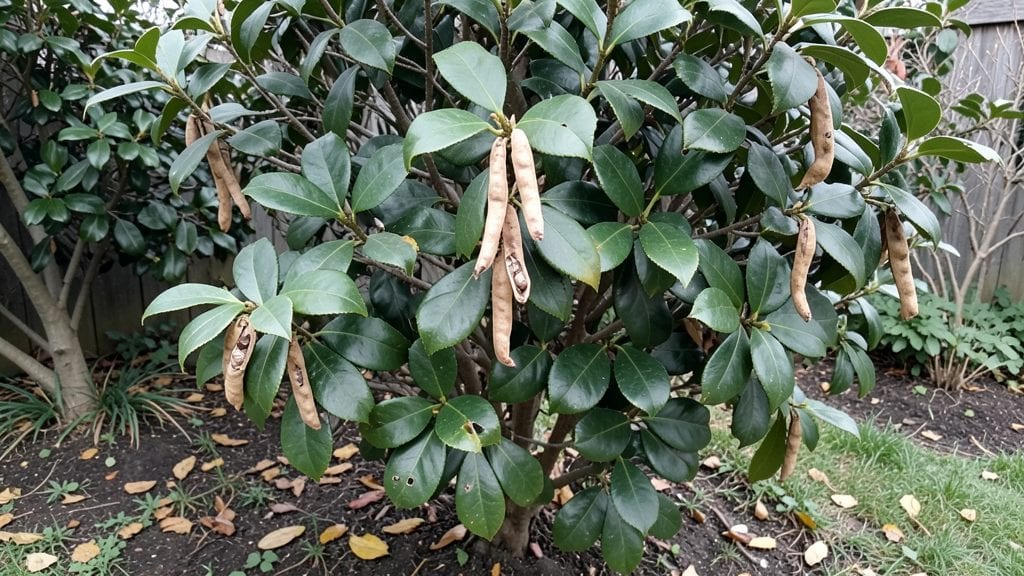
Extracting camellia seeds from seed pods unlocks the secret to growing these elegant shrubs from scratch—though the process demands patience and a little science. 🌱 I’ve wrestled with dozens of those hard, leathery pods over the years, and the key to success lies in mimicking nature’s winter chill cycle before planting.
The right timing and method can turn a handful of seeds into thriving young plants that’ll reward you with blooms for decades.
The first step is testing viability—some seeds won’t sprout no matter what you do. After extracting the seeds, soak them in water for 24 hours to check for sinks (good) or floats (discard).
Then comes the layered chill process: place seeds between damp paper towels in a sealed bag and refrigerate for 60–90 days to break dormancy. This mimics the cold winter months camellias need to germinate naturally, and it’s the difference between waiting months for sprouts or giving up entirely.
Once chilled, plant the seeds in a well-draining mix of peat moss and perlite, keeping them moist but never soggy. Germination can take 3–6 months, so consistency is key—think of it as a slow-burning investment. When those first pale green leaves appear, you’ll know the wait was worth it.
The seedlings are delicate but resilient, and with proper care, they’ll develop into sturdy plants ready for outdoor transplanting in 1–2 years.
Here’s the thing—most gardeners skip the chill step and wonder why their seeds never sprout. But once you master this process, you’ll have camellias blooming year-round, their glossy leaves and delicate flowers becoming the showstopper of your landscape. The payoff? A garden heirloom you grew yourself, from seed to showstopper.
📚 In This Guide
- What you need
- Instructions
- Tips and common mistakes
- Wrapping up and next steps
What you need
- ● Fresh camellia seed pods: 5–10 mature, fully ripe pods (harvested in late fall or winter).
- ● Well-draining potting mix: 2–3 gallons of a blend designed for acid-loving plants (e.g., 50% peat moss, 30% pine bark fines, 20% perlite).
- ● Small pots or seed trays: 4–6 individual containers (4–6 inches deep) with drainage holes.
- ● Plastic wrap or humidity dome: To maintain moisture during germination.
- ● Spray bottle: For gentle watering (avoid over-saturation!).
- ● Grow lights or sunny windowsill: A south-facing window or LED grow lights (12–16 hours/day) for seedlings.
- ● Patience (and a chill!): A refrigerator or cold frame for the layered chill process (6–8 weeks at 35–45°F).
- ○ Rooting hormone: Speeds up germination (optional but recommended for finicky seeds).
- ● pH test kit: Ensures your soil stays acidic (ideal pH: 5.5–6.5).
- ● Heat mat: For faster germination after chilling (70–75°F).
- ● Labeled tags: To track seedling progress and varieties.
- ● Outdoor hardening tray: For gradually acclimating seedlings to outdoor conditions.
Step-by-step instructions for germinating camellia seed pods
This layered chill method mimics nature's seasonal cycles—key to breaking camellia dormancy.
🌱 Step 1: Extract and Clean the Seeds
Gently open the mature camellia seed pod with a clean knife, avoiding the hard, glossy seeds inside. Rinse them under lukewarm water to remove any remaining pulp or gel—this prevents fungal growth later. I soak the seeds for 10 minutes in a 1% hydrogen peroxide solution (1 part 3% peroxide to 29 parts water) to sterilize the outer shell without damaging the embryo.
Pat them dry with a paper towel, then inspect for cracks or soft spots—discard any damaged seeds. Healthy seeds feel firm and smooth, like tiny marbles. Store them in a paper envelope (plastic traps moisture) until stratification begins. This step ensures only viable seeds proceed to germination.
💧 Step 2: Apply the Layered Chill Process
Place the cleaned seeds between two layers of dampened sphagnum moss in a sealed plastic bag. I use one part moss to two parts seeds by volume, ensuring even moisture distribution. The bag creates a humid microclimate while allowing airflow—critical for preventing rot during the 3-month cold treatment. Seal the bag and place it in your refrigerator's vegetable crisper drawer (not the freezer), where temperatures hover around 35-40°F.
Check the moss weekly: it should feel like a wrung-out sponge, not dripping. If it dries out, mist lightly with water and reseal. This mimics winter's gradual moisture loss and cold exposure, which camellia seeds need to break dormancy. After 12 weeks, move the bag to room temperature for 2 weeks to simulate spring thaw.
☀️ Step 3: Sow Stratified Seeds in Warmth
Fill a 4-inch pot with sterile seed-starting mix (never garden soil—it's too dense). Plant the seeds ½ inch deep, spacing them 1 inch apart to prevent overcrowding. I use a pencil to make small holes—this ensures consistent depth without crushing the seeds. Gently press the mix around them to eliminate air pockets.
Place the pot in a propagation mat set to 75°F (or on top of your refrigerator) to maintain warmth. Cover the pot with a clear plastic dome to retain humidity, but prop it open slightly for airflow. Germination can take 4-12 weeks, depending on seed age—older seeds may take longer. Keep the mix moist but never soggy; bottom-watering prevents surface mold.
🌿 Step 4: Transition to Light and Monitor Growth
Once seedlings emerge, remove the dome immediately to harden them. Place the pot under bright, indirect light (a grow light 4 inches above works best) for 14 hours daily. You'll notice the first cotyledons (tiny, rounded leaves) appear within 2-3 weeks—this confirms successful germination. Avoid direct sun at this stage; young seedlings scorch easily.
When the seedlings reach 2 inches tall and develop true leaves (the second set, not cotyledons), transplant them into individual 6-inch pots with fresh mix. This step reduces competition and encourages stronger root systems. Fertilize lightly with a diluted seaweed solution (¼ strength) to support early growth without burning tender roots.
⏰ Step 5: Gradually Acclimate to Outdoor Conditions
After 4 months of indoor growth, begin hardening off by placing seedlings outside in partial shade for 1 hour daily. Increase exposure by 1 hour every 3 days, protecting them from direct sun and wind. You'll see stems toughen and leaves darken—signs they're adapting. By 6-8 weeks, they should tolerate 4-6 hours of morning sun without stress.
Transplant outdoors after the last frost, spacing them 6-8 feet apart in well-draining, acidic soil (pH 5.5-6.5). Mulch with 2 inches of pine needles to retain moisture and mimic their native forest floor. The first blooms may take 3-5 years, but patience pays off—these seedlings will reward you with year-round interest and fragrant flowers.
Tips & tricks for perfect camellia seed pod germination
These refined techniques will help you navigate the delicate balance between patience and precision required for camellia seed germination.
Seed Selection: In Step 1, when extracting seeds, prioritize pods that are fully mature but still pliable—overripe pods may have already begun to degrade internally. The seeds should feel dense and slightly heavier than their size suggests. I've found that seeds from pods harvested in late autumn (just before natural dormancy sets in) germinate most reliably. If you're unsure about maturity, cut open the pod and look for seeds that are uniformly glossy and free of any white, fuzzy mold—this indicates freshness and viability.
Hydrogen Peroxide Solution: During the 10-minute soak in Step 1, be precise with your hydrogen peroxide mixture. The 1% solution (1 part 3% peroxide to 29 parts water) is crucial—stronger concentrations can damage the seed coat while weaker ones won't effectively sterilize. I like to use a small glass jar for this step, as it allows me to easily monitor the seeds without disturbing them. After soaking, rinse with lukewarm water to remove any residual peroxide, which could inhibit germination if left on the seeds.
Stratification Timing: The 3-month cold treatment in Step 2 is non-negotiable for camellias, but consistency matters just as much as duration. Place your sealed bag in the refrigerator's vegetable crisper drawer where temperatures remain steady around 35-40°F—avoid door shelves where temperatures fluctuate. I mark my calendar with the start date and set a reminder to check moisture weekly. This mimics nature's gradual temperature shifts during winter, which is essential for breaking dormancy. After exactly 12 weeks, move the bag to room temperature for those critical 2 weeks of simulated spring thaw.
Light Transition: When transitioning seedlings to light in Step 4, position your grow light 4 inches above the plants and maintain that distance as they grow. The 14 hours of daily light should be split evenly between morning and afternoon to prevent etiolation (that leggy, stretched growth). I use a simple timer to automate this, as camellia seedlings are particularly sensitive to light deprivation. Watch for the first cotyledons appearing within 2-3 weeks—this is your confirmation that the stratification worked and germination is underway.
Pro Tips for Camellia Seed Pod
- These refined techniques will help you navigate the delicate balance between patience and precision required for camellia seed germination.
- Seed Selection: In Step 1, when extracting seeds, prioritize pods that are fully mature but still pliable—overripe pods may have already begun to degrade internally.
- Hydrogen Peroxide Solution: During the 10-minute soak in Step 1, be precise with your hydrogen peroxide mixture.
Frequently asked questions
Got questions about growing camellia seed pods or harvesting their blooms?
Here are some of the most common ones—plus expert answers to help you succeed!
How long does it take for camellia seed pods to mature?
Camellia seed pods typically take 6–12 months to mature after flowering, depending on the variety and climate. In warmer regions, pods may ripen faster, while cooler areas could extend the timeline. Patience is key—pods turn brown and dry before splitting open to release seeds.
Why does my camellia need a "layered chill process"?
Camellias are subtropical plants that require a cool dormancy period (around 4–6 weeks below 45°F/7°C) to break dormancy and bloom reliably. The "layered chill" mimics natural seasonal shifts, ensuring healthy growth and vibrant flowers year-round. Skip this step, and you might see fewer blooms!
Can I grow camellias from seed pods indoors?
Yes! Start by stratifying the seeds (mimicking winter) for 2–3 months in a damp paper towel in the fridge. Once sprouted, plant them in well-draining soil and place them in bright, indirect light. Keep humidity high until established—indoor camellias thrive in pots but may need pruning to encourage bushier growth.
What should I do if my camellia pods rot before opening?
Rot is often caused by overwatering or poor drainage. Ensure your camellia is planted in slightly acidic, well-draining soil (pH 5.5–6.5) and water only when the top inch of soil is dry. If rot occurs, trim affected pods, improve airflow, and adjust watering habits. Fungicides (like copper-based sprays) can also help prevent future issues.
Are there alternatives to growing from seed pods?
If seed germination seems tricky, consider:
- Grafting: Propagate from a healthy camellia branch (best done in late winter).
- Layering: Bend a low branch to the ground, cover with soil, and wait for roots to form.
- Buying nursery-grown plants: Choose disease-resistant varieties like Camellia japonica or Camellia sasanqua for guaranteed blooms.
Wrapping up and next steps
Growing camellia seed pods with the layered chill process is a rewarding journey that unlocks stunning year-round blooms—even in warmer climates! 🌸 By mastering the right balance of moisture, temperature, and patience, you can nurture these delicate beauties into thriving plants.
Whether you’re a seasoned gardener or just starting out, every seedling you coax to life is a testament to your green thumb.
Ready to bloom with confidence? Start by planting your chilled seeds in well-draining soil and keep them in a bright, sheltered spot. Monitor their progress, and soon, you’ll be rewarded with lush foliage and breathtaking flowers—proof that your efforts have paid off! 🌱✨