
Lawn
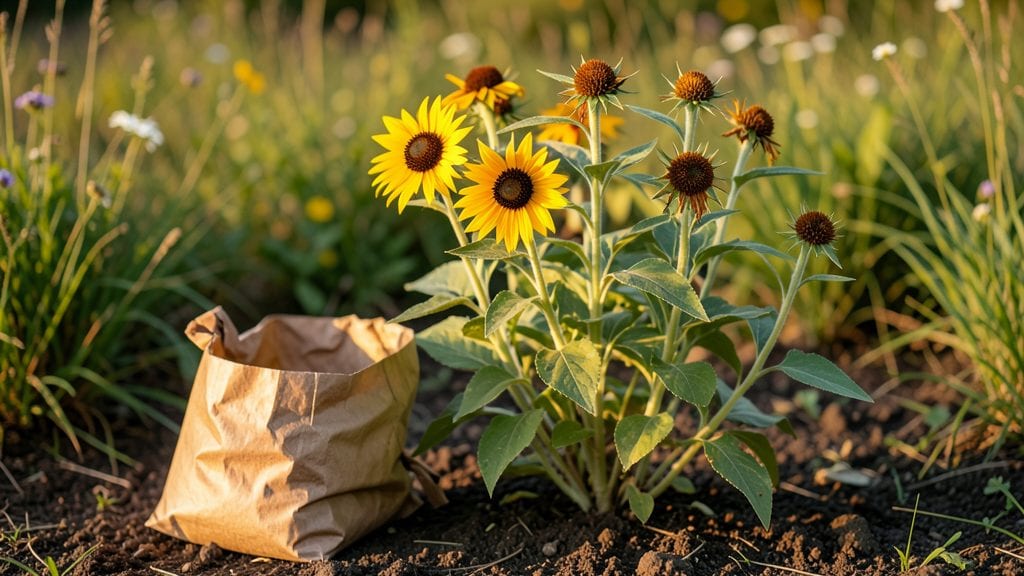
Mastering rudbeckia seed collection ensures you’ll always have a fresh supply of golden coneflowers—no store-bought plants needed. 🌻 I’ve saved seeds from my own garden for three seasons now, and the trick is timing: wait until the seed heads... turn brown and papery, then harvest them before they scatter.
The right technique means you’ll have a head start on next spring’s garden, with plants that look exactly like your favorites.
You only need three things: sharp scissors, a paper bag, and a dry spot indoors. Cut the seed heads when they’re completely dry but still intact, then let them finish drying upside-down in the bag for a week or two.
This prevents mold and ensures the seeds stay viable. Store them in an airtight container in a cool, dark place—my seeds last for years this way, ready to replant whenever I want that cheerful golden display.
By next spring, you’ll be planting seeds that grow into those same bold, long-lasting blooms you love. The plants thrive with minimal care, and you’ll save money while keeping your garden’s signature look.
Just avoid damp conditions during storage, or you might lose some seeds to mold. With this method, you’ll have a reliable source of rudbeckia for seasons to come.
This works for all rudbeckia varieties, whether you’re growing the classic ‘Goldsturm’ or a unique heirloom. The process is simple, but the payoff—fresh, familiar flowers without the cost—is worth every minute. Ready to turn this year’s seeds into next year’s garden showstopper?
📚 In This Guide
- What you need
- Instructions
- Tips and common mistakes
- Wrapping up and next steps
What you need
- ● Mature rudbeckia flowers (preferably Rudbeckia hirta or Rudbeckia fulgida varieties with dry, brown seed heads)
- ● Pruning shears or clean scissors (sterilized with rubbing alcohol to prevent disease transfer)
- ● Paper bags or breathable seed envelopes (1–2 per plant, labeled with the rudbeckia variety and date)
- ● Brown paper towels or newspaper (for drying seeds indoors)
- ● Air-tight seed storage containers (small jars with lids or resealable bags with silica gel packets)
- ● Seed catalog or notebook (to track varieties, germination rates, and growing conditions)
- ● Fine-mesh sieve or sifter (for separating seeds from chaff)
- ● Desiccant packets (extra for long-term storage to absorb moisture)
- ● Hand lens or magnifying glass (to inspect seed viability)
- ● Humidity monitor (if storing seeds in a basement or garage)
Step-by-step instructions for collecting and storing rudbeckia seeds
Here’s how I preserve rudbeckia seeds year after year—simple, foolproof, and ready for next spring.
🌱 Step 1: Wait for Seed Heads to Dry Completely
Leave the dried seed heads on the plant until they turn a tan or light brown color and the petals crumble away easily. This usually happens in late fall, after the first frost. The seed pods inside will feel dry and papery—if they still feel moist, wait a few more days.
I know it’s tempting to cut them earlier, but green or damp seeds won’t store well. The goal is to harvest when the seeds are fully mature but still intact inside the pods. If a pod opens and releases seeds on its own, you’ve waited too long—collect what’s left and save it for next year.
✂️ Step 2: Harvest and Remove Seeds from Heads
Once the seed heads are fully dry, snip them off the stem with clean pruning shears and place them in a paper bag (not plastic). The paper allows airflow, which prevents mold. Gently rub the dried heads between your hands or use a small brush to release the seeds into the bag.
If you’re collecting from multiple plants, label each bag with the rudbeckia variety and the harvest date. I’ve lost track of which seeds belong to which plant before—don’t make that mistake! Store the bags in a cool, dry place (like a basement or garage) for a few weeks to ensure any lingering moisture evaporates.
🪴 Step 3: Clean and Store Seeds Properly
After a week or two, open the bags and inspect the seeds. Remove any debris, chaff, or empty seed pods by hand or with a fine-mesh strainer. Place the clean seeds in a small envelope or airtight container—I use glass jars with tight lids for long-term storage.
For best results, store the seeds in a cool, dark place (like a refrigerator) where the temperature stays between 35-45°F. Seeds stored this way can remain viable for 2-3 years, though I’ve found rudbeckia seeds germinate best when planted within 1-2 years. Label the container with the variety and date to keep track of freshness.
🌿 Step 4: Test Germination Before Planting Next Year
Before sowing, test a few seeds to ensure they’re still viable. Moisten a paper towel, place 5-10 seeds between two towels, and fold them into a sandwich. Seal the towel in a ziplock bag and store it in a warm spot (around 70°F). Check daily—if you see sprouts in 5-7 days, your seeds are good to go.
If germination is slow or uneven, try soaking the seeds in lukewarm water for 24 hours before planting. Rudbeckia seeds sometimes need a little extra encouragement to break dormancy. Once you confirm viability, plant them outdoors in early spring, about ¼ inch deep, for strong, healthy blooms next season.
Tips & tricks for perfect rudbeckia seed preservation
A few simple tricks that'll make all the difference in keeping your rudbeckia seeds viable for years.
Timing is Everything: The 24-hour soak for breaking dormancy is your secret weapon. I've found that soaking seeds in lukewarm water for exactly this time mimics natural spring rains, which helps trigger germination. Don't skip this step—it can mean the difference between strong seedlings and weak sprouts. Use a clear glass to monitor the water level and top off with warm water if it cools below 70°F during the process.
The Temperature Factor: Maintaining that 35-45°F range during storage is crucial for long-term viability. I store my seeds in the crisper drawer of my refrigerator where the temperature stays consistently around 40°F. This mimics natural winter conditions, slowing down metabolic processes that could reduce seed quality. If your fridge runs warmer, consider adding a small fan to improve airflow around the storage container.
Harvesting Cues: In Step 1, when the seed heads turn tan and the petals crumble easily, that's your perfect harvest window. I've learned to check them daily after the first frost—sometimes they can dry overnight! The seed pods should feel completely dry and papery when you gently squeeze them. If you're unsure, wait one more day rather than harvesting too early.
Storage Organization: Labeling your storage containers with both the variety and harvest date is a game-changer. I use small masking tape labels that I can write on with a fine-tip marker. This system has saved me from planting the wrong variety twice! Store seeds in small portions—if you have multiple varieties, keep them separate to maintain genetic purity and track individual performance next season.
Pro Tips for Rudbeckia Seed Collection
- A few simple tricks that'll make all the difference in keeping your rudbeckia seeds viable for years.
- Timing is Everything: The 24-hour soak for breaking dormancy is your secret weapon.
- The Temperature Factor: Maintaining that 35-45°F range during storage is crucial for long-term viability.
Frequently asked questions
Got questions about saving rudbeckia seeds for next season? You’re in the right place! Here are some of the most common queries—and their straightforward answers—to help you master seed collection like a pro.
When is the best time to collect rudbeckia seeds?
Harvest seeds when the flower heads turn brown and dry, usually late summer to early fall (August–October, depending on your climate). Wait until the seed pods are crispy to the touch—this ensures they’re fully mature and ready for storage. If you pick too early, seeds may not germinate well.
How long can I store rudbeckia seeds before planting?
Rudbeckia seeds stay viable for 1–2 years if stored properly in a cool, dry place (like a sealed container in the fridge). For best results, plant them within 6–12 months. Pro tip: Label your containers with the collection date to track freshness!
What if my rudbeckia seeds don’t sprout after planting?
Seeds may fail to germinate due to old age, improper storage, or poor soil conditions. Try these fixes:
- Test viability by soaking seeds in water—sinkers are good, floaters are likely dead.
- Plant fresh seeds in well-draining soil and keep them moist (not soggy).
- Consider stratification (chilling seeds for 4–6 weeks) to mimic winter conditions.
Can I collect seeds from hybrid rudbeckia varieties?
Hybrid rudbeckias (like ‘Goldsturm’) may not produce true-to-type seeds—their offspring could look different. If you love a specific hybrid, ask the nursery for seeds or propagate via division instead. For consistent blooms, stick to heirloom or open-pollinated varieties.
Do I need special containers to store rudbeckia seeds?
Nope! Use any airtight container—paper envelopes, glass jars, or ziplock bags work great. Just add a desiccant packet (like silica gel) to absorb moisture. Avoid plastic alone, as it can trap humidity and cause mold. Label each container with the seed type and date!
Wrapping up and next steps
Collecting rudbeckia seeds is a rewarding way to ensure next year’s garden bursts with vibrant blooms—without breaking the bank! 🌻 By mastering the dry, store, and stratify process, you’ve unlocked the secret to growing these cheerful flowers from scratch.
Now that you’re equipped with the know-how, there’s nothing stopping you from turning your yard into a rudbeckia paradise.
Ready to take the next step? Start by labeling your seed packets and planning where you’ll plant them in early spring. Happy gardening—your future flowers will thank you! 🌱