
Lawn
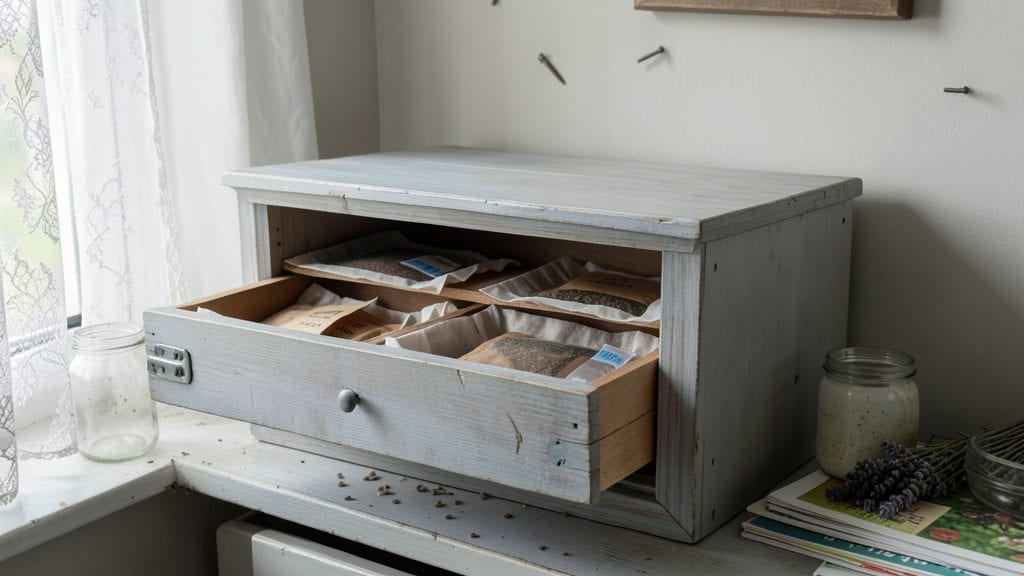
Climate-controlled seed storage cabinets are the secret weapon for gardeners who refuse to waste another season’s seeds. I learned the hard way—after a humid summer ruined my heirloom tomato seeds, I finally invested in a proper storage system, and now my seeds stay viable for years instead of months.
The right cabinet keeps humidity low, temperature steady, and pests out, so you’re not scrambling to replant from scratch every spring.
You’ll need a sealed unit that maintains 40-50°F and 30-50% humidity—commercial options like the SeedVault or Gardeners.com Seed Keeper do this automatically, but DIY solutions with moisture absorbers and insulated boxes work too.
Labeling trays by seed type and planting year keeps things organized, and a small fan inside prevents mold buildup. Even a basic pantry can work if you monitor conditions closely.
With the right setup, your seeds stay fresh for 5-10 years or longer, depending on the variety. Imagine opening a cabinet in January and finding seeds ready to plant—no last-minute store runs, no guesswork.
The peace of mind alone makes the investment worth it, especially for rare or expensive varieties. Let’s get your seeds stored like a pro.
Common mistakes? Overpacking containers (leaves no airflow) or storing seeds in the fridge without protection (condensation ruins them). Start simple—even a repurposed wooden box with silica gel packets works—and upgrade as you see what fails. Your future garden’s success depends on it.
📚 In This Guide
- What you need
- Instructions
- Tips and common mistakes
- Wrapping up and next steps
What you need
- ● Seed Storage Cabinet: Climate-controlled unit (preferably 35–40°F with 30–50% humidity)
- ● Size: Minimum 2–3 cubic feet (adjust based on seed volume)
- ○ Optional: Vacuum-sealed or airtight models for extra protection
- ● Desiccant Packs: 5–10 silica gel or clay-based packs (renew every 6–12 months)
- ● Seed Containers: Mylar bags with oxygen absorbers (1–2 per bag)
- ● OR airtight glass jars with rubber seals
- ● Thermometer & Hygrometer: Digital probes for real-time monitoring
- ● Labeling Supplies: Acid-free labels, permanent markers, or a seed inventory app
- ● Power Source: Outlet access or battery backup for climate control
- ● Shelf Organizers: Adjustable shelves (if customizing a cabinet)
- ○ Vacuum Sealer: For long-term seed preservation (optional but recommended)
- ● Safety Gear: Gloves (for handling desiccants) and a dust mask (if repurposing materials)
How to organize and store seeds for maximum longevity
Proper seed storage extends viability for years—here’s how to create an ideal environment.
Select the Right Storage Location
Choose a cool, dark, and dry spot with minimal temperature fluctuations. A basement, root cellar, or dedicated seed storage cabinet works best, as long as it stays between 32–41°F. Avoid garages, attics, or kitchen cabinets where heat and humidity build up. I like to place a small, battery-powered hygrometer in the space to monitor moisture levels—keeping humidity below 50% prevents mold and premature sprouting.
If your home lacks a naturally cool area, a standard refrigerator set to its coldest setting (not the freezer) can work in a pinch. Just store seeds in airtight containers to prevent cross-contamination from food odors. The key is consistency—temperature swings accelerate seed deterioration, so avoid locations near windows, heating vents, or appliances that generate heat.
Use Airtight Containers for Protection
Transfer seeds into hermetically sealed containers like glass jars with rubber gaskets, Mylar bags with oxygen absorbers, or vacuum-sealed bags. I prefer glass jars because they’re reusable, easy to label, and allow me to quickly check seed condition without opening them. For long-term storage, pair Mylar bags with oxygen absorbers—these remove residual moisture and oxygen, which are the primary enemies of seed viability.
Label each container with the seed variety, storage date, and germination test results from previous years. A simple masking tape label with a permanent marker works, but I’ve found that small, waterproof labels adhered directly to the container last longer. Never store seeds in paper envelopes or ziplock bags—these allow moisture and air to seep in over time, drastically reducing shelf life.
Control Humidity and Prevent Condensation
Before sealing containers, ensure seeds are completely dry. Spread them on a paper towel in a single layer for 24 hours in a well-ventilated area. Use a dehumidifier or silica gel packets inside storage containers to absorb any lingering moisture. I place a small packet of uncooked rice in each jar as a natural humidity indicator—if the rice clumps together, the environment is too damp and seeds are at risk.
Condensation inside containers is a silent killer. To avoid this, let containers sit at room temperature for 1–2 hours before sealing them completely. If you’ve stored seeds in the refrigerator, remove them 30 minutes before transferring to long-term storage to equalize temperatures. This simple step prevents moisture buildup that can trigger mold or premature germination.
Test and Rotate Seed Stock Annually
Conduct a germination test every 1–2 years to assess seed viability. Place 10 seeds between damp paper towels in a sealed plastic bag, then keep them in a warm (70–75°F) location. Check for sprouts after 7–14 days—if fewer than 80% germinate, it’s time to replenish your stock. I keep a small notebook to track test results by variety, so I know exactly which seeds to prioritize for future planting.
Rotate older seeds to the front of your storage system and newer ones to the back. This ensures you plant the oldest seeds first, maximizing their potential. For heirloom or rare varieties, I store extra seeds in a second location (like a different room or even a friend’s storage unit) as a backup. Diversity in storage locations protects against unexpected losses from power outages, pests, or environmental shifts.
Protect Against Pests and Light Exposure
Seeds are vulnerable to weevils, moths, and rodents, so store them in containers that are too small for pests to enter or too dark for them to detect. Avoid cardboard boxes or fabric bags—these provide easy access for insects. I’ve had success using metal tins for high-value seeds, as they’re nearly impenetrable to pests. For glass jars, wrap the lid with parafilm to create an extra barrier.
Light exposure accelerates seed degradation, so keep containers in opaque or dark-colored storage. Even indirect light can reduce viability over time, so avoid clear plastic bins or containers with see-through lids. If you must use transparent containers, wrap them in aluminum foil or place them inside a light-blocking box. The goal is to mimic the natural darkness seeds experience underground in their dormant state.
Tips & tricks for perfect seed storage cabinets
Creating an ideal seed storage environment isn't just about following steps—it's about understanding the subtle details that make all the difference between seeds that last for years and those that lose viability within months.
Temperature Consistency is Non-Negotiable: While the 32–41°F range in Step 1 is ideal, even small fluctuations can accelerate seed deterioration. I recommend placing your seed storage cabinet in a location with minimal daily temperature swings—avoid areas near exterior walls or appliances that cycle on and off. For extra protection, consider a dedicated seed storage cabinet with built-in temperature regulation, especially if you live in a climate with extreme seasonal variations.
The 24-Hour Drying Rule is Critical: Don't rush this step! The 24 hours you spend drying seeds on paper towels in Step 3 is the most important drying period. I've seen seeds stored in damp conditions begin to mold within weeks, completely ruining viability. For seeds with higher moisture content (like some heirloom varieties), extend this to 48 hours. Use a small fan on low setting to speed up evaporation without creating static electricity that could damage delicate seed coats.
Labeling System Matters More Than You Think: The labeling system from Step 2 isn't just about organization—it's your seed viability insurance policy. I've found that using waterproof labels with both the seed variety and storage date prevents mix-ups, especially when dealing with multiple varieties. Add a third line for the germination test date from previous years. This triple-label system has saved me from planting outdated seeds that wouldn't germinate, wasting valuable garden space.
Germination Test Timing is Strategic: The 1–2 year test interval in Step 4 might seem long, but there's a reason for it. Most seeds maintain viability longer than we expect—especially in optimal conditions. However, if you're storing rare or expensive seeds, consider testing every year. The warm 70–75°F condition during testing mimics ideal germination conditions, giving you the most accurate viability assessment. I've noticed that some varieties (like tomatoes) show reduced germination after just 3 years, while others (like beans) can last 5+ years with proper storage.
Pro Tips for Seed Storage Cabinets
- Temperature Consistency is Non-Negotiable: While the 32–41°F range in Step 1 is ideal, even small fluctuations can accelerate seed deterioration.
- The 24-Hour Drying Rule is Critical: Don't rush this step!
Frequently asked questions
Got questions about keeping your seeds fresh and ready to grow? We’ve got answers! Here are some of the most common queries gardeners have about seed storage cabinets—plus quick solutions to keep your stash thriving.
How long can seeds last in a seed storage cabinet?
A properly climate-controlled seed storage cabinet can extend seed viability for years. Most seeds last 5–10 years under ideal conditions (35–40°F with <50% humidity), while some heirloom varieties can survive 20+ years. Always check seed packets for specific lifespan guidelines!
What’s the best temperature and humidity for seed storage?
Ideal conditions are 35–40°F and 30–50% humidity. Avoid fluctuations—extreme heat or moisture can trigger germination or mold. A seed storage cabinet with automatic climate control takes the guesswork out of it!
Are seed storage cabinets worth the investment?
If you’re a serious gardener, a cabinet pays for itself by preserving rare or expensive seeds. For casual gardeners, even a cool, dark pantry works temporarily—but a dedicated unit ensures long-term reliability and protects against pests or power outages.
How do I prevent pests from ruining my seeds?
Store seeds in airtight, moisture-proof containers (like Mylar bags or glass jars) inside the cabinet. Add food-grade diatomaceous earth or cedar blocks to deter insects. Regularly inspect seeds for signs of damage or critters!
Can I use a regular fridge or freezer instead?
A fridge (35–40°F) works in a pinch, but humidity and temperature swings can harm seeds. Freezers (0°F) are too cold and cause moisture buildup. A dedicated seed storage cabinet is designed for consistent, optimal conditions—no compromises!
Wrapping up and next steps
Investing in a seed storage cabinet is a game-changer for gardeners who want to preserve their hard-earned seeds for years to come. With the right climate control and organization, you’ll ensure seed longevity while keeping your collection safe from humidity, temperature swings, and pests.
Whether you’re a hobbyist or a serious seed saver, this simple step protects your garden’s future—and your wallet!
Ready to take the next step? Assess your seed collection’s needs today—start small with a compact cabinet or go all-in with a full climate-controlled unit. Your future harvests will thank you! 🌱✨